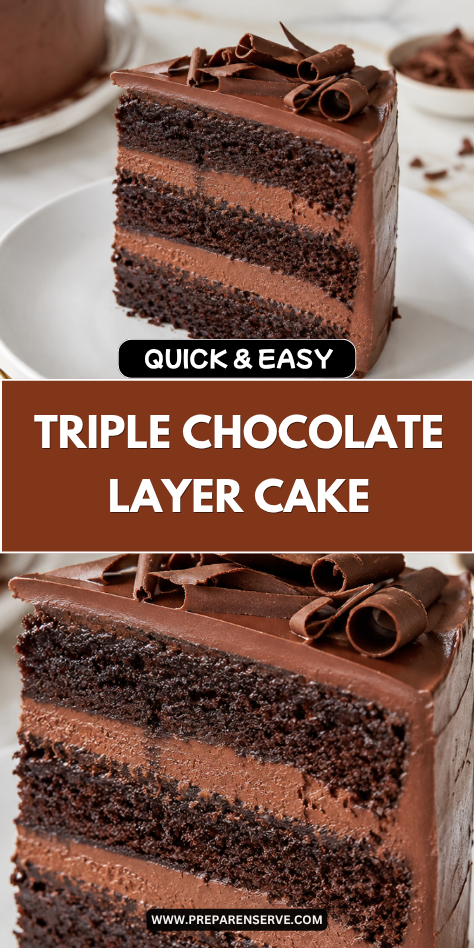
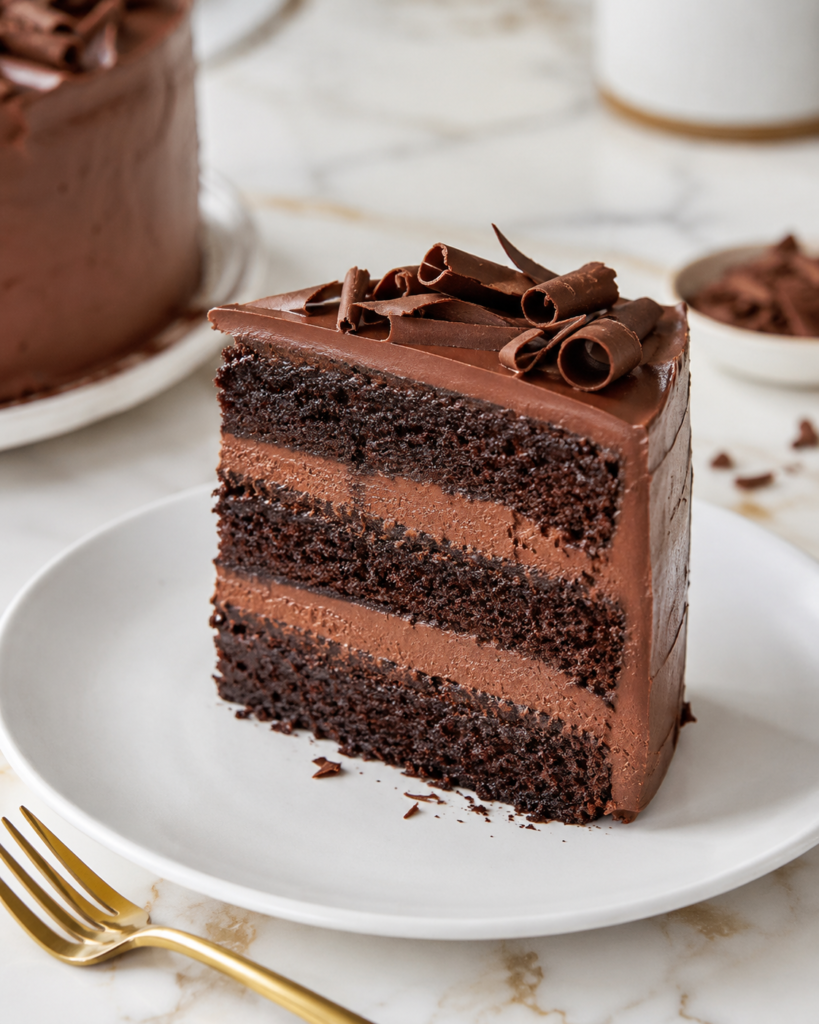
I make Triple Chocolate Layer Cake when I want a dessert that feels rich, classic, and truly homemade. It has soft chocolate cake layers, creamy chocolate frosting, and a glossy chocolate finish that makes it feel special without being too fancy.
I like this cake because it is the kind of dessert people remember. The crumb is moist, the frosting is smooth, and the extra chocolate on top makes each slice feel like a real celebration cake.
Why You’ll Love This Recipe
Triple Chocolate Layer Cake is rich, tender, and full of deep chocolate flavor. The cake layers use cocoa powder for a soft, dark crumb, while the frosting adds a creamy chocolate finish that spreads easily between the layers.
This recipe is a wonderful choice for birthdays, holidays, family dinners, or any time you want a dependable homemade cake. It looks impressive once stacked and frosted, but the steps are simple when you take them one at a time.
The flavor is chocolatey without tasting dry or bitter. A little hot coffee or hot water helps bloom the cocoa, and the chocolate ganache on top gives the cake a smooth, bakery-style finish.
Serves: 12 people
This recipe serves 12 people with tall, generous slices. If you are serving it after a big meal or adding it to a dessert table, you can cut thinner slices and serve 14 to 16 people.
Ingredients You’ll Need
For the Chocolate Cake Layers
- 2 cups all-purpose flour
- 2 cups granulated sugar
- 3/4 cup unsweetened cocoa powder
- 2 teaspoons baking soda
- 1 teaspoon baking powder
- 1 teaspoon kosher salt
- 2 large eggs, room temperature
- 1 cup buttermilk, room temperature
- 1/2 cup vegetable oil or canola oil
- 2 teaspoons vanilla extract
- 1 cup hot coffee or hot water
For the Chocolate Buttercream Frosting
- 1 cup unsalted butter, softened to room temperature
- 3 1/2 cups powdered sugar
- 1/2 cup unsweetened cocoa powder
- 1/4 teaspoon kosher salt
- 2 teaspoons vanilla extract
- 1/4 cup heavy cream or whole milk, plus more as needed
- 4 ounces semi-sweet chocolate, melted and cooled slightly
For the Chocolate Ganache Topping
- 4 ounces semi-sweet chocolate, finely chopped
- 1/2 cup heavy cream
- 1 tablespoon unsalted butter, optional for shine
Optional Garnishes
- Chocolate curls
- Mini chocolate chips
- Chocolate sprinkles
- Fresh strawberries or raspberries
Pro Tips
Use room temperature ingredients.
Room temperature eggs and buttermilk mix more smoothly into the batter. This helps the cake bake with a softer, more even crumb.
Bloom the cocoa with hot liquid.
Hot coffee or hot water brings out the flavor of the cocoa powder. Coffee will not make the cake taste like coffee, but it helps the chocolate taste deeper.
Do not overmix the batter.
Once the dry and wet ingredients come together, mix only until smooth. Overmixing can make the cake layers dense instead of tender.
Cool the layers completely before frosting.
Warm cake will melt the buttercream and make the layers slide. Let the cakes cool fully on a rack before trimming, stacking, or frosting.
Use a crumb coat.
A thin first layer of frosting traps crumbs and makes the final coat look cleaner. Chill the cake briefly after the crumb coat so the second layer goes on smoothly.
Let ganache cool before pouring.
Ganache should be pourable but not hot when it goes on the cake. If it is too warm, it can melt the frosting and run too far down the sides.
Tools You’ll Need
- Two 9-inch round cake pans
- Parchment paper
- Mixing bowls
- Electric hand mixer or stand mixer
- Whisk
- Rubber spatula
- Measuring cups
- Measuring spoons
- Cooling rack
- Offset spatula
- Cake turntable, optional
- Serrated knife, optional for leveling layers
- Small saucepan or microwave-safe bowl
- Heat-safe bowl for ganache
- Wire whisk
- Cake plate or cake stand
Substitutions and Variations
Use a Different Pan
Bake the cake in a 9×13-inch pan if you do not want to make layers. The flavor stays the same, and the cake is easier to frost and serve for a casual family dessert.
Make It Dairy-Free
Use dairy-free milk mixed with 1 tablespoon vinegar instead of buttermilk, and use plant-based butter in the frosting. Choose dairy-free chocolate and skip the heavy cream or use coconut cream for the ganache.
Change the Frosting
Use chocolate cream cheese frosting, vanilla buttercream, or whipped chocolate ganache instead of classic chocolate buttercream. Keep the cake layers chocolate so the dessert still feels like a triple chocolate cake.
Add a Filling
Spread raspberry jam, caramel sauce, or chocolate mousse between the cake layers. Use a thin layer so the cake stays stable and the chocolate flavor remains the main focus.
Make It Extra Crunchy
Add mini chocolate chips, toasted nuts, or crushed chocolate cookies between the layers. This gives each slice a little texture while keeping the cake rich and familiar.
Make Ahead Tips
Triple Chocolate Layer Cake is a great dessert to make ahead because the layers, frosting, and ganache can each be prepared in stages. The cake layers can be baked 1 day ahead, cooled completely, wrapped tightly in plastic wrap, and stored at room temperature.
You can also freeze the unfrosted cake layers for up to 2 months. Wrap each layer well in plastic wrap and foil, then thaw overnight in the refrigerator before frosting.
The chocolate buttercream can be made up to 3 days ahead and stored in the refrigerator. Let it soften at room temperature, then beat it again until smooth and fluffy. The ganache is best made the day you decorate the cake, but it can be made a few hours ahead and gently rewarmed until pourable.
Instructions
Step 1: Prepare the Cake Pans
Preheat the oven to 350°F. Grease two 9-inch round cake pans, line the bottoms with parchment paper, and lightly grease the parchment.
Dust the pans with a little cocoa powder or flour to help the cakes release cleanly. Set the pans aside while you make the batter.
Step 2: Mix the Dry Ingredients
In a large mixing bowl, whisk together 2 cups all-purpose flour, 2 cups granulated sugar, 3/4 cup unsweetened cocoa powder, 2 teaspoons baking soda, 1 teaspoon baking powder, and 1 teaspoon kosher salt. Whisk well so the cocoa and leavening are evenly spread through the flour.
Breaking up any cocoa lumps now helps the batter turn smooth later. This step also helps the cake layers rise evenly.
Step 3: Add the Wet Ingredients
Add 2 large room temperature eggs, 1 cup room temperature buttermilk, 1/2 cup vegetable oil or canola oil, and 2 teaspoons vanilla extract to the dry ingredients. Mix on medium speed for about 1 minute, or whisk by hand until mostly smooth.
Scrape down the sides and bottom of the bowl so no dry pockets remain. The batter will look thick at this point.
Step 4: Add the Hot Coffee or Water
Slowly pour in 1 cup hot coffee or hot water while mixing on low speed. Continue mixing until the batter is smooth and thin.
The hot liquid helps bloom the cocoa and gives the cake a deeper chocolate flavor. Do not worry if the batter looks looser than a classic cake batter.
Step 5: Bake the Cake Layers
Divide the batter evenly between the prepared pans. Tap the pans gently on the counter to release large air bubbles.
Bake for 28 to 34 minutes, or until a toothpick inserted in the center comes out with a few moist crumbs. Let the cakes cool in the pans for 10 to 15 minutes before turning them onto a cooling rack.
Step 6: Cool the Cakes Completely
Let the cake layers cool fully before frosting. This usually takes about 1 to 2 hours, depending on your kitchen.
If the tops are domed, level them gently with a serrated knife once they are cool. Flat layers make the cake easier to stack and frost.
Step 7: Make the Chocolate Buttercream
Beat 1 cup softened unsalted butter in a large bowl for 2 to 3 minutes, until creamy and smooth. Add 3 1/2 cups powdered sugar, 1/2 cup unsweetened cocoa powder, and 1/4 teaspoon kosher salt.
Mix on low speed at first so the dry ingredients do not fly out of the bowl. Add 2 teaspoons vanilla extract and 1/4 cup heavy cream or whole milk, then beat until fluffy.
Step 8: Add the Melted Chocolate
Pour in 4 ounces melted and slightly cooled semi-sweet chocolate. Beat the frosting for 1 to 2 minutes until smooth, rich, and spreadable.
If the frosting feels too thick, add more cream or milk 1 tablespoon at a time. If it feels too soft, add a little more powdered sugar until it holds its shape.
Step 9: Fill and Stack the Cake
Place one cooled cake layer on a cake plate or cake stand. Spread an even layer of chocolate buttercream over the top.
Place the second cake layer on top, flat side up if possible. Press gently to help it settle into place without pushing out too much frosting.
Step 10: Crumb Coat the Cake
Spread a thin layer of frosting over the top and sides of the cake. This first layer traps crumbs and makes the final frosting layer smoother.
Chill the cake for 20 to 30 minutes, or until the crumb coat feels firm to the touch. Keep the remaining frosting at room temperature so it stays spreadable.
Step 11: Frost the Cake
Spread the remaining chocolate buttercream over the chilled crumb coat. Use an offset spatula to smooth the top and sides, or make soft swirls for a more relaxed homemade look.
Do not worry about making it perfect. A few gentle swoops in the frosting make the cake look cozy and inviting.
Step 12: Make the Ganache
Place 4 ounces finely chopped semi-sweet chocolate in a heat-safe bowl. Warm 1/2 cup heavy cream in a small saucepan or microwave until hot but not boiling.
Pour the hot cream over the chocolate and let it sit for 2 to 3 minutes. Add 1 tablespoon unsalted butter if using, then whisk until smooth and glossy.
Step 13: Add the Ganache Topping
Let the ganache cool until it is thick but still pourable. Spoon or pour it over the top of the frosted cake, guiding a little over the edges if you want soft drips.
If the ganache is too thin, let it sit for a few more minutes. If it becomes too thick, warm it gently for a few seconds and stir again.
Step 14: Decorate and Serve
Add chocolate curls, mini chocolate chips, chocolate sprinkles, or fresh berries while the ganache is still soft. This helps the toppings stick to the cake.
Let the cake sit for a few minutes before slicing. Use a sharp knife and wipe it clean between slices for neat pieces.
Serving Suggestions
Triple Chocolate Layer Cake is lovely served with cold milk for a classic family dessert. The cool milk balances the rich chocolate and makes each slice feel extra comforting.
A scoop of vanilla ice cream also pairs beautifully with this cake. The creamy vanilla flavor softens the deep chocolate and makes it feel like a celebration dessert.
For a fresh touch, serve each slice with strawberries, raspberries, or sliced bananas. The fruit adds brightness and keeps the plate from feeling too heavy.
Coffee or hot tea works well for adults who want something warm beside the cake. The slight bitterness of coffee is especially nice with the chocolate buttercream.
For birthdays, serve the cake with simple candles and a small bowl of sprinkles for kids to add at the table. It keeps the moment fun without needing complicated decorations.
If you are serving this cake at a party, cut thin slices because it is rich. Smaller slices make it easier for guests to enjoy with other treats.
Leftovers and Storage
Store leftover Triple Chocolate Layer Cake covered at room temperature for up to 2 days if your kitchen is cool. If the room is warm or humid, keep the cake in the refrigerator so the frosting and ganache stay firm.
For longer storage, refrigerate the cake in an airtight cake container for up to 5 days. Let slices sit at room temperature for 20 to 30 minutes before serving so the frosting softens and the cake tastes moist again.
You can also freeze individual slices. Place slices on a baking sheet until firm, then wrap each slice tightly in plastic wrap and foil. Store in a freezer-safe bag or container for up to 2 months.
Thaw frozen slices overnight in the refrigerator or at room temperature for a shorter time. For the best texture, unwrap the cake after thawing so condensation does not settle on the frosting.
Nutrition and Benefits
- Rich celebration dessert: This cake is meant to be a special treat, and a small slice feels satisfying. The deep chocolate flavor makes it perfect for birthdays, holidays, and family gatherings.
- Homemade ingredients: Making the cake from scratch lets you control the cocoa, frosting, and toppings. It also gives the cake a fresh flavor that feels more personal than a boxed dessert.
- Good make-ahead option: The cake layers can be baked ahead, and the finished cake stores well. This makes it helpful when you are planning for guests or a busy celebration day.
- Flexible decorating: Chocolate curls, sprinkles, berries, or mini chocolate chips can all work on top. You can keep the cake simple or make it look more festive without changing the recipe.
- Family-friendly portions: The cake slices neatly and can be cut into large or small pieces. This makes it easy to serve for both kids and adults.
Recipe FAQ
Can I make Triple Chocolate Layer Cake without coffee?
Yes, you can use hot water instead of hot coffee. Coffee deepens the chocolate flavor, but it does not make the cake taste like coffee. Hot water still blooms the cocoa and helps keep the cake moist.
Can I bake this cake in a 9×13-inch pan?
Yes, you can bake the batter in a 9×13-inch pan for an easier version. The baking time may be closer to 35 to 40 minutes, but start checking early. Frost the cooled cake right in the pan for a simple family dessert.
Why is my cake dry?
Cake can turn dry if it is overbaked or if too much flour is added. Spoon and level the flour instead of packing it into the measuring cup. Start checking the cake a few minutes before the suggested baking time.
Can I make the cake layers ahead?
Yes, the cake layers can be made 1 day ahead and stored tightly wrapped at room temperature. They can also be frozen for up to 2 months. Thaw them before frosting so the buttercream spreads smoothly.
How do I keep the layers from sliding?
Make sure the cake layers are completely cool before frosting. Use a moderate amount of frosting between layers and chill the crumb-coated cake before adding the final coat. Leveling domed tops also helps the cake stack evenly.
Can I use milk chocolate instead of semi-sweet chocolate?
Yes, but the cake will taste sweeter and less intense. Semi-sweet chocolate balances the cocoa and buttercream well. If using milk chocolate, you may want to reduce the powdered sugar in the frosting slightly.
How do I get clean cake slices?
Use a sharp knife and wipe it clean between each cut. Chilling the cake briefly before slicing can also help if the frosting is very soft. Let the slices sit at room temperature before serving for the best texture.
A Rich Chocolate Cake Made for Sharing
Triple Chocolate Layer Cake is soft, rich, and full of comforting homemade flavor. The tender cake layers, creamy frosting, and glossy ganache make each slice feel special without needing fancy decorating. It is a dependable dessert for birthdays, holidays, and family celebrations.
This recipe is worth making again because it gives you a classic chocolate cake with reliable results. The layers can be made ahead, the frosting is easy to spread, and the toppings are simple to change. It is a sweet, satisfying cake that brings everyone back for another slice.