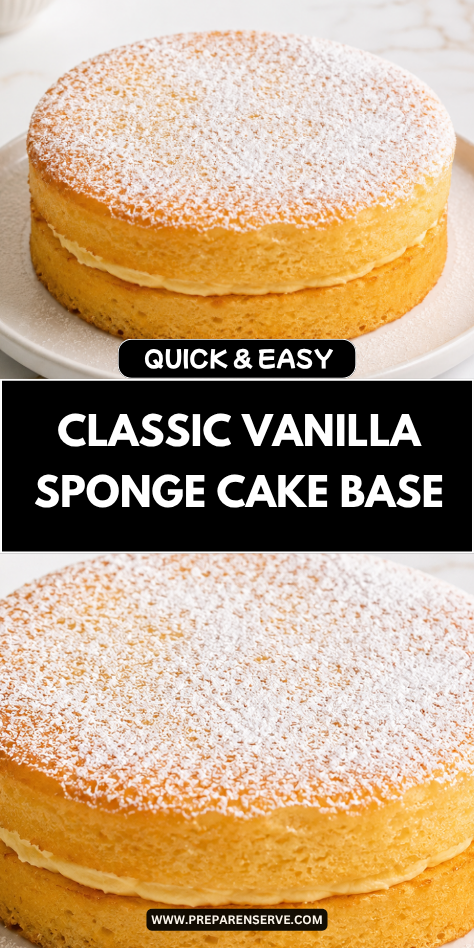
I make Classic Vanilla Sponge Cake Base when I need a soft, simple cake that can work for almost any family celebration. It is light, tender, and gently sweet, which makes it a lovely starting point for birthdays, layered cakes, fruit desserts, or an easy weekend treat.
I like this recipe because it feels dependable once you understand the basic steps. The eggs give the cake its lift, the vanilla adds warm flavor, and the soft crumb makes it easy to pair with frosting, whipped cream, jam, or fresh fruit.
Why You’ll Love This Recipe
Classic Vanilla Sponge Cake Base is a recipe worth learning because it is simple, useful, and easy to dress up. The flavor is mild and buttery with a soft vanilla taste, so it works well with many fillings and toppings.
This cake is also great for families because it is not too heavy or overly rich. Kids enjoy the soft texture, and adults love that it can be turned into a pretty dessert without needing complicated ingredients.
You can use this sponge cake for layer cakes, snack cakes, trifles, strawberry shortcake-style desserts, or simple slices with powdered sugar. Once you have a good base, you can make it fit birthdays, holidays, school treats, or casual family desserts.
Serves: 10 people
This recipe makes one 9-inch round cake or two thinner 8-inch layers, depending on how you want to serve it. It can serve about 10 people when sliced into simple dessert portions.
If you are building a taller layer cake, you can double the recipe and bake it in multiple pans. For smaller families, leftover slices can be wrapped and saved, which makes this cake helpful for make-ahead desserts or weekend treats.
Ingredients You’ll Need
For the Vanilla Sponge Cake
- 1 cup all-purpose flour, spooned and leveled
- 1 teaspoon baking powder
- 1/4 teaspoon salt
- 4 large eggs, room temperature
- 3/4 cup granulated sugar
- 1/4 cup whole milk
- 1/4 cup unsalted butter, melted and slightly cooled
- 2 teaspoons vanilla extract
- 1/4 teaspoon almond extract, optional
For Preparing the Pan
- 1 tablespoon unsalted butter or baking spray, for greasing
- 1 tablespoon all-purpose flour, for dusting the pan
- 1 round piece parchment paper, cut to fit the bottom of the pan
Optional for Serving or Filling
- 1 cup whipped cream
- 1/2 cup strawberry jam or raspberry jam
- 1 cup fresh berries
- 1 tablespoon powdered sugar, for dusting
Pro Tips
Use room temperature eggs for the best volume. Eggs whip up lighter and hold more air when they are not cold from the refrigerator.
Beat the eggs and sugar long enough. The mixture should look pale, thick, and fluffy, and it should fall from the beaters in a ribbon before slowly sinking back in.
Fold the flour in gently. Sponge cake depends on the air whipped into the eggs, so rough stirring can knock out the lift and make the cake dense.
Melt the butter and let it cool slightly before adding it. Hot butter can deflate the batter or make it uneven, while cooled melted butter blends in more smoothly.
Do not overbake the cake. A sponge cake should be lightly golden and spring back when touched in the center, with a toothpick coming out clean.
Let the cake cool before slicing or filling it. A warm sponge is delicate, and cooling helps the crumb set so it is easier to cut and layer.
Tools You’ll Need
- 9-inch round cake pan or two 8-inch round cake pans
- Parchment paper
- Mixing bowls
- Electric hand mixer or stand mixer
- Whisk
- Rubber spatula
- Measuring cups
- Measuring spoons
- Fine mesh sieve, optional for sifting flour
- Small saucepan or microwave-safe bowl for melting butter
- Cooling rack
- Toothpick or cake tester
- Offset spatula, optional for spreading filling
- Serrated knife, optional for leveling or slicing layers
Substitutions and Variations
Use Cake Flour
Swap the all-purpose flour for 1 cup cake flour if you want an even softer crumb. Cake flour gives the sponge a finer texture, which works especially well for layer cakes.
Make It Dairy-Free
Use unsweetened almond milk, oat milk, or soy milk in place of whole milk, and use dairy-free baking butter instead of regular butter. The cake will still be soft and lightly flavored, though the richness may be a little different.
Add Citrus Flavor
Stir in 1 teaspoon lemon zest or orange zest with the vanilla extract. This gives the sponge a fresh flavor that pairs nicely with berries, whipped cream, or a light glaze.
Turn It Into a Layer Cake
Bake the batter in two 8-inch pans for thinner layers that are easy to fill. Add whipped cream, buttercream, pastry cream, jam, or fresh fruit between the layers while keeping the vanilla sponge as the main base.
Make It More Dessert-Ready
Brush the cooled cake with a simple syrup made from equal parts sugar and water if you want extra moisture. This is helpful when making a celebration cake, trifle, or dessert that will be chilled before serving.

Make Ahead Tips
Classic Vanilla Sponge Cake Base is a helpful cake to make ahead because it holds well when wrapped properly. You can bake the cake 1 day before serving, let it cool completely, then wrap it tightly in plastic wrap and keep it at room temperature.
If you want to make it further ahead, freeze the cooled cake for up to 2 months. Wrap it in plastic wrap, then place it in a freezer-safe bag or wrap it again in foil to protect it from freezer air.
For layer cakes, it is often easier to slice, fill, and decorate a chilled or slightly frozen sponge. The crumb stays neater, and the cake is less likely to tear when you spread whipped cream, jam, or frosting.
If you plan to fill the cake with whipped cream or fresh fruit, wait until the day you serve it. The plain sponge can be made ahead, but delicate fillings taste freshest when added closer to serving time.
Instructions
Step 1: Prepare the Cake Pan
Preheat the oven to 350°F. Grease one 9-inch round cake pan or two 8-inch round cake pans with 1 tablespoon unsalted butter or baking spray.
Line the bottom of the pan with parchment paper, then lightly dust the sides with 1 tablespoon all-purpose flour. Tap out any extra flour so the cake releases cleanly after baking.
Step 2: Mix the Dry Ingredients
In a medium bowl, whisk together 1 cup all-purpose flour, 1 teaspoon baking powder, and 1/4 teaspoon salt. If your flour looks clumpy, sift it once for a lighter texture.
Set the dry ingredients aside while you whip the eggs and sugar. Having everything ready helps you fold the batter gently without pausing too much.
Step 3: Warm the Milk and Butter
In a small saucepan or microwave-safe bowl, warm 1/4 cup whole milk with 1/4 cup melted unsalted butter until the mixture is warm but not hot. Stir in 2 teaspoons vanilla extract and 1/4 teaspoon almond extract if you are using it.
The mixture should feel warm to the touch, not steaming. If it gets too hot, let it cool for a few minutes before adding it to the batter.
Step 4: Beat the Eggs and Sugar
Add 4 large room temperature eggs and 3/4 cup granulated sugar to a large mixing bowl. Beat with an electric hand mixer or stand mixer on medium-high speed for 5 to 7 minutes.
The mixture should become pale, thick, and fluffy. When you lift the beaters, the batter should fall in ribbons that sit on top for a moment before sinking back in.
Step 5: Fold in the Flour Mixture
Sprinkle about one-third of the flour mixture over the whipped eggs. Use a rubber spatula to fold gently from the bottom of the bowl up and over the top.
Repeat with the remaining flour in two more additions. Fold only until you no longer see dry streaks, being careful not to stir hard or deflate the batter.
Step 6: Add the Warm Milk Mixture
Scoop about 1 cup of the batter into the warm milk and butter mixture. Stir gently until it looks smooth and combined.
Pour this loosened mixture back into the main bowl of batter. Fold gently until everything is blended and the batter looks even, light, and pourable.
Step 7: Fill the Pan
Pour the batter into the prepared cake pan or divide it evenly between two 8-inch pans. Smooth the top gently with a spatula so the cake bakes evenly.
Tap the pan lightly on the counter once or twice to release any large air bubbles. Do not tap too hard, because you want to keep most of the air in the batter.
Step 8: Bake the Sponge Cake
Bake one 9-inch cake for 25 to 30 minutes, or two 8-inch cakes for 18 to 22 minutes. The cake should be lightly golden and spring back when touched gently in the center.
A toothpick inserted into the center should come out clean. Avoid opening the oven too early, because sponge cake can sink if the structure has not set.
Step 9: Cool the Cake
Let the cake cool in the pan for 10 minutes. Run a thin knife around the edge if needed, then turn the cake out onto a cooling rack.
Peel off the parchment paper and let the cake cool completely. A fully cooled cake is easier to slice, fill, frost, or dust with powdered sugar.
Step 10: Fill or Serve
Once cooled, serve the cake plain or add your favorite toppings. You can dust it with 1 tablespoon powdered sugar, spread it with 1/2 cup strawberry jam or raspberry jam, or top it with 1 cup whipped cream and 1 cup fresh berries.
For a layer cake, slice the sponge carefully with a serrated knife if needed. Fill it gently so the soft crumb stays neat and tender.
Serving Suggestions
Classic Vanilla Sponge Cake Base is lovely with whipped cream and fresh berries. The soft cake, light cream, and juicy fruit make a simple dessert that works for birthdays, brunch, or Sunday dinner.
You can spread a thin layer of strawberry jam or raspberry jam over the cooled cake. This adds sweetness and color without making the cake heavy.
For a celebration cake, use this sponge with vanilla buttercream, chocolate frosting, or cream cheese frosting. The mild vanilla flavor gives you a flexible base that works with many fillings.
This cake also makes a good base for trifles. Cut it into cubes and layer it with pudding, whipped cream, berries, or sliced bananas for an easy make-ahead dessert.
For a simple family snack, serve slices with a dusting of powdered sugar. A cup of milk, tea, or coffee on the side makes it feel cozy without extra work.
You can also use this cake for strawberry shortcake-style desserts. Slice the cake, add sweetened berries and whipped cream, and serve it in soft, generous pieces.
Leftovers and Storage
Store leftover Classic Vanilla Sponge Cake Base tightly wrapped at room temperature for up to 2 days. Keep it in a cool, dry spot so the texture stays soft.
If the cake has whipped cream, fresh fruit, or dairy-based filling, store it in the refrigerator instead. Cover it well and enjoy it within 2 to 3 days for the best taste and texture.
Plain sponge cake can be frozen for up to 2 months. Wrap the cooled cake tightly in plastic wrap, then place it in a freezer-safe bag or wrap it again in foil.
Thaw the cake at room temperature while still wrapped. This helps keep moisture in the cake as it softens.
If the cake feels a little dry after storing, brush it lightly with simple syrup before filling or serving. A small amount can bring back softness without making the cake soggy.
Nutrition and Benefits
- Eggs give this sponge cake structure, lift, and a tender texture. They also add protein and richness without needing a heavy amount of fat.
- Vanilla adds warm flavor and makes the cake taste comforting and familiar. It pairs well with fruit, cream, frosting, chocolate, and jam.
- This cake is lighter than many butter-heavy cakes because much of the lift comes from whipped eggs. The texture feels soft and airy while still being satisfying.
- Making a sponge cake base at home gives you control over the sweetness, fillings, and toppings. You can keep it simple or turn it into a special dessert.
- Fresh fruit, whipped cream, or a light dusting of powdered sugar can make each serving feel balanced. The plain cake gives you room to choose toppings that fit your family.
Recipe FAQ
Can I make this sponge cake without a stand mixer?
Yes, you can use an electric hand mixer instead of a stand mixer. The eggs and sugar need enough time to become pale, thick, and fluffy. Mixing by hand with a whisk is possible, but it takes much longer and is harder to do evenly.
Why did my sponge cake sink in the middle?
A sponge cake can sink if the eggs were not whipped enough, the batter was overmixed, or the oven door was opened too early. Make sure the egg mixture reaches the ribbon stage before folding in the flour. Bake until the center springs back and a toothpick comes out clean.
Can I use this cake for a layered birthday cake?
Yes, this sponge cake makes a nice base for a layered birthday cake. For easier layers, bake it in two 8-inch pans instead of one deeper pan. Let the layers cool completely before filling and frosting.
How do I keep sponge cake moist?
Do not overbake the cake, and wrap it well once it cools. If you are making a filled cake, you can brush the layers lightly with simple syrup. This is especially helpful if the cake will be chilled before serving.
Can I use cake flour instead of all-purpose flour?
Yes, cake flour can make the crumb even softer and finer. Use the same amount, spooned and leveled, for a light sponge texture. Be gentle when folding it into the whipped eggs.
What fillings go best with vanilla sponge cake?
Whipped cream, buttercream, pastry cream, lemon curd, chocolate ganache, and fruit jam all work well. Fresh berries, sliced peaches, or bananas are also delicious. Choose a filling that is soft enough to spread without tearing the cake.
Can I freeze vanilla sponge cake?
Yes, plain vanilla sponge cake freezes well. Let it cool completely, wrap it tightly, and freeze for up to 2 months. Thaw it while still wrapped so it stays soft and moist.
A Soft Vanilla Cake Base for Any Sweet Occasion
Classic Vanilla Sponge Cake Base is the kind of recipe that makes homemade desserts feel simple and dependable. Its light crumb, gentle vanilla flavor, and soft texture make it easy to turn into a birthday cake, fruit dessert, trifle, or casual family treat.
I love keeping a basic cake like this in my recipe box because it works with so many toppings and fillings. It is simple, comforting, and useful for celebrations, meal prep desserts, or a sweet slice to share at home.