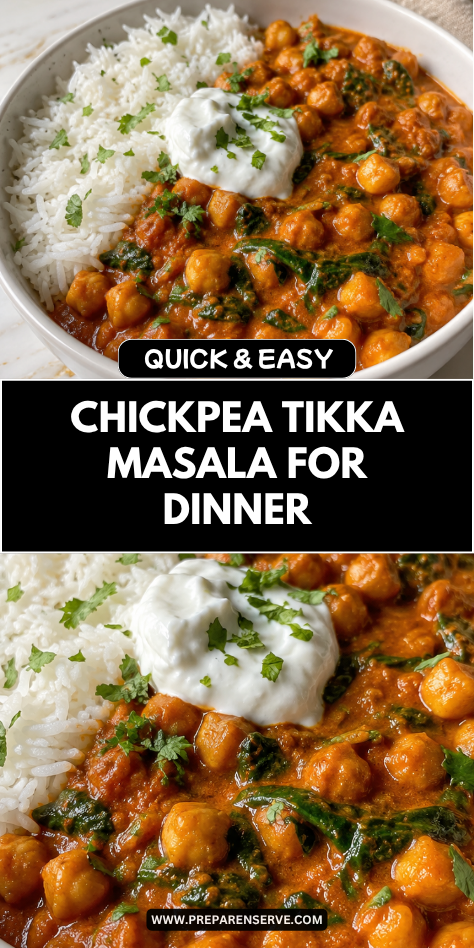
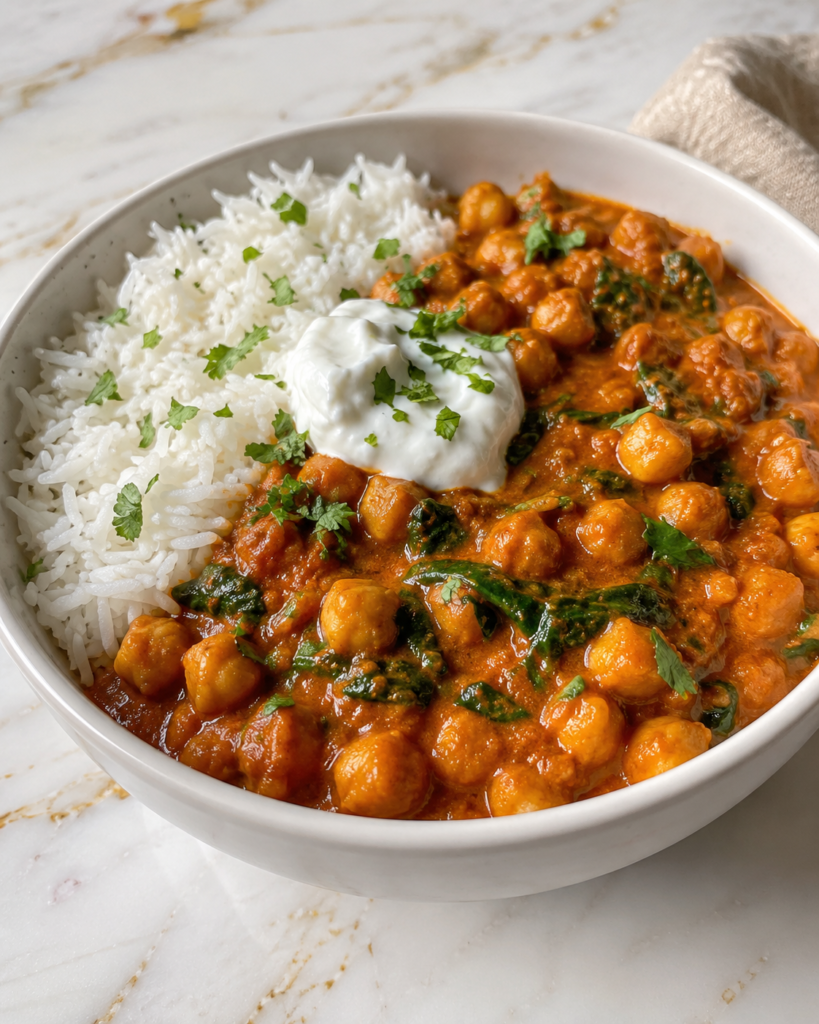
I make Chickpea Tikka Masala when I want a warm, cozy dinner that still feels simple and affordable. It has tender chickpeas, a creamy tomato sauce, and gentle spices that make the whole kitchen smell comforting.
I love this recipe because it gives you a lot of flavor without needing meat or complicated steps. The chickpeas make it filling, the sauce feels rich and smooth, and it is easy to serve with rice, naan, or a simple vegetable side for a family meal.
Why You’ll Love This Recipe
Chickpea Tikka Masala is a comforting vegetarian dinner that feels hearty enough for the whole family. The chickpeas soak up the creamy spiced tomato sauce, so every bite tastes warm, rich, and satisfying.
This recipe is also easy to make with pantry ingredients. Canned chickpeas, crushed tomatoes, spices, broth, and cream come together in one skillet or pot, which makes cleanup easier on busy nights.
It is a helpful meal when you want something flexible. You can make it mild for kids, add more heat for adults, serve it over rice, or scoop it up with warm naan for a cozy dinner that feels dependable.
Serves: 4 people
This recipe serves 4 people with a generous portion of chickpea tikka masala for each plate. It is filling when served over basmati rice, jasmine rice, or with warm naan on the side.
If you are feeding younger kids, the portions may stretch a little further. For bigger appetites, you can add extra rice, a side of roasted vegetables, or double the chickpeas to make the meal heartier.
Ingredients You’ll Need
For the Chickpea Tikka Masala
- 2 tablespoons vegetable oil or avocado oil
- 1 tablespoon unsalted butter
- 1 small yellow onion, finely diced
- 4 cloves garlic, minced
- 1 tablespoon fresh grated ginger or 1 teaspoon ground ginger
- 1 tablespoon garam masala
- 1 teaspoon ground cumin
- 1 teaspoon paprika
- 1/2 teaspoon ground coriander
- 1/2 teaspoon ground turmeric
- 1/4 teaspoon cayenne pepper, optional
- 2 cans chickpeas, 15 ounces each, drained and rinsed
- 1 can crushed tomatoes, 15 ounces
- 1/2 cup low-sodium vegetable broth or water
- 3/4 cup heavy cream or full-fat coconut milk
- 1 teaspoon sugar, optional
- 3/4 teaspoon salt, plus more to taste
- 1/4 teaspoon black pepper
- 2 tablespoons chopped fresh cilantro, for serving
For Serving
- 3 cups cooked basmati rice or jasmine rice
- Warm naan, optional
- Plain yogurt, optional
- Sliced cucumbers, optional
- Lemon wedges, optional
Pro Tips
Drain and rinse the chickpeas well before adding them to the sauce. This helps remove the canned taste and lets the spices and tomato sauce shine.
Let the onion cook until it is soft and lightly golden. This simple step builds flavor and helps the sauce taste deeper and more homemade.
Toast the spices for a short time before adding the tomatoes. Cooking the spices in the oil and butter wakes them up and gives the sauce a warmer flavor.
Simmer the chickpeas long enough to soften slightly. They are already cooked, but a little simmering time helps them absorb the sauce and become more tender.
Keep the heat low after adding cream or coconut milk. A gentle simmer helps the sauce stay smooth and creamy without separating.
Serve mild toppings on the side for kids. Plain yogurt, cucumbers, extra rice, or naan can help balance the spices and make the meal easy for everyone to enjoy.
Tools You’ll Need
- Large skillet, sauté pan, or Dutch oven
- Cutting board
- Sharp knife
- Measuring cups
- Measuring spoons
- Can opener
- Fine mesh strainer for rinsing chickpeas
- Wooden spoon or silicone spatula
- Small bowl for spices
- Rice cooker or medium saucepan, if making rice
- Serving bowls or plates
Substitutions and Variations
Make It Dairy-Free
Use full-fat coconut milk instead of heavy cream and skip the butter or use a dairy-free butter. The sauce will still be creamy, with a gentle coconut flavor that works well with the warm spices.
Add More Vegetables
Stir in spinach, peas, cauliflower, bell peppers, carrots, or zucchini near the end of cooking. This adds color, texture, and extra nutrients while keeping the creamy tikka masala sauce as the main flavor.
Adjust the Spice Level
Leave out the cayenne pepper for a mild family-friendly version. Add extra cayenne, chili powder, or red pepper flakes if you want the sauce to have more heat.
Make It Heartier
Add diced potatoes, cooked lentils, paneer, tofu, or extra chickpeas to make the meal more filling. Keep the sauce amount in mind and add a splash of broth if the pan gets too thick.
Lighten It Up
Use half-and-half, light coconut milk, or a smaller amount of cream for a lighter sauce. Serve it with cauliflower rice, extra vegetables, or a cucumber salad if you want a fresher plate.
Make Ahead Tips
Chickpea Tikka Masala is a wonderful make-ahead meal because the sauce becomes even more flavorful after it rests. You can cook the full dish up to 3 days ahead, let it cool, and store it in an airtight container in the refrigerator.
If you want to prep in smaller steps, chop the onion, mince the garlic, and measure the spices ahead of time. Keep the onion in one container and the garlic and ginger in another so everything is ready when you start cooking.
You can also drain and rinse the chickpeas ahead, then store them covered in the fridge for 1 to 2 days. This makes the cooking process feel faster, especially on a busy weeknight.
For freezing, the chickpea mixture freezes well, but the sauce may look slightly different after thawing if made with cream. Coconut milk usually freezes a little better, and either version can be smoothed out by reheating gently and stirring well.
Instructions
Step 1: Cook the Onion
Place a large skillet, sauté pan, or Dutch oven over medium heat. Add 2 tablespoons vegetable oil or avocado oil and 1 tablespoon unsalted butter, then let the butter melt into the oil.
Add 1 finely diced small yellow onion and stir to coat it in the fat. Cook for 5 to 6 minutes, stirring often, until the onion becomes soft and lightly golden.
Step 2: Add Garlic and Ginger
Add 4 minced garlic cloves and 1 tablespoon fresh grated ginger to the pan. Stir constantly for about 30 to 60 seconds, just until they smell fragrant.
Do not let the garlic brown too much, because it can turn bitter. If the pan looks dry, add a small splash of vegetable broth or water to keep everything moving.
Step 3: Toast the Spices
Add 1 tablespoon garam masala, 1 teaspoon ground cumin, 1 teaspoon paprika, 1/2 teaspoon ground coriander, 1/2 teaspoon ground turmeric, and 1/4 teaspoon cayenne pepper if using. Stir the spices into the onion mixture for 30 to 60 seconds.
This short cooking time helps the spices bloom in the oil and butter. The mixture should smell warm, rich, and cozy before you add the tomatoes.
Step 4: Add Tomatoes and Broth
Pour in 1 can crushed tomatoes and 1/2 cup low-sodium vegetable broth or water. Stir well, scraping the bottom of the pan to lift up any flavorful bits.
Bring the sauce to a gentle simmer over medium heat. Let it cook for 8 to 10 minutes, stirring now and then, until it thickens slightly and the tomato flavor softens.
Step 5: Add the Chickpeas
Stir in 2 cans drained and rinsed chickpeas. Add 3/4 teaspoon salt and 1/4 teaspoon black pepper, then mix until the chickpeas are fully coated in the sauce.
Let the chickpeas simmer in the sauce for 10 to 12 minutes. This helps them soften and soak up the warm spices.
Step 6: Make the Sauce Creamy
Reduce the heat to medium-low and stir in 3/4 cup heavy cream or full-fat coconut milk. Let the sauce warm gently for 3 to 4 minutes, stirring often.
Avoid boiling the sauce hard after adding the cream or coconut milk. A gentle simmer keeps the texture smooth and creamy.
Step 7: Balance the Flavor
Taste the sauce and decide if it needs a little more salt. If the tomatoes taste sharp, stir in 1 teaspoon sugar to soften the acidity.
You can also add a small squeeze of lemon at the end if you want the flavors to taste brighter. Keep the seasoning gentle if you are serving kids or anyone who prefers a mild dish.
Step 8: Finish with Cilantro
Turn off the heat and stir in 2 tablespoons chopped fresh cilantro. Save a little extra cilantro for sprinkling over the top if your family likes it.
The cilantro adds a fresh finish to the creamy sauce. If someone in your home does not enjoy cilantro, you can leave it out or serve it on the side.
Step 9: Prepare the Serving Bowls
Spoon cooked basmati rice or jasmine rice into serving bowls or onto plates. Add a generous scoop of chickpea tikka masala over the rice.
Make sure each serving gets plenty of sauce. The rice soaks it up and makes every bite warm, creamy, and filling.
Step 10: Serve Warm
Serve the chickpea tikka masala warm with naan, plain yogurt, sliced cucumbers, or lemon wedges if you like. These simple sides help balance the spices and make the meal feel complete.
For younger kids, serve extra rice and a spoonful of plain yogurt on the side. This keeps the flavor gentle and lets them mix in as much sauce as they want.
Serving Suggestions
Chickpea Tikka Masala is delicious over warm basmati rice because the grains are light and fluffy. The rice catches the creamy tomato sauce and helps make the meal filling without needing much else.
Warm naan is another favorite side for this dish. It is soft, easy to tear, and perfect for scooping up the chickpeas and sauce.
A simple cucumber salad makes the plate feel fresh. I like sliced cucumbers with a little salt, lemon juice, and plain yogurt because it cools the warm spices.
Roasted cauliflower, steamed peas, or sautéed spinach all work nicely with the creamy sauce. These vegetables add color and make the meal feel balanced while keeping the main flavor cozy.
For a lighter dinner, serve the chickpea tikka masala with cauliflower rice or a crisp salad. The sauce is rich enough that even a lighter side still feels satisfying.
For meal prep, portion the chickpeas and rice into containers and keep toppings separate. Add yogurt, cucumbers, cilantro, or lemon right before serving so everything tastes fresh.
Leftovers and Storage
Store leftover Chickpea Tikka Masala in an airtight container in the refrigerator for up to 4 days. If possible, store the rice separately so it does not soak up all the sauce while it sits.
To reheat, place the chickpea mixture in a saucepan or skillet over medium-low heat. Add a splash of vegetable broth, water, or cream if the sauce has thickened in the fridge.
You can also reheat it in the microwave in short bursts, stirring between each one. Cover the bowl loosely so the sauce warms evenly and does not splatter.
Chickpea Tikka Masala can be frozen for up to 2 months. Let it cool fully, place it in a freezer-safe container, and thaw overnight in the refrigerator before reheating.
If the sauce looks separated after thawing, warm it gently and stir well. A small splash of broth or coconut milk can help bring it back to a smooth texture.
Nutrition and Benefits
- Chickpeas are a good source of plant-based protein and fiber, which helps make this meal filling. They are also budget-friendly and easy to keep in the pantry for quick dinners.
- Tomatoes add color, flavor, and natural acidity to the sauce. They help balance the richness of the cream or coconut milk.
- Garlic, ginger, and warm spices bring deep flavor without needing complicated ingredients. They make the dish taste cozy and homemade while keeping the recipe practical.
- Using basmati rice gives the meal a soft, fluffy base that pairs well with the creamy sauce. You can also choose brown rice or cauliflower rice depending on your family’s needs.
- Adding vegetables like spinach, peas, cauliflower, or bell peppers can make the dish more colorful and balanced. It is an easy way to bring extra texture and freshness to the meal.
Recipe FAQ
Can I make Chickpea Tikka Masala dairy-free?
Yes, this recipe is easy to make dairy-free. Use full-fat coconut milk instead of heavy cream and replace the butter with more oil or a dairy-free butter. The sauce will still be creamy and rich with a light coconut flavor.
Can I use dried chickpeas instead of canned?
Yes, cooked dried chickpeas work well in this recipe. You will need about 3 cups cooked chickpeas to replace the 2 cans. Make sure they are tender before adding them to the sauce so the final dish has the right texture.
Is Chickpea Tikka Masala spicy?
It can be mild or spicy depending on how much cayenne pepper you use. For a family-friendly version, leave the cayenne out completely. The garam masala, cumin, paprika, coriander, and turmeric still give the sauce plenty of warm flavor.
What can I serve with Chickpea Tikka Masala?
Basmati rice, jasmine rice, naan, or flatbread all go well with this dish. You can also serve it with cucumbers, plain yogurt, roasted vegetables, or a simple salad. These sides help balance the creamy sauce.
Can I freeze Chickpea Tikka Masala?
Yes, Chickpea Tikka Masala freezes well for up to 2 months. Let it cool completely before freezing it in a sealed container. Thaw it overnight in the refrigerator and reheat gently for the best texture.
Why does my sauce taste too tangy?
Some canned tomatoes are more acidic than others. Stir in 1 teaspoon sugar, a little extra cream, or a splash of coconut milk to soften the flavor. Simmering the sauce a few extra minutes can also help it taste smoother.
Can I add vegetables to this recipe?
Yes, vegetables are a great addition. Spinach, peas, cauliflower, bell peppers, carrots, and zucchini all work well. Add tender vegetables near the end so they do not overcook, and add firmer vegetables earlier so they have time to soften.
A Cozy Chickpea Dinner to Make Again
Chickpea Tikka Masala is a warm, dependable meal that brings comfort without making dinner feel difficult. The creamy tomato sauce, tender chickpeas, and gentle spices make it filling, flavorful, and easy to enjoy with rice or naan.
I love keeping recipes like this in the dinner rotation because they are practical, affordable, and family-friendly. It reheats well, works for meal prep, and gives you a cozy homemade meal that feels worth making again.