I started making chili in the Instant Pot when I wanted all the deep, slow-cooked flavor of a long-simmered pot without waiting hours for it to come together.
Pressure cooking does something remarkable to chili — it drives the spices deep into the beans and meat and builds a richness in a fraction of the time a stovetop version takes.
I’ve worked out the liquid ratio and the timing so yours comes out thick, bold, and deeply satisfying every single time.
I’ll walk you through the whole process so there is no guesswork and everything finishes exactly the way a good chili should. It’s a fast, reliable recipe that makes chili night possible even on the busiest weeknights.

Why You’ll Love This Recipe
This Instant Pot chili recipe delivers bold, rich flavor with very little hands-on effort. The pressure cooker allows the spices, meat, and tomatoes to meld together quickly, creating a depth of flavor that tastes like it’s been simmering all day. You get a thick, hearty chili without constant stirring or monitoring.
Another reason this recipe stands out is how approachable it is. The steps are straightforward and forgiving, making it ideal for beginners or anyone short on time. Even if you’re new to pressure cooking, this recipe builds confidence with reliable results.
Families love this chili because it’s customizable and filling. You can adjust the spice level, swap ingredients, or keep it classic depending on who you’re feeding. This Instant Pot chili recipe fits seamlessly into busy family routines.
It’s also a practical meal that works for leftovers and meal planning. A single batch can stretch across multiple meals without losing quality. That kind of flexibility makes it a dependable favorite.
Serves: 2 people
This recipe is portioned to serve two people generously. The servings are hearty and satisfying, making it perfect for a cozy dinner. If you prefer leftovers or want to feed more people, the recipe can be doubled while staying within your Instant Pot’s capacity.
Ingredients You’ll Need
Meat and Beans
- 1/2 pound ground beef
- 1/2 cup kidney beans, drained and rinsed
- 1/2 cup black beans, drained and rinsed
Vegetables
- 1 small yellow onion, diced
- 1 small green bell pepper, diced
- 2 cloves garlic, minced
Tomato Base
- 1 can (14.5 ounces) diced tomatoes
- 2 tablespoons tomato paste
Seasonings
- 1 tablespoon chili powder
- 1 teaspoon ground cumin
- 1/2 teaspoon paprika
- 1/4 teaspoon cayenne pepper
- 1/2 teaspoon salt
- 1/4 teaspoon black pepper
Liquids
- 1/2 cup beef broth
Pro Tips
Brown the ground beef thoroughly before pressure cooking. Letting it develop color adds depth to the final flavor. Avoid stirring constantly so the meat can properly sear.
Use fresh spices when possible for the best flavor. Chili relies heavily on dried seasonings, and older spices can taste dull. Replacing them can make a noticeable difference.
Dice the vegetables evenly to ensure consistent cooking. Uniform pieces soften at the same rate and blend better into the chili. This creates a smoother texture overall.
If cooking for kids, reduce or omit the cayenne pepper. You can always add heat later, but it’s harder to take it away. Keeping it mild makes the recipe more family-friendly.
Deglaze the pot after browning the meat. Scraping up browned bits prevents burn warnings and adds flavor. A small splash of broth works well for this step.
Let the chili rest for a few minutes after cooking. This allows it to thicken naturally and settle. The texture improves noticeably with a short rest.
Tools You’ll Need
- Instant Pot or electric pressure cooker
- Cutting board
- Sharp knife
- Measuring cups
- Measuring spoons
- Wooden spoon or silicone spatula
Substitutions and Variations
Ground turkey or ground chicken can be used instead of ground beef. These options create a lighter chili while still keeping it hearty. You may need to add a bit more seasoning for depth.
If you prefer a vegetarian version, omit the meat and add extra beans or lentils. Chickpeas or pinto beans work especially well. Increase the vegetables slightly to keep the chili filling.
For a thicker chili, reduce the broth slightly or add an extra tablespoon of tomato paste. This creates a denser texture without changing flavor. Adjust slowly to avoid over-thickening.
If you enjoy smoky flavors, add smoked paprika instead of regular paprika. This gives the chili a subtle, rich undertone. It pairs especially well with beef.
You can also add corn for a touch of sweetness. Stir it in before pressure cooking or after, depending on texture preference. It adds color and kid-friendly appeal.
For spice lovers, increase the chili powder or cayenne gradually. Tasting after cooking helps you find the right balance. This keeps the heat controlled and enjoyable.
Make Ahead Tips
This Instant Pot chili is an excellent recipe to prepare ahead of time, especially for busy weeks or planned meals. You can dice the onion and bell pepper and mince the garlic up to two days in advance. Store them in airtight containers in the refrigerator until you’re ready to cook.
The ground beef can also be browned ahead of time if you want to save even more time. Once cooked, let it cool completely and refrigerate it for up to two days. When ready to make the chili, simply add it back to the Instant Pot and continue with the recipe.
Fully cooked chili holds up exceptionally well when made in advance. Preparing it a day early allows the flavors to deepen and blend even more. Many people find the chili tastes richer and more balanced after resting overnight.
If you plan to freeze the chili for future meals, allow it to cool completely first. Transfer it to freezer-safe containers, leaving some space for expansion. Properly stored, it can be frozen for up to three months.
When reheating make-ahead chili, warm it gently on the stovetop or using the sauté function on the Instant Pot. Stir occasionally to maintain an even texture. Add a small splash of broth if needed to loosen the consistency.
Instructions
Step 1: Prepare the Ingredients
Start by gathering and preparing all of your ingredients. Dice the onion and green bell pepper into small, even pieces. Mince the garlic and set it aside so it’s ready to use.
Measure out all the spices, tomato paste, broth, and beans before turning on the Instant Pot. Having everything ready helps the cooking process move smoothly. This is especially helpful when working with pressure cooking timing.
Drain and rinse the beans thoroughly. This removes excess sodium and helps keep the chili from becoming overly salty. Set them aside until needed.
Step 2: Brown the Ground Beef
Turn the Instant Pot to the sauté function and allow it to heat. Add the ground beef to the pot, breaking it up with a spoon as it cooks. Let it brown fully, allowing some pieces to develop color.
Season the beef lightly with salt and pepper while it cooks. This builds flavor from the very beginning. Avoid stirring constantly so the meat can properly sear.
Once the beef is fully cooked, drain excess grease if needed. Leaving a small amount in the pot adds flavor, but too much can make the chili heavy. Turn off the sauté function briefly if needed.
Step 3: Sauté the Vegetables
Add the diced onion and green bell pepper to the cooked beef. Turn the sauté function back on and stir to combine. Cook for several minutes until the vegetables begin to soften.
Add the minced garlic and stir continuously for about 30 seconds. Garlic should become fragrant but not browned. This step adds depth without bitterness.
If any browned bits are stuck to the bottom of the pot, add a splash of beef broth. Scrape gently with a wooden spoon to deglaze the pot. This prevents burn warnings and keeps flavor intact.
Step 4: Add the Seasonings and Tomato Base
Stir in the chili powder, cumin, paprika, cayenne pepper, salt, and black pepper. Mix well so the spices coat the meat and vegetables evenly. Toasting the spices briefly enhances their flavor.
Add the tomato paste and stir until fully incorporated. This helps thicken the chili and adds richness. Make sure it is evenly distributed throughout the mixture.
Pour in the diced tomatoes with their juices. Stir thoroughly, scraping the bottom of the pot again to ensure nothing is stuck. This step prepares the pot for pressure cooking.
Step 5: Add Beans and Liquid
Add the drained kidney beans and black beans to the pot. Stir gently to combine without mashing the beans. Keeping them intact improves texture.
Pour in the beef broth and stir once more. The liquid helps create steam for pressure cooking and balances the thickness of the chili. Make sure the mixture is evenly combined.
At this point, turn off the sauté function. Take a final look to ensure no food is stuck to the bottom of the pot. This helps avoid pressure cooking issues.
Step 6: Pressure Cook the Chili
Secure the Instant Pot lid and set the valve to the sealing position. Select the pressure cook or manual setting and cook on high pressure for 15 minutes. This time allows the flavors to fully meld.
Once the cooking cycle ends, allow the pressure to release naturally for 10 minutes. This helps the chili settle and prevents splattering. After 10 minutes, carefully perform a quick release.
Open the lid slowly and stir the chili. The texture should be thick and well blended. If it appears thinner than desired, it will continue to thicken as it rests.
Step 7: Adjust and Rest
Taste the chili and adjust seasoning if needed. Add more salt, pepper, or spice gradually to suit your preference. Stir well after any adjustments.
Let the chili rest for about 5 to 10 minutes before serving. This allows it to thicken naturally and develop a better texture. Resting also makes serving easier.
If you prefer a thicker chili, you can use the sauté function to simmer briefly. Stir frequently to prevent sticking. Turn off the pot once the desired consistency is reached.
Serving Suggestions
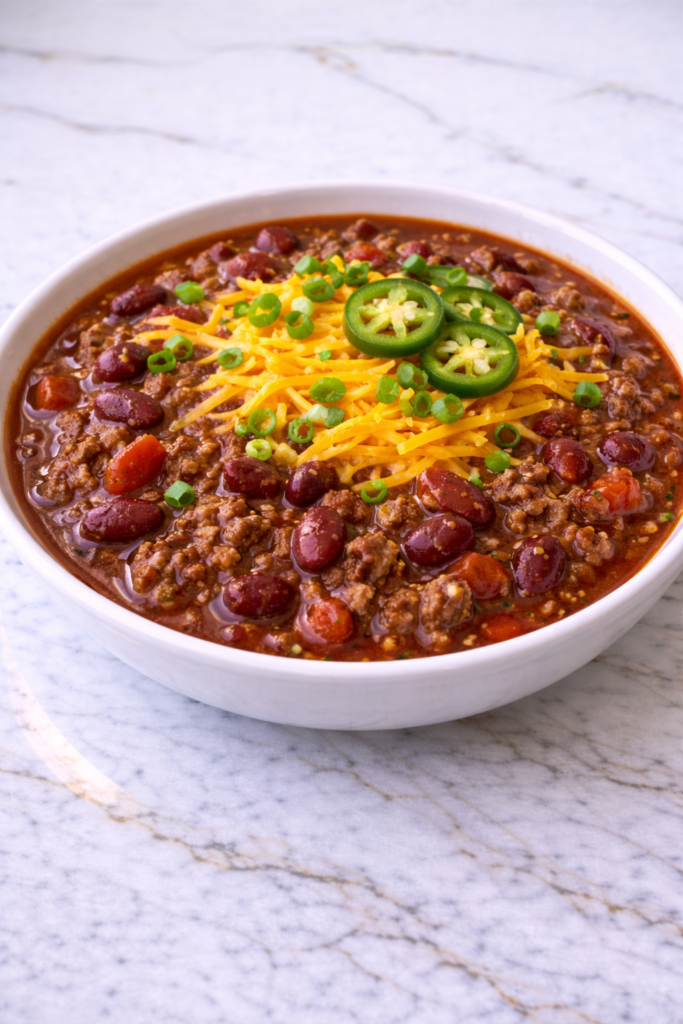
This Instant Pot chili is delicious served in a deep bowl with simple toppings. Sour cream, shredded cheese, or chopped green onions add contrast and flavor. Let everyone customize their own bowl at the table.
Chili pairs well with cornbread or warm dinner rolls. The bread helps balance the bold flavors and soak up the sauce. This combination is especially comforting for family dinners.
For a heartier meal, serve the chili over cooked rice or baked potatoes. The chili acts as a rich topping and stretches portions easily. This option works well for growing appetites.
You can also serve chili as a topping for hot dogs or nachos. This turns leftovers into a fun and casual meal. Kids often enjoy these creative serving ideas.
If you prefer a lighter pairing, serve the chili with a simple green salad. The fresh crunch balances the richness of the dish. A mild dressing works best to keep flavors balanced.
Leftovers and Storage
Leftover Instant Pot chili stores very well and often tastes even better after sitting for a day. Allow the chili to cool completely before transferring it to airtight containers. Stored in the refrigerator, it will stay fresh for up to four days.
When reheating chili from the refrigerator, use gentle heat to maintain its texture. Warm it on the stovetop over medium-low heat, stirring occasionally. You can also reheat individual portions in the microwave, covering loosely to prevent splatters.
If the chili thickens too much after chilling, add a small splash of beef broth or water while reheating. Stir well to restore the original consistency without diluting the flavor. This keeps leftovers just as enjoyable as the first serving.
Chili is also an excellent freezer-friendly meal. Once fully cooled, portion it into freezer-safe containers or bags. Label clearly and freeze for up to three months for best quality.
To reheat frozen chili, thaw it overnight in the refrigerator when possible. Reheat slowly on the stovetop or using the sauté function on the Instant Pot. Stir frequently to ensure even heating throughout.
Nutrition and Benefits
This Instant Pot chili offers a balanced combination of protein, fiber, and comforting flavor. Ground beef provides protein that helps support muscle health and keeps meals satisfying. Beans contribute additional protein and fiber, helping promote fullness.
Tomatoes add important vitamins like vitamin C and antioxidants such as lycopene. These nutrients support overall wellness and add brightness to the chili’s flavor. Cooking them under pressure helps preserve their benefits.
The vegetables in this recipe contribute both nutrients and texture. Onions and bell peppers provide vitamins and subtle sweetness. Garlic adds flavor while offering natural immune-supporting properties.
Using the Instant Pot helps reduce the need for excess oil. Pressure cooking builds flavor efficiently without long simmering times. This keeps the chili hearty without feeling overly heavy.
Because this chili includes protein, vegetables, and legumes, it works well as a complete meal. It provides steady energy and comfort, making it suitable for busy days. The balance makes it a practical family dinner option.
Recipe FAQ
Can I make this chili with dried beans instead of canned beans?
Dried beans can be used, but they must be cooked separately first. Adding uncooked dried beans directly to the chili can result in uneven cooking. For best texture and safety, use cooked beans only.
Is this chili spicy?
This chili is mildly spiced as written. The cayenne pepper adds gentle warmth without overwhelming heat. You can easily adjust the spice level by increasing or decreasing the amount used.
Can I double this recipe in the Instant Pot?
Yes, you can double the recipe as long as you do not exceed the maximum fill line. A larger Instant Pot works best for doubled batches. Cooking time remains the same.
Why does my chili seem thin after cooking?
Chili often thickens as it rests. Letting it sit for several minutes helps the texture improve naturally. You can also simmer briefly using the sauté function if needed.
Can I use ground turkey instead of beef?
Ground turkey works well as a substitute. It creates a lighter chili with a slightly different flavor. You may want to increase seasoning slightly for added depth.
How can I make this chili kid-friendly?
Reduce or omit the cayenne pepper to keep it mild. You can also serve toppings on the side so kids can customize their bowls. This makes the meal more approachable for picky eaters.
Does chili really taste better the next day?
Many people find chili improves after resting overnight. The flavors have more time to blend and deepen. Leftovers often become a favorite meal.
A Comforting Classic for Any Day
Instant Pot chili is one of those recipes that fits effortlessly into everyday life. It’s warm, filling, and dependable, making it perfect for busy schedules. Each bowl delivers comfort without complication.
This recipe shows how simple ingredients can come together into something deeply satisfying. With minimal effort and reliable results, it’s easy to return to again and again. It’s the kind of meal that earns a permanent spot in your rotation.
Whether served fresh or reheated later, this chili always feels like home. It brings people together around the table with ease. That dependable comfort is what makes it truly special.