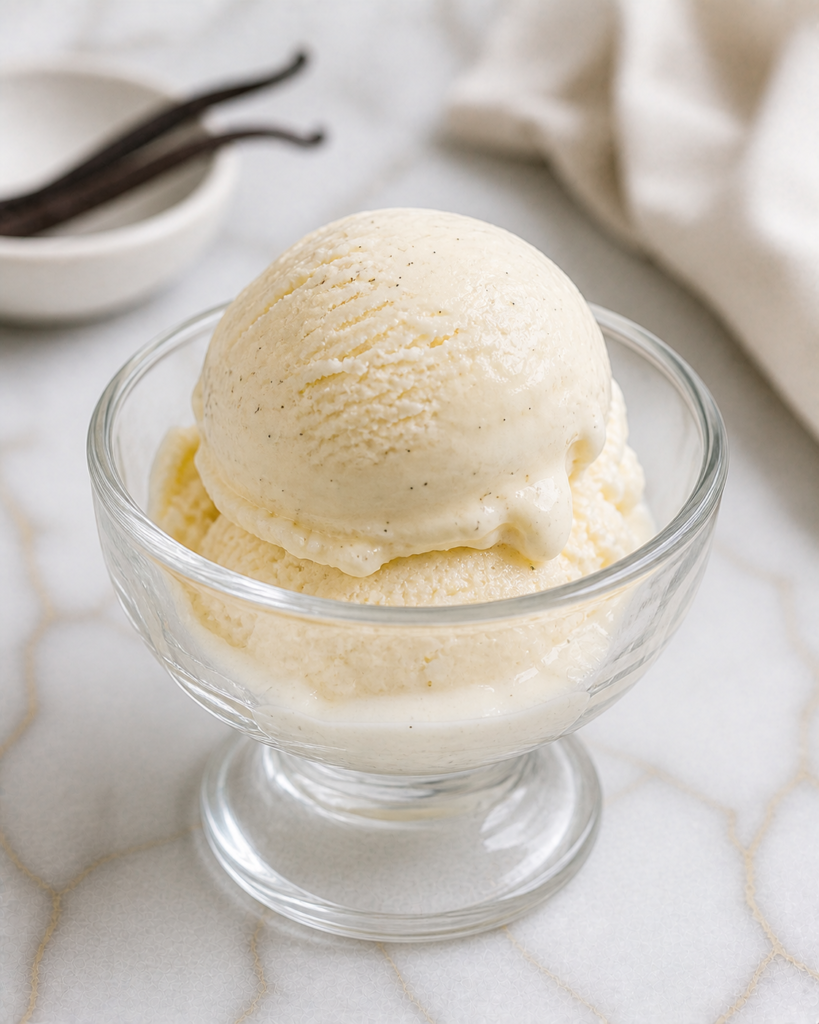
I make Classic Vanilla Bean Ice Cream when I want a dessert that feels simple, creamy, and homemade in the best way. The vanilla bean gives it a warm, real vanilla flavor, and the custard base makes every scoop smooth and rich.
I like this recipe because it works with almost any dessert, but it also tastes wonderful all by itself. It is the kind of ice cream my family loves with brownies, pie, cake, fruit, or tucked into cones on a warm afternoon.
Why You’ll Love This Recipe
Classic Vanilla Bean Ice Cream is creamy, smooth, and full of deep vanilla flavor. The tiny vanilla bean specks make it look special, while the flavor stays familiar and easy for everyone to enjoy.
This recipe uses a custard base, which gives the ice cream a rich texture and dependable scoop. It takes a little more care than a no-churn version, but the result is worth it when you want a classic homemade treat.
It is also one of the most useful ice cream recipes to keep on hand. You can serve it plain, add mix-ins, make sundaes, or pair it with warm desserts for a cozy family finish.
Serves: 8 people
This recipe makes about 1 quart of ice cream, which serves around 8 people with small to medium scoops. It is a nice amount for a family dessert, a small gathering, or a weekend treat.
If you are serving it with pie, cake, cobbler, or brownies, smaller scoops are usually enough. If vanilla ice cream is the main dessert, you may want to double the recipe or plan for a few extra toppings.
Ingredients You’ll Need
For the Vanilla Bean Ice Cream Base
- 2 cups heavy cream
- 1 cup whole milk
- 3/4 cup granulated sugar
- 1 vanilla bean, split lengthwise and seeds scraped
- 5 large egg yolks
- 1/4 teaspoon fine salt
- 1 teaspoon vanilla extract
Optional Toppings and Mix-Ins
- 1/2 cup mini chocolate chips, optional
- 1/2 cup crushed cookies, optional
- 1/2 cup caramel sauce, optional for serving
- 1/2 cup chocolate sauce, optional for serving
- 1 cup fresh berries, optional for serving
- Waffle cones or bowls, optional for serving
Pro Tips
Use a real vanilla bean if you can. Vanilla bean gives the ice cream a warm flavor and those pretty little specks throughout the base. Vanilla extract helps support the flavor, but the bean makes it taste more special.
Temper the egg yolks slowly. Add the warm cream mixture to the egg yolks a little at a time while whisking. This keeps the eggs smooth and prevents them from scrambling.
Do not boil the custard. The custard should cook gently until it thickens enough to coat the back of a spoon. If it boils, the eggs can curdle and the texture may turn grainy.
Chill the base completely. A cold ice cream base churns better and freezes with a smoother texture. I like to chill it for at least 4 hours, but overnight is even better.
Freeze the ice cream maker bowl ahead of time. Many ice cream makers need a fully frozen bowl before churning. Check your machine’s instructions and freeze the bowl early so it is ready when the base is chilled.
Let the ice cream soften before scooping. Homemade ice cream can freeze firmer than store-bought. Let it sit at room temperature for 5 to 10 minutes before scooping for the creamiest texture.
Tools You’ll Need
- Ice cream maker
- Medium saucepan
- Medium mixing bowl
- Whisk
- Rubber spatula
- Fine mesh strainer
- Measuring cups
- Measuring spoons
- Sharp knife
- Cutting board
- Heatproof container for chilling the base
- Plastic wrap
- Freezer-safe ice cream container
- Ice cream scoop
Substitutions and Variations
Use Vanilla Extract Only
Use 2 teaspoons vanilla extract if you do not have a vanilla bean. The ice cream will still taste smooth and classic, though it will not have the same vanilla bean specks.
Make It Extra Rich
Replace the whole milk with half-and-half for a creamier texture. This makes the ice cream richer and more custard-like, which is nice for special desserts.
Add Chocolate Pieces
Fold in mini chocolate chips, chopped chocolate, or chocolate shavings during the last minute of churning. This adds texture while keeping the vanilla flavor as the main focus.
Try a Cookie Swirl
Add crushed chocolate sandwich cookies, vanilla wafers, or shortbread pieces after churning. Fold them in gently before freezing so the ice cream stays creamy with little bites of cookie throughout.
Make It Sundae-Ready
Serve the ice cream with caramel sauce, chocolate sauce, berries, sprinkles, chopped nuts, or whipped cream. These toppings let everyone build their own bowl while keeping the vanilla bean base simple and classic.
Make Ahead Tips
Classic Vanilla Bean Ice Cream is a perfect make-ahead dessert because the base needs time to chill before churning. You can make the custard base up to 2 days ahead and keep it covered in the refrigerator. A longer chill helps the vanilla flavor deepen and gives the ice cream a smoother texture.
You can also churn the ice cream 1 to 2 days before serving. Once churned, transfer it to a freezer-safe container, press a piece of plastic wrap against the surface, and cover it tightly. This helps prevent ice crystals from forming on top.
For parties, scoop the ice cream ahead of time onto a parchment-lined tray and freeze the scoops until firm. Move the frozen scoops to a covered container, then serve them quickly when dessert is ready. This makes serving easier when you are pairing the ice cream with pie, brownies, cake, or warm cobbler.
Instructions
Step 1: Prepare the Vanilla Bean
Place 1 vanilla bean on a cutting board and split it lengthwise with a sharp knife. Use the back of the knife to scrape out the tiny seeds from inside the pod.
Save both the seeds and the pod. The seeds add strong vanilla flavor, and the pod helps infuse the cream mixture as it warms.
Step 2: Warm the Cream Mixture
In a medium saucepan, combine 2 cups heavy cream, 1 cup whole milk, 1/2 cup of the granulated sugar, the vanilla bean seeds, and the vanilla bean pod. Warm the mixture over medium-low heat until it is steaming but not boiling.
Stir now and then so the sugar dissolves and the dairy warms evenly. Once steaming, remove the pan from the heat and let the vanilla steep for 10 minutes.
Step 3: Whisk the Egg Yolks
In a medium mixing bowl, whisk 5 large egg yolks with the remaining 1/4 cup granulated sugar and 1/4 teaspoon fine salt. Whisk until the mixture looks slightly lighter and smooth.
The sugar helps protect the yolks as they warm. This step also helps the custard thicken evenly later.
Step 4: Temper the Eggs
Slowly pour about 1 cup of the warm cream mixture into the egg yolks while whisking constantly. Add it in a thin stream so the eggs warm gently instead of scrambling.
Once the yolks are warmed, slowly pour the egg mixture back into the saucepan with the rest of the cream. Whisk gently as you combine everything.
Step 5: Cook the Custard
Place the saucepan over low heat and cook the custard, stirring constantly with a rubber spatula. Cook until the mixture thickens enough to coat the back of the spatula, about 5 to 8 minutes.
Do not let the custard boil. It should look smooth and slightly thick, and a finger drawn through the coating on the spatula should leave a clear line.
Step 6: Strain and Flavor the Base
Pour the custard through a fine mesh strainer into a clean heatproof container. Remove and discard the vanilla bean pod, or rinse and dry it to use in vanilla sugar.
Stir in 1 teaspoon vanilla extract. The extract boosts the vanilla flavor and gives the ice cream a rounded, classic taste.
Step 7: Chill the Ice Cream Base
Cover the container and refrigerate the custard base for at least 4 hours, or overnight. For the smoothest ice cream, the base should be very cold before churning.
If you want to prevent a skin from forming, press plastic wrap directly against the surface of the custard. This keeps the texture smooth and ready for the ice cream maker.
Step 8: Churn the Ice Cream
Pour the chilled custard base into your ice cream maker. Churn according to the manufacturer’s instructions, usually 20 to 25 minutes.
The ice cream is ready when it looks thick, creamy, and similar to soft serve. If adding mini chocolate chips or small mix-ins, add them during the last minute of churning.
Step 9: Freeze Until Firm
Transfer the churned ice cream to a freezer-safe container. Smooth the top, press plastic wrap against the surface, and cover with a lid.
Freeze for at least 4 hours, or until firm enough to scoop. The ice cream will become creamier and more sliceable after it has fully set.
Step 10: Scoop and Serve
Let the ice cream sit at room temperature for 5 to 10 minutes before scooping. Homemade ice cream is often firmer than store-bought, so this short rest helps it soften.
Scoop into bowls, cones, or alongside your favorite dessert. Add caramel sauce, chocolate sauce, berries, cookies, or whipped cream if you like.
Serving Suggestions
Classic Vanilla Bean Ice Cream is wonderful served in a simple bowl with no toppings at all. The real vanilla flavor and creamy texture make it feel complete on its own.
It is also one of the best desserts to serve with warm apple pie, peach cobbler, brownies, or chocolate cake. The cold ice cream melts slightly into the warm dessert and makes each bite rich and comforting.
For a family sundae night, set out chocolate sauce, caramel sauce, sprinkles, chopped nuts, whipped cream, and cherries. The vanilla base works with almost any topping, so everyone can make their own bowl.
Fresh berries are a lighter way to serve this ice cream. Strawberries, blueberries, raspberries, or sliced peaches add color and freshness beside the creamy vanilla.
You can also scoop the ice cream into waffle cones or bowls for a simple summer treat. This makes it easy to serve outside or after a casual family dinner.
For special desserts, sandwich a scoop between two chocolate chip cookies or brownies. Freeze the sandwiches until firm for a homemade treat that kids and adults both enjoy.
Leftovers and Storage
Store leftover Classic Vanilla Bean Ice Cream in a freezer-safe container with a tight lid. Press plastic wrap or parchment paper directly against the surface before closing the container. This helps protect the ice cream from freezer burn and keeps the texture smoother.
Homemade ice cream is best enjoyed within 2 weeks for the freshest flavor and creamiest texture. It can last longer in the freezer, but it may become harder or develop ice crystals over time. Keep it toward the back of the freezer where the temperature stays steady.
Let the ice cream soften at room temperature for a few minutes before scooping. Avoid microwaving the container, because uneven heat can melt the edges too quickly. If the ice cream has softened a lot during serving, refreeze it quickly to help protect the texture.
Nutrition and Benefits
- Rich homemade flavor: This ice cream uses cream, milk, egg yolks, sugar, and real vanilla bean for a classic custard base. The result is smooth, creamy, and full of warm vanilla flavor.
- Simple ingredients: Making ice cream at home lets you know exactly what goes into each scoop. There are no complicated add-ins unless you choose to add them yourself.
- Great dessert pairing: Vanilla bean ice cream works with pies, cakes, brownies, cookies, cobblers, and fresh fruit. It is one of the most useful desserts to keep in the freezer.
- Family-friendly treat: The flavor is mild, sweet, and familiar, which makes it easy for kids and adults to enjoy. It can be served plain or dressed up with toppings.
- Make-ahead friendly: The ice cream can be made days before serving. This makes it helpful for parties, holidays, birthdays, and relaxed family meals.
Recipe FAQ
Can I make vanilla bean ice cream without an ice cream maker?
Yes, but the texture will be different. Pour the chilled custard into a freezer-safe container and freeze it, stirring every 30 minutes for the first 2 to 3 hours. It will not be quite as smooth as churned ice cream, but it will still taste creamy and homemade.
Can I use vanilla extract instead of a vanilla bean?
Yes, you can use vanilla extract if you do not have a vanilla bean. Use 2 teaspoons vanilla extract total for a strong vanilla flavor. Add it after cooking the custard so the flavor stays fresh.
Why did my custard curdle?
Custard usually curdles when it gets too hot or cooks too quickly. Keep the heat low and stir constantly while it thickens. Straining the custard can catch small bits, but a badly curdled custard may taste grainy.
How long should I chill the ice cream base?
Chill the base for at least 4 hours, but overnight is even better. A very cold base churns faster and creates a smoother texture. It also gives the vanilla more time to flavor the custard.
Why is my homemade ice cream hard?
Homemade ice cream can freeze harder because it has fewer stabilizers than store-bought ice cream. Let it sit at room temperature for 5 to 10 minutes before scooping. Storing it in a shallow container can also make it easier to soften evenly.
Can I add mix-ins to this ice cream?
Yes, mini chocolate chips, crushed cookies, chopped brownies, or toasted nuts can be added during the last minute of churning. Add sauces or swirls after churning by layering them into the container. Do not overmix swirls, or they may disappear into the ice cream.
How long does homemade vanilla ice cream last?
It is best within 2 weeks for the smoothest texture and freshest flavor. Keep it tightly covered with plastic wrap pressed against the surface. This helps reduce ice crystals and freezer burn.
A Creamy Vanilla Treat to Keep in the Freezer
Classic Vanilla Bean Ice Cream is smooth, rich, and simple in the most comforting way. The real vanilla bean flavor makes every scoop feel homemade and special, while the custard base gives it a creamy texture that works with almost any dessert.
I like keeping this recipe close for birthdays, summer nights, pie slices, brownies, and family sundae bowls. It can be made ahead, served plain, or dressed up with toppings, making it a dependable treat worth making again.