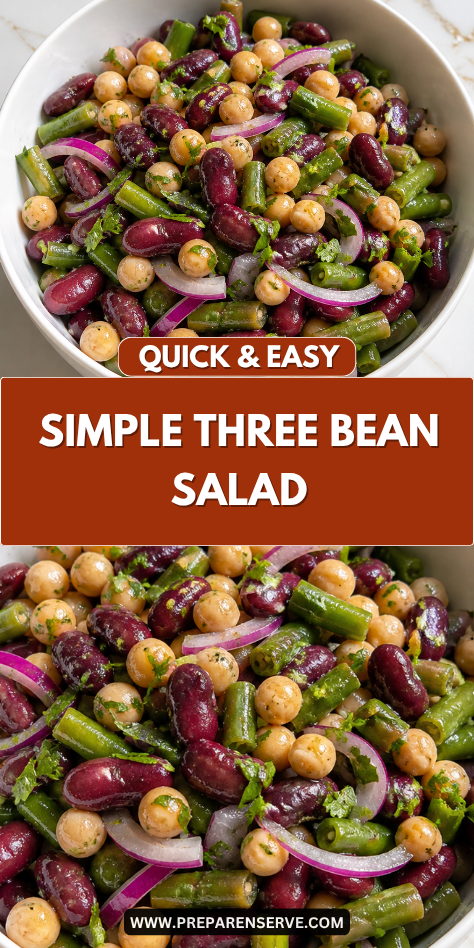
I make this Simple Three Bean Salad whenever I need an easy side dish that can be prepared ahead of time and still taste fresh the next day. The combination of tender beans, crisp vegetables, and tangy dressing creates a comforting salad that works for family dinners, picnics, and quick lunches throughout the week.
This recipe has stayed in regular rotation in my kitchen because it uses simple pantry ingredients and comes together without much effort. It is one of those dependable dishes that feels hearty, colorful, and satisfying while still being light enough for warmer days.
Why You’ll Love This Recipe
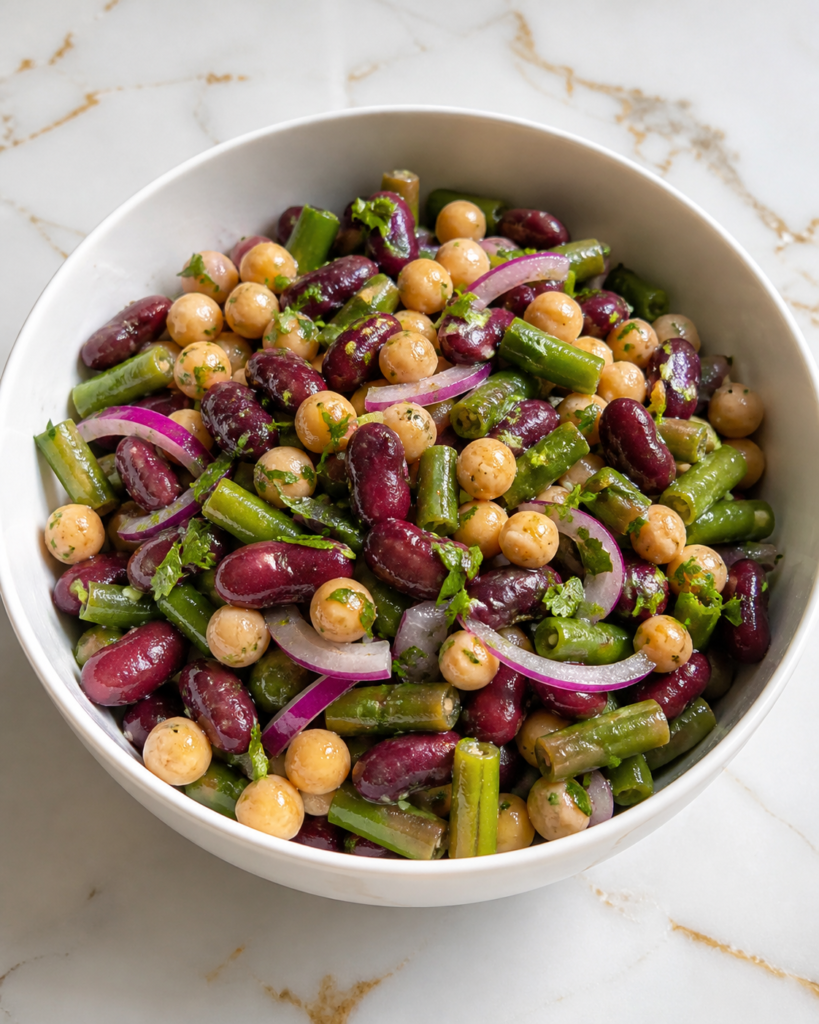
This salad is packed with simple ingredients that create a fresh balance of flavor and texture. The beans make it filling and satisfying, while the crisp vegetables and tangy dressing keep it bright and refreshing.
I also appreciate how easy this recipe is to prepare ahead of time for busy schedules or gatherings. The flavors continue to develop as the salad chills, which makes leftovers taste even better the next day.
Another reason this salad is so useful is its flexibility. It works well as a side dish for grilled meals, a quick lunch, or part of a larger family spread for holidays and potlucks.
Serves: 6 people
This recipe makes about six generous side dish servings or four larger lunch portions. It can easily be doubled for cookouts, family gatherings, or meal prep during the week.
Ingredients You’ll Need
For the Salad
- 1 can green beans, drained and rinsed
- 1 can kidney beans, drained and rinsed
- 1 can chickpeas, drained and rinsed
- 1/2 cup red onion, thinly sliced
- 1/2 cup celery, sliced
- 1/2 cup red bell pepper, diced
- 1/4 cup fresh parsley, chopped
For the Dressing
- 1/4 cup olive oil
- 1/4 cup apple cider vinegar
- 2 tablespoons sugar
- 1 teaspoon Dijon mustard
- 1 garlic clove, minced
- 1/2 teaspoon salt
- 1/4 teaspoon black pepper
Pro Tips
Rinse canned beans well
Rinsing the beans removes excess salt and improves the flavor of the salad. It also helps the dressing coat the beans more evenly.
Slice vegetables thinly
Thinly sliced onions and celery blend into the salad better and create a balanced texture in every bite. Smaller pieces are also easier for children to enjoy.
Chill the salad before serving
Allowing the salad to rest in the refrigerator for at least an hour helps the beans absorb the dressing. The flavors become more balanced and refreshing after chilling.
Use fresh parsley for the best flavor
Fresh herbs brighten the salad and help balance the tangy dressing. Dried parsley does not provide the same fresh taste or texture.
Do not overdress the salad
Beans naturally absorb dressing as they sit, so start with a moderate amount first. You can always add a little more dressing before serving if needed.
Stir gently when mixing
Mixing too aggressively can break apart the beans and make the salad look mushy. Gentle tossing keeps the salad colorful and fresh-looking.
Tools You’ll Need
- Large mixing bowl
- Cutting board
- Sharp knife
- Measuring cups and spoons
- Colander
- Small bowl or jar for dressing
- Whisk
- Mixing spoon
- Airtight storage containers
Substitutions and Variations
Swap the Beans
Black beans, cannellini beans, or wax beans can replace any of the beans in this recipe. Different combinations still keep the salad hearty and colorful.
Make It Sweeter or Tangier
Adjust the sugar or vinegar slightly depending on your family’s taste preferences. A little extra vinegar gives a brighter flavor, while extra sugar softens the tanginess.
Add More Crunch
Chopped cucumbers, shredded carrots, or diced cucumbers can add extra texture and freshness. Crunchy vegetables help balance the soft beans nicely.
Make It Heartier
Add diced cheese, cooked quinoa, or chopped boiled eggs for a more filling meal. These additions work especially well for lunches and meal prep.
Boost the Flavor
Fresh dill, basil, or sliced green onions can add more variety and brightness to the salad. Small additions help keep the recipe flexible without changing its classic style.
Make Ahead Tips
This Simple Three Bean Salad is one of my favorite make-ahead recipes because the flavors improve after chilling in the refrigerator. I often prepare it the night before serving so the beans have time to absorb the dressing fully.
The vegetables can also be chopped ahead of time and stored separately in airtight containers until ready to mix. Keeping everything prepared in advance makes assembly quick and easy during busy weekdays or family gatherings.
If you plan to serve the salad over several days, reserve a small amount of dressing to refresh the salad before serving leftovers. Beans naturally absorb liquid over time, so a little extra dressing can help maintain the best texture.
This recipe is especially useful for meal prep because it stores well and tastes good cold straight from the refrigerator. The simple ingredients also make it easy to double for larger families or gatherings.
Instructions
Step 1: Rinse and Drain the Beans
Open the cans of green beans, kidney beans, and chickpeas, then pour them into a colander. Rinse the beans thoroughly under cool running water to remove excess salt and canning liquid.
Allow the beans to drain well before adding them to the salad bowl. Excess moisture can water down the dressing and affect the texture of the salad.
Step 2: Prepare the Vegetables
Thinly slice the red onion and celery into small even pieces. Dice the red bell pepper and chop the parsley finely so the vegetables blend evenly throughout the salad.
Smaller vegetable pieces help create balanced texture in every bite. The colorful vegetables also make the salad look fresh and inviting.
Step 3: Make the Dressing
In a small bowl or jar, combine the olive oil, apple cider vinegar, sugar, Dijon mustard, minced garlic, salt, and black pepper. Whisk or shake the dressing until the ingredients are fully blended.
Taste the dressing and adjust the flavor if needed. A little extra vinegar can brighten the salad, while another small spoonful of sugar can soften the tanginess.
Step 4: Combine the Salad
Place the drained beans, sliced onion, celery, bell pepper, and parsley into a large mixing bowl. Pour the dressing over the salad gradually while tossing gently to coat all the ingredients evenly.
Mix carefully so the beans stay intact and the vegetables remain crisp. Gentle stirring helps the salad maintain its fresh appearance.
Step 5: Chill the Salad
Cover the bowl tightly or transfer the salad to airtight containers before refrigerating. Allow the salad to chill for at least 1 hour before serving so the flavors have time to blend together.
Stir the salad gently once or twice during chilling if possible. This helps distribute the dressing evenly throughout the beans and vegetables.
Step 6: Serve and Garnish
Before serving, taste the salad again and adjust seasoning if needed. Sprinkle extra parsley or sliced green onions on top for added freshness and color.
Serve the salad cold as a side dish, light lunch, or part of a larger meal. The fresh flavor and hearty texture pair well with many family meals.
Serving Suggestions
This Simple Three Bean Salad works especially well alongside grilled chicken, burgers, or sandwiches during warmer months. The tangy dressing and hearty beans help balance richer foods very nicely.
For lighter lunches, I like serving this salad with crackers, fresh fruit, or soup. The protein and fiber from the beans make it filling without feeling too heavy.
It also pairs nicely with picnic foods and cookout favorites because it can be served cold and prepared ahead of time. The sturdy ingredients hold up well even after sitting out briefly during meals.
During busy weekdays, this salad works wonderfully for meal prep lunches because it stores well and tastes even better after chilling overnight. Small containers make quick grab-and-go lunches easy.
For larger gatherings or holiday meals, this salad can be served as part of a buffet spread with roasted vegetables, pasta salads, and grilled meats. Its bright color and simple flavor fit easily into many menus.
You can also spoon the salad over fresh greens or grain bowls for a more complete meal. Adding avocado or cheese creates an even heartier lunch or dinner option.
Leftovers and Storage
Store leftover Simple Three Bean Salad in an airtight container in the refrigerator as soon as possible after serving. The salad stays fresh for about 4 to 5 days when properly chilled.
Because the beans absorb dressing over time, the salad may appear slightly drier after refrigeration. Stirring in a small splash of olive oil or vinegar before serving can help refresh the texture.
This recipe is excellent for meal prep because the ingredients hold up well and maintain their flavor for several days. Many people even find the salad tastes better after resting overnight in the refrigerator.
If extra liquid collects at the bottom of the container, stir the salad gently before serving again. The beans naturally release some moisture as they sit.
Freezing is not recommended because the vegetables can become soft and watery after thawing. Freshly prepared salad provides the best texture and flavor.
When serving leftovers, garnish with fresh parsley or green onions to brighten the appearance and flavor. Small fresh additions can help the salad feel freshly made again.
Nutrition and Benefits
- Beans provide plant-based protein and fiber that help make the salad filling and balanced for family meals.
- Vegetables like celery, onions, and bell peppers add crunch, vitamins, and fresh flavor to every serving.
- Olive oil in the dressing adds healthy fats while helping coat the salad with light, tangy flavor.
- This salad is naturally budget-friendly because it uses simple pantry ingredients that are easy to keep on hand.
- The recipe works well for meal prep since the ingredients hold their texture and flavor for several days after preparation.
Recipe FAQ
Can I make this salad ahead of time?
Yes, this salad is actually better after chilling for several hours because the flavors blend together more fully. Preparing it the night before serving works especially well. Store it in the refrigerator until ready to serve.
How long does three bean salad stay fresh?
The salad usually stays fresh for about 4 to 5 days when refrigerated in an airtight container. Stirring before serving helps redistribute the dressing. The beans hold up well even after several days.
Can I use fresh green beans instead of canned?
Yes, fresh green beans can be used if preferred. Blanch them briefly in boiling water, then cool them completely before adding to the salad. This keeps them crisp but tender.
Is this salad vegetarian?
Yes, this recipe is naturally vegetarian as written. It can also be vegan if the sugar used fits your dietary preferences. The simple ingredients work well for many eating styles.
What other beans can I use?
Black beans, cannellini beans, pinto beans, or wax beans all work nicely in this salad. Different bean combinations can change the texture slightly while keeping the salad hearty and colorful.
Can I reduce the sugar in the dressing?
Yes, the sugar can easily be adjusted to taste. Some families prefer a tangier dressing with less sweetness. Start with a smaller amount and add more if needed.
What is the best way to serve this salad?
This salad can be served as a side dish, light lunch, or picnic favorite. It pairs well with grilled meats, sandwiches, soups, and fresh bread. The chilled texture makes it especially refreshing during warmer months.
A Simple Classic That Always Feels Fresh
This Simple Three Bean Salad is one of those dependable recipes that works for almost any occasion. The combination of hearty beans, crisp vegetables, and tangy dressing creates a comforting side dish that feels fresh, balanced, and easy to prepare.
It is a practical recipe to keep on hand because the ingredients are affordable, flexible, and easy to prepare ahead of time. The reliable flavor and simple preparation make this salad worth making again and again for family meals and gatherings.