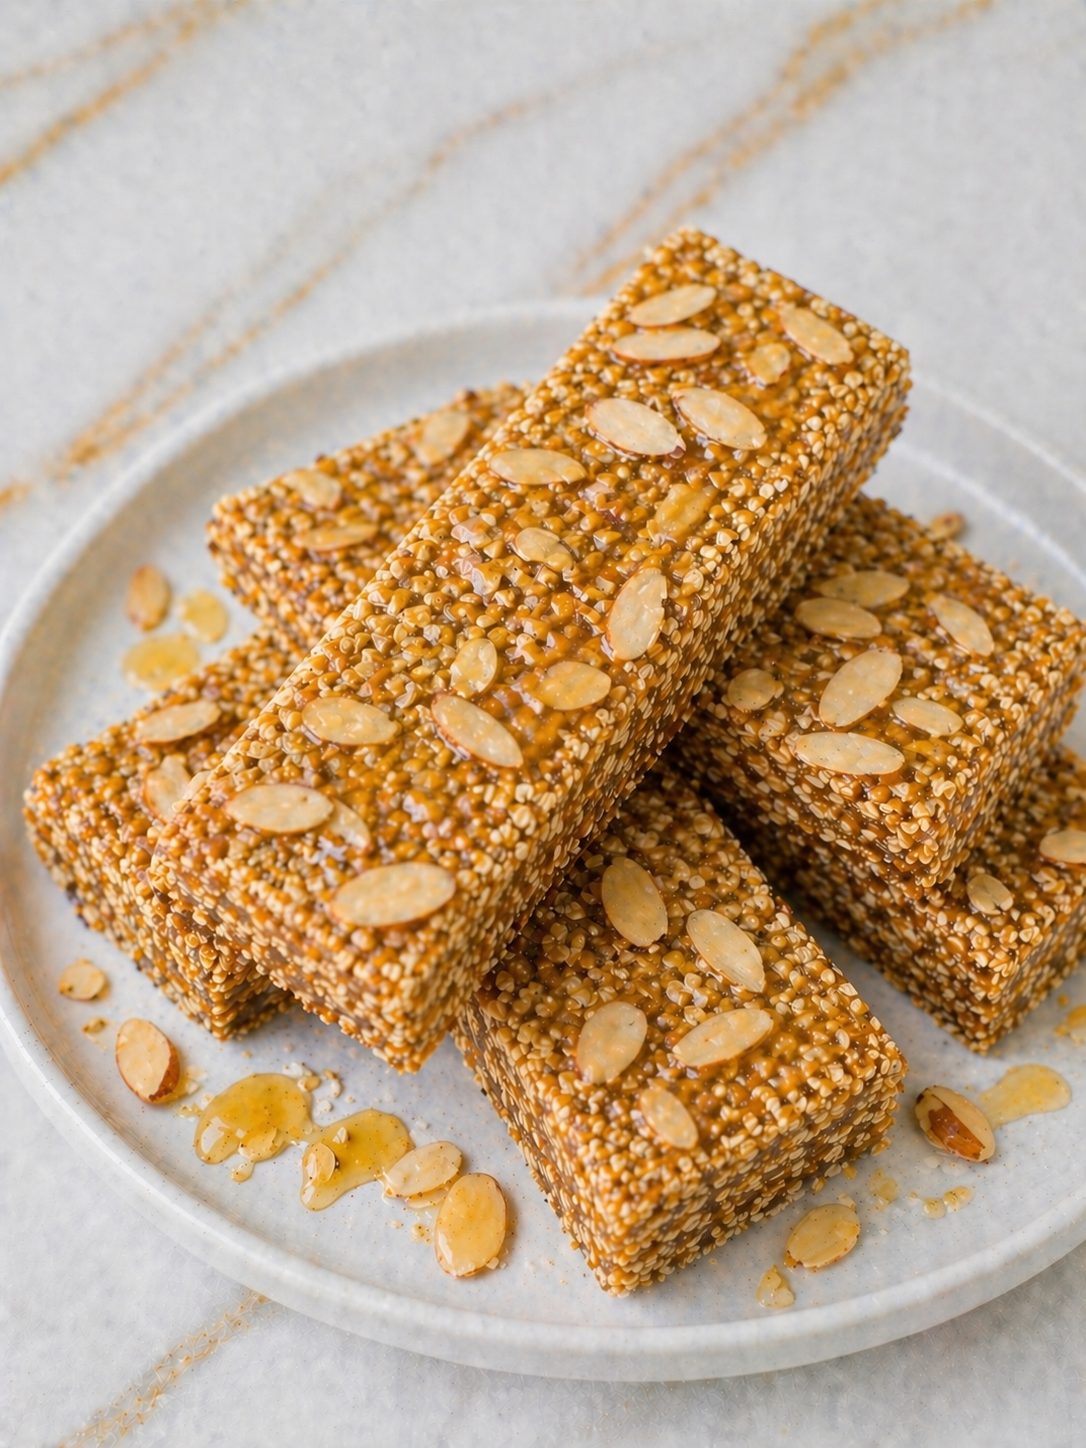
I always appreciate having a homemade snack ready when the week gets busy, and these No-Bake Maple Pecan Granola Bars are one of my favorite easy options. They come together quickly, chill in the refrigerator, and make snack time feel much simpler.
The flavor is warm, nutty, and comforting with sweet maple notes and crunchy pecans in every bite. They remind me of cozy mornings and dependable recipes worth making again.

Why You’ll Love This Recipe
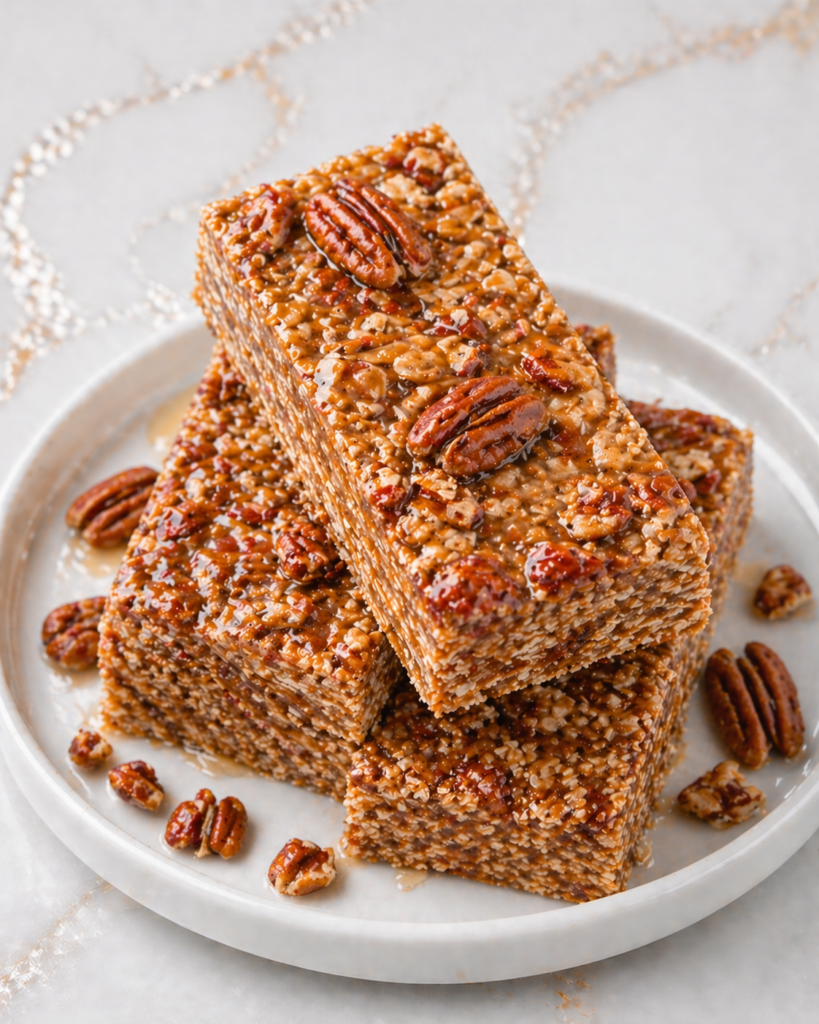
These bars combine hearty oats, rich pecans, and maple sweetness for a snack that feels satisfying and wholesome. Every bite has a soft chew with little bits of crunch throughout.
There is no baking required, which makes this recipe especially helpful on warm days or during busy weeks. You only need one bowl and a pan, so cleanup stays easy and manageable.
They are also simple to customize for different tastes. You can add seeds, dried fruit, chocolate chips, or extra spice while keeping the maple pecan base everyone enjoys.
Serves: 8 people
This recipe makes 8 generous bars or 10 smaller squares, depending on how you slice them. It can also be doubled if you want extra bars ready for breakfasts, lunchboxes, or snacks during the week.
Ingredients You’ll Need
- 3/4 cup creamy almond butter or peanut butter
- 1/3 cup honey
- 1/3 cup pure maple syrup
- 1 teaspoon vanilla extract
- 2 1/2 cups old-fashioned rolled oats
- 1/2 cup chopped pecans
- 1/4 teaspoon fine salt
- 1/2 teaspoon ground cinnamon
- 2 tablespoons ground flaxseed
- 1 tablespoon chia seeds
Optional Add-Ins
- 1/4 cup shredded coconut
- 2 tablespoons sunflower seeds
- 2 tablespoons mini chocolate chips
- 1/4 teaspoon nutmeg
- Extra chopped pecans for topping
Pro Tips
- Toast the pecans in a dry skillet for a few minutes before using if you have time. This adds deeper flavor and extra crunch to the bars.
- Stir the nut butter well before measuring, especially if using natural varieties. A smooth mixture helps the bars combine evenly.
- Use pure maple syrup for the best flavor. Pancake syrup can taste sweeter but does not have the same warm maple depth.
- Press the mixture firmly into the pan so the bars hold together after chilling. Taking an extra minute here makes slicing much easier later.
- Line the pan with parchment paper and leave extra paper hanging over two sides. This helps lift the chilled bars out cleanly.
- Chill the bars fully before cutting. At least 2 hours gives the best firm texture and neat slices.
Tools You’ll Need
- Medium mixing bowl
- Measuring cups and spoons
- Rubber spatula or wooden spoon
- 8×8-inch square pan
- Parchment paper
- Sharp knife
- Refrigerator space for chilling
- Small skillet for toasting pecans if desired
Substitutions and Variations
Make It Nut-Free
Use sunflower seed butter and pumpkin seeds instead of nut butter and pecans. It keeps the bars hearty and family-friendly for nut-free needs.
Change the Sweetener
Use all maple syrup or all honey if preferred. Either option still gives the bars a soft, chewy texture.
Add More Crunch
Mix in chopped walnuts, sunflower seeds, or toasted coconut. These additions give each bite extra texture.
Make It Heartier
Stir in 1/4 cup protein powder or extra flaxseed with a splash of milk if needed. This makes the bars more filling for breakfast or snacks.
Boost the Flavor
Add cinnamon, nutmeg, or a tiny splash of almond extract. These small changes pair beautifully with the maple pecan base.
Make Ahead Tips
These No-Bake Maple Pecan Granola Bars are a smart make-ahead snack because they store well and stay ready whenever the week gets busy. I like to prepare a batch early so breakfast and afternoon snacks feel much easier.
You can make the bars completely, chill them until firm, and slice them into portions right away. Keeping them pre-cut saves time and makes grab-and-go snacks simple for the whole family.
For longer storage, wrap each bar individually and place them in a freezer-safe bag or container. This gives you homemade snacks ready to thaw whenever schedules get full.
If you plan to add toppings like extra pecans or a drizzle of maple glaze, wait until the day you serve them. Fresh toppings help the bars look neat and taste their best.
Instructions
Step 1: Prepare the Pan
Line an 8×8-inch square pan with parchment paper, leaving extra paper hanging over two sides. This makes it easy to lift the chilled bars out later.
Step 2: Mix the Wet Ingredients
Add the almond butter, honey, maple syrup, and vanilla extract to a medium bowl. Stir until smooth and creamy, warming briefly if needed to loosen the mixture.
Step 3: Add the Dry Ingredients
Stir in the rolled oats, salt, cinnamon, flaxseed, and chia seeds. Mix until the oats are evenly coated and the mixture looks thick and sticky.
Step 4: Fold in Pecans
Add the chopped pecans and stir gently until they are evenly spread throughout the mixture. If using toasted pecans, let them cool first.
Step 5: Press into the Pan
Transfer the mixture to the prepared pan and spread it evenly. Press down firmly with the back of a spoon or clean hands so the bars hold together well.
Step 6: Chill Until Firm
Place the pan in the refrigerator for at least 2 hours. The bars should feel firm and fully set before slicing.
Step 7: Slice the Bars
Use the parchment paper to lift the chilled slab from the pan. Cut into 8 bars or 10 smaller squares with a sharp knife.
Step 8: Serve and Enjoy
Serve chilled for a firmer texture or let the bars sit at room temperature for a few minutes for a softer bite. Store leftovers promptly to keep them fresh.
Serving Suggestions
Serve these bars with coffee or milk for a quick breakfast that feels warm and satisfying. They also pair nicely with yogurt and sliced bananas.
I often pack one in lunchboxes with apple slices or grapes for an easy midday snack. They travel well and stay tidy in a small container.
For after-school snacks, serve the bars with smoothies or cheese cubes. That simple pairing helps keep hungry kids full until dinner.
These bars are also perfect for road trips, park days, or long errands when everyone needs something quick. Keeping a few chilled bars ready can make the day feel smoother.
For dessert, drizzle the bars lightly with melted chocolate or a little extra maple syrup. It turns a snack into a simple treat.
Leftovers and Storage
Store leftover bars in an airtight container in the refrigerator for up to 7 days. I like to place parchment paper between layers so they stay neat and easy to separate.
They are best enjoyed chilled, but they can sit at room temperature for a short time if packed for the day. If your kitchen is warm, return them to the refrigerator so they stay firm.
To freeze, wrap each bar individually in parchment paper or plastic wrap. Place them in a freezer-safe bag or container, where they keep well for up to 2 months.
When ready to enjoy, thaw a bar overnight in the refrigerator or let it sit at room temperature for about 20 minutes. They soften quickly and taste fresh once thawed.
Nutrition and Benefits
- Rolled oats provide fiber and steady energy, helping these bars feel more satisfying than many packaged snacks. They also create the chewy texture people enjoy.
- Pecans add healthy fats and a pleasant crunch that makes the bars feel hearty and filling. They also bring rich nutty flavor.
- Maple syrup adds sweetness with warm flavor, so a little goes a long way. It helps create the cozy taste that makes these bars special.
- Nut butter adds protein and helps bind the bars together naturally. It also gives the bars a creamy richness.
- Homemade bars let you control sweetness, ingredients, and portion size. That can be especially helpful for families wanting dependable snack choices.
Recipe FAQ
Can I use quick oats instead of rolled oats?
Yes, quick oats can be used if needed. The bars will be softer and a little less chewy, but they should still hold together.
Can I make these bars nut-free?
Yes, use sunflower seed butter and replace pecans with pumpkin seeds or sunflower seeds. The bars will still be hearty and delicious.
What if my mixture seems too dry?
Add one tablespoon of maple syrup, honey, or nut butter at a time and stir well. Oats can vary slightly, so small adjustments are normal.
Can I toast the pecans first?
Absolutely. Toasted pecans add deeper flavor and extra crunch, which many people enjoy in this recipe.
Are these bars good for lunchboxes?
Yes, they are great for lunchboxes when packed in a sealed container. Use an ice pack on warm days to help them stay firm.
Can I leave out the seeds?
Yes, the flaxseed and chia seeds are optional. Replace them with a little extra oats if you want to keep the balance.
How do I keep the bars from crumbling?
Press the mixture firmly into the pan and chill until fully set before slicing. Using a sharp knife also helps make cleaner bars that stay together.
Conclusion
These No-Bake Maple Pecan Granola Bars are easy to prepare, simple to store, and always helpful during busy weeks. They bring warm flavor and chewy texture into a snack the whole family can enjoy.
With reliable results, flexible add-ins, and a homemade feel that never gets old, they are worth making again and again. Keeping a batch in the fridge makes everyday routines feel smoother and snack time much easier.