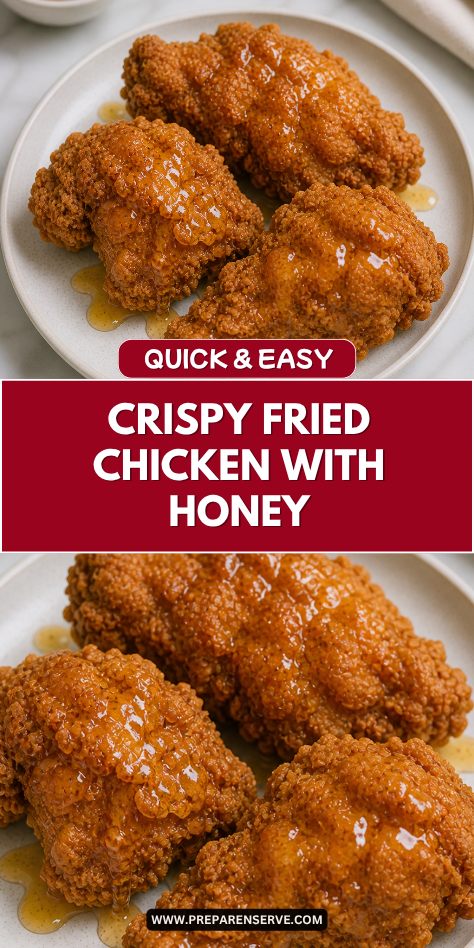
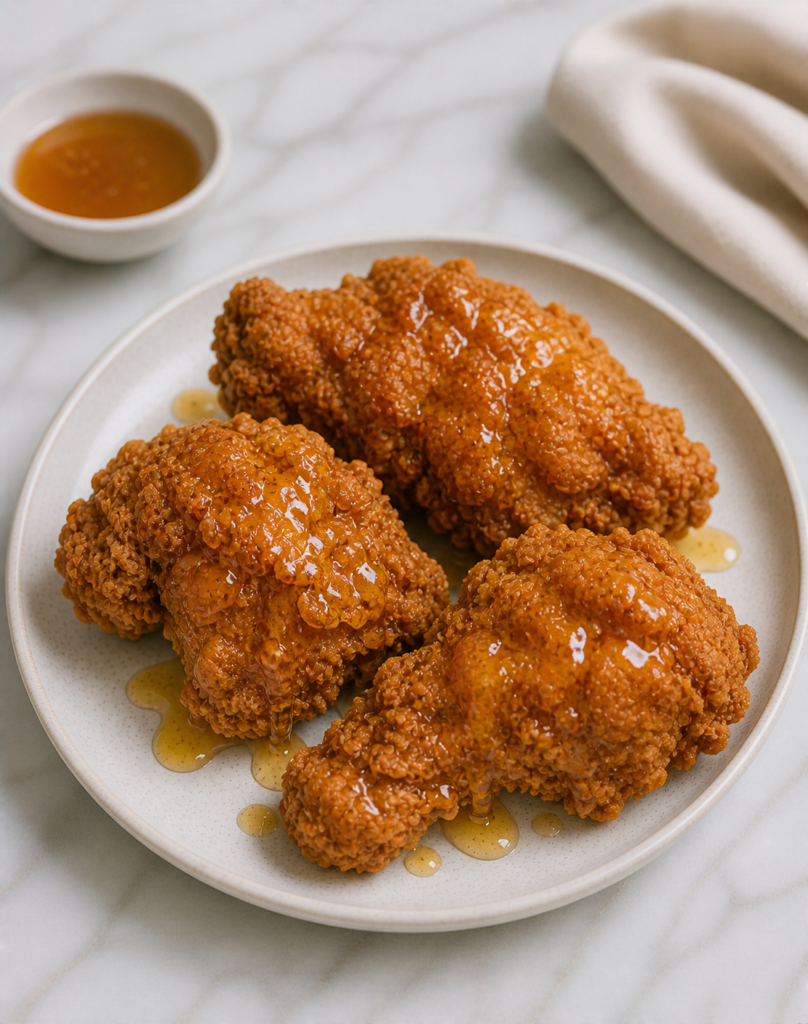
I make Crispy Fried Chicken with Honey when I want a meal that feels like a treat but still brings everyone to the table in a simple, familiar way. The chicken comes out golden and crunchy on the outside, tender on the inside, and finished with a light drizzle of honey that adds just the right touch of sweetness.
This is the kind of recipe my family gets quiet for after the first bite. It has that cozy fried chicken flavor people love, but the honey makes it feel a little extra special without turning it into something complicated.
Why You’ll Love This Recipe
Crispy Fried Chicken with Honey gives you the best mix of crunch, juicy chicken, and sweet-savory flavor. The seasoned coating fries up crisp and golden, while the honey adds a smooth finish that pairs beautifully with the salty crust.
This recipe is great for family dinners, weekend meals, picnics, game day spreads, or a homemade comfort meal when you want something dependable. It feels special, but the steps are easy to follow once everything is set up.
You can also serve it in many different ways. It works with biscuits, mashed potatoes, coleslaw, waffles, cornbread, or a simple green salad for balance.
Serves: 4 people
This recipe serves 4 people with about 2 pieces of chicken per person, depending on the size of the pieces and the sides you serve. If you are feeding kids, you can use smaller drumsticks or cut larger pieces in half after frying.
For a bigger family meal, this recipe can be doubled, but it is best to fry in batches. Crowding the pan lowers the oil temperature and can make the coating greasy instead of crisp.
Ingredients You’ll Need
For the Chicken
- 2 pounds bone-in chicken pieces, such as drumsticks, thighs, or a mix
- 2 cups buttermilk
- 1 large egg
- 1 tablespoon hot sauce, optional
- 2 teaspoons kosher salt
- 1 teaspoon black pepper
- 1 teaspoon garlic powder
- 1 teaspoon onion powder
- 1 teaspoon paprika
For the Crispy Coating
- 2 cups all-purpose flour
- ½ cup cornstarch
- 2 teaspoons kosher salt
- 1 teaspoon black pepper
- 1 teaspoon garlic powder
- 1 teaspoon onion powder
- 1 teaspoon paprika
- ½ teaspoon dried thyme
- ½ teaspoon baking powder
- ¼ teaspoon cayenne pepper, optional
For Frying and Serving
- 4 to 6 cups neutral oil, such as vegetable oil, canola oil, or peanut oil
- ⅓ cup honey
- 1 tablespoon unsalted butter, optional
- ½ teaspoon flaky salt, optional for serving
The chicken pieces are the heart of this recipe, and bone-in pieces work especially well because they stay juicy during frying. Drumsticks and thighs are family favorites because they are flavorful, affordable, and easy for kids to hold.
Buttermilk helps tenderize the chicken and gives the coating something to cling to. The egg adds a little richness and helps create a thicker, craggy crust that fries up crisp.
The flour and cornstarch work together to make the coating light but crunchy. Cornstarch helps prevent the crust from feeling too heavy, while baking powder adds a little lift.
The honey is added at the end so it stays smooth and glossy. Warming it with a small pat of butter makes it easier to drizzle and gives the fried chicken a soft, sweet finish.
Pro Tips
Let the chicken marinate long enough for the best flavor. Even 1 hour helps, but 4 hours or overnight gives the buttermilk more time to tenderize the meat.
Do not skip the cornstarch in the coating. It helps make the crust crispier and lighter, which is especially helpful for homemade fried chicken.
Press the flour mixture firmly onto the chicken after dipping. This helps create those crunchy little ridges that make fried chicken so good.
Let the coated chicken rest for 10 to 15 minutes before frying. This gives the coating time to hydrate and stick better, which means less breading falls off in the oil.
Keep the oil temperature steady around 325°F to 350°F. If the oil is too cool, the chicken can turn greasy, and if it is too hot, the outside may brown before the inside cooks through.
Use a meat thermometer to check doneness. Chicken should reach 165°F in the thickest part, but dark meat like thighs and drumsticks often tastes more tender around 175°F.
Drizzle the honey right before serving. This keeps the crust crisp while still giving every piece that warm sweet-savory flavor.
Tools You’ll Need
- Large mixing bowl
- Medium mixing bowl
- Measuring cups
- Measuring spoons
- Whisk
- Tongs
- Large heavy-bottomed pot, Dutch oven, or deep cast iron skillet
- Deep-fry thermometer or candy thermometer
- Meat thermometer
- Baking sheet
- Wire cooling rack
- Paper towels
- Small saucepan or microwave-safe bowl for warming honey
- Slotted spoon or spider strainer
- Plate or tray for dredged chicken
A heavy-bottomed pot or Dutch oven is helpful because it holds heat well and gives the chicken enough room to fry safely. A deep-fry thermometer is also important because oil temperature can rise and fall quickly as chicken goes in and out of the pan.
A wire cooling rack keeps the fried chicken crisp after it comes out of the oil. Paper towels can catch drips, but placing the chicken directly on paper towels for too long can soften the bottom crust.
Substitutions and Variations
Use Boneless Chicken
Boneless chicken thighs or chicken tenders can be used for a faster version. They cook more quickly than bone-in pieces, so check the temperature early to keep them juicy.
Make It Mild for Kids
Leave out the cayenne pepper and skip the hot sauce in the buttermilk mixture. The chicken will still have plenty of flavor from the garlic powder, onion powder, paprika, salt, and pepper.
Add a Spicy Honey Finish
Stir a pinch of cayenne pepper or a few drops of hot sauce into the warm honey. This gives the chicken a gentle sweet heat that adults may enjoy while keeping the base recipe family-friendly.
Try a Gluten-Free Coating
Use a good 1:1 gluten-free flour blend in place of the all-purpose flour. Keep the cornstarch in the mixture because it helps the coating stay crisp.
Make It Extra Crunchy
Add ½ cup finely crushed cornflakes or panko breadcrumbs to the flour mixture. This gives the coating more texture while still keeping the fried chicken easy and recognizable.
Make Ahead Tips
Crispy Fried Chicken with Honey can be made easier by preparing the chicken and coating ahead of time. The chicken can soak in the buttermilk mixture for at least 1 hour, but 4 hours or overnight gives the best flavor and tenderness.
If you are planning this for a family dinner, mix the buttermilk, egg, hot sauce, kosher salt, black pepper, garlic powder, onion powder, and paprika in the morning. Add the chicken, cover the bowl, and keep it in the refrigerator until you are ready to cook.
You can also whisk the flour coating ahead and store it in a covered container at room temperature. This saves time when the kitchen gets busy and helps you move smoothly from marinating to dredging.
For best results, do not fully bread the chicken too far in advance. Coat it about 10 to 15 minutes before frying so the crust has time to stick without becoming too wet.
The honey can be warmed right before serving. If you are using butter with the honey, melt them together slowly so the drizzle is smooth and glossy.
Instructions
Step 1: Marinate the Chicken
In a large mixing bowl, whisk together the buttermilk, egg, hot sauce if using, kosher salt, black pepper, garlic powder, onion powder, and paprika. Add the chicken pieces and turn them until they are fully coated.
Cover the bowl and refrigerate for at least 1 hour, or up to overnight. The longer rest helps the chicken become tender and flavorful all the way through.
Step 2: Mix the Crispy Coating
In a separate medium bowl, whisk together the all-purpose flour, cornstarch, kosher salt, black pepper, garlic powder, onion powder, paprika, dried thyme, baking powder, and cayenne pepper if using. Make sure the seasonings are evenly mixed through the flour.
The coating should look light and slightly speckled from the spices. Cornstarch and baking powder help create a crisp crust that does not feel too heavy.
Step 3: Dredge the Chicken
Remove one piece of chicken from the buttermilk mixture and let the extra drip back into the bowl. Place it in the flour mixture and press the coating firmly onto all sides.
For extra crunch, dip the coated chicken back into the buttermilk, then into the flour mixture again. Set the coated chicken on a baking sheet or tray while you finish the remaining pieces.
Step 4: Let the Coating Rest
Let the dredged chicken rest for 10 to 15 minutes before frying. This short rest helps the flour mixture cling to the chicken and creates a better crust.
You will know it is ready when the coating looks slightly damp in spots and no longer powdery all over. This step may seem small, but it helps prevent the breading from falling off in the oil.
Step 5: Heat the Oil
Pour 4 to 6 cups of neutral oil into a heavy-bottomed pot, Dutch oven, or deep cast iron skillet. The oil should be deep enough to come halfway up the chicken pieces, with plenty of space left at the top of the pot.
Heat the oil to 325°F to 350°F over medium heat. Use a deep-fry thermometer to watch the temperature, because steady heat is one of the most important parts of good fried chicken.
Step 6: Fry the Chicken in Batches
Carefully add a few pieces of chicken to the hot oil, making sure not to crowd the pot. Fry for about 12 to 16 minutes, turning every few minutes so the chicken browns evenly.
The exact time depends on the size of the pieces. Drumsticks and thighs may take longer than smaller pieces, so use a meat thermometer to check the thickest part.
Step 7: Check for Doneness
The chicken is safe to eat when it reaches 165°F in the thickest part, away from the bone. Dark meat is often more tender when it reaches about 175°F.
The outside should be deep golden brown and crisp. If the crust is browning too fast before the inside is done, lower the heat slightly and continue cooking more gently.
Step 8: Drain and Keep Crisp
Transfer the fried chicken to a wire rack set over a baking sheet. Let it rest for a few minutes so extra oil can drip away and the crust can stay crisp.
Avoid stacking the chicken while it is hot. Stacking traps steam, which can soften the crunchy coating you worked to build.
Step 9: Warm the Honey
Add the honey and optional butter to a small saucepan over low heat. Warm gently until the butter melts and the honey is smooth and easy to drizzle.
You can also warm the honey and butter in a microwave-safe bowl in short bursts. Stir well before using so the drizzle is even and glossy.
Step 10: Drizzle and Serve
Drizzle the warm honey over the fried chicken right before serving. Add a small pinch of flaky salt if you like a sweet and salty finish.
Serve the chicken while the crust is still crisp and warm. Keep extra honey on the side so everyone can add more if they like.
Serving Suggestions
Crispy Fried Chicken with Honey is wonderful with classic mashed potatoes and gravy. The soft potatoes balance the crunchy chicken, and the honey adds a sweet touch that feels comforting without being too much.
Buttermilk biscuits are another favorite side for this meal. They are perfect for catching little drips of honey and make the plate feel like a cozy family dinner.
Coleslaw adds a cool, crisp contrast to the hot fried chicken. A simple creamy slaw or vinegar-based slaw both work well with the sweet and savory flavor.
For a breakfast-for-dinner twist, serve the chicken with waffles. The honey works like a simple syrup, and the crispy chicken makes the meal feel fun and filling.
Cornbread, macaroni and cheese, roasted corn, or green beans all pair well with this recipe. These sides help turn the chicken into a full meal that works for weekends, gatherings, or Sunday dinner.
For a lighter plate, serve smaller pieces with a fresh green salad. The crisp lettuce and bright dressing help balance the richness of the fried chicken.
Leftovers and Storage
Store leftover Crispy Fried Chicken with Honey in an airtight container in the refrigerator for up to 3 days. Let the chicken cool first, but do not leave it out at room temperature for more than 2 hours.
For the best texture, store the honey separately if you know you will have leftovers. Chicken that has already been drizzled with honey will still taste good, but the crust may soften more quickly.
To reheat, place the chicken on a wire rack over a baking sheet and warm it in a 375°F oven for 15 to 20 minutes. This helps bring back some of the crispness better than the microwave.
An air fryer also works well for reheating. Heat the chicken at 350°F until warmed through and crisp on the outside.
Freezing is possible, though the crust is always best fresh. Wrap cooled chicken tightly, freeze for up to 2 months, then thaw overnight in the refrigerator before reheating in the oven.
Nutrition and Benefits
- Good source of protein: Chicken provides filling protein that helps make this meal satisfying. Pairing it with vegetables or salad can help round out the plate.
- Homemade comfort food: Making fried chicken at home lets you control the seasoning, sweetness, and oil used. It also gives you a fresh, hot crust that is hard to match from takeout.
- Family-friendly flavor: The honey finish adds a gentle sweetness that many kids enjoy. The spice level can be kept mild or adjusted for adults.
- Flexible serving options: This chicken works for dinner, lunch boxes, picnics, or weekend brunch. Leftovers can be served cold, reheated, or tucked into sandwiches.
- Balanced sweet and savory taste: The salty crust and warm honey work together without making the dish too sweet. A small pinch of flaky salt at the end makes the flavors even better.
Recipe FAQ
Can I use boneless chicken for this recipe?
Yes, boneless chicken thighs or chicken tenders work well. They cook faster than bone-in pieces, so check them early with a meat thermometer. The chicken is done when it reaches 165°F.
Why did my coating fall off?
The coating may fall off if the chicken was too wet, the flour was not pressed on firmly, or the oil was not hot enough. Letting the coated chicken rest for 10 to 15 minutes also helps the crust stick better. Try not to move the chicken too much during the first few minutes of frying.
What oil is best for frying chicken?
Vegetable oil, canola oil, and peanut oil are all good choices because they handle high heat well. Use a neutral oil so it does not change the flavor of the chicken. Avoid oils with low smoke points.
Can I make this without buttermilk?
Yes, you can make a simple substitute with 2 cups of milk and 2 tablespoons of lemon juice or vinegar. Let it sit for 5 to 10 minutes before using. It will not be exactly the same, but it works well for tenderizing the chicken.
How do I keep fried chicken crispy?
Place cooked chicken on a wire rack instead of directly on paper towels. Do not cover it tightly while it is hot, because steam will soften the crust. If needed, keep it warm in a 200°F oven on a rack while frying the rest.
Can I bake this instead of frying?
You can bake it, but the texture will not be the same as fried chicken. For a baked version, place coated chicken on a rack over a baking sheet, spray with oil, and bake at 425°F until cooked through. It will be crisp in spots, but not as crunchy as the fried version.
When should I add the honey?
Add the honey right before serving. This keeps the chicken crispy while still giving it that sweet, glossy finish. For leftovers, store extra honey separately and drizzle after reheating.
A Golden, Sweet-Savory Favorite for the Table
Crispy Fried Chicken with Honey is the kind of meal that feels warm, familiar, and worth the little extra care. The crust fries up crunchy, the chicken stays juicy, and the honey brings a soft sweetness that makes every piece feel special.
It is a dependable recipe for family dinners, weekend meals, and comfort food nights when everyone wants something satisfying. With simple ingredients and a few careful steps, this chicken is easy to enjoy again and again.