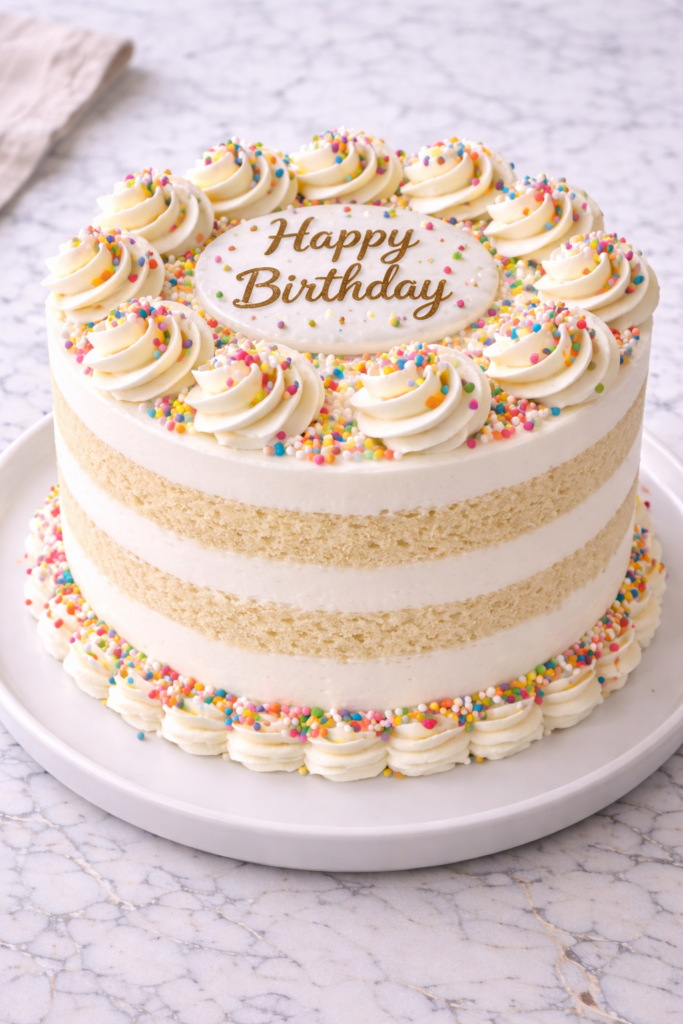
I started making this when I wanted a homemade birthday cake that actually tasted as good as it looked without relying on a box mix.
A really good vanilla cake comes down to a few key details — the right fat ratio, real vanilla, and a crumb that is tender and moist all the way through. The buttercream is where you can make it feel truly special, and I’ve worked out a version that is smooth, not too sweet, and pipes beautifully every time.
I’ll walk you through the batter, the layers, and the frosting so yours comes together with confidence. It’s the kind of from-scratch birthday cake that makes the whole celebration feel a little more meaningful.

Why You’ll Love This Recipe
This classic vanilla birthday cake with buttercream delivers exactly what people hope for when they picture a birthday cake. The vanilla flavor is warm and balanced, allowing the buttercream to shine without overwhelming the cake itself. Each bite feels soft, moist, and celebratory.
The recipe is designed to be approachable for home bakers of all skill levels. The steps are straightforward, and the ingredients are familiar and easy to find. That makes it a reliable choice when you want great results without unnecessary stress.
This cake is also incredibly versatile. It works for birthdays of all ages and adapts easily to different decorations and themes. Whether kept simple or dressed up, it always feels special.
Serves: 2 people
This recipe can be scaled depending on the occasion, but this version is written for a small celebration or tasting portion. It is ideal for a quiet birthday, an anniversary, or a practice bake before a larger event. The method stays the same when doubled or tripled.
Ingredients You’ll Need
For the Vanilla Cake
- 1½ cups all-purpose flour
- 1½ teaspoons baking powder
- ¼ teaspoon salt
- ½ cup unsalted butter, softened
- ¾ cup granulated sugar
- 2 large eggs, room temperature
- 2 teaspoons pure vanilla extract
- ½ cup whole milk, room temperature
For the Buttercream Frosting
- ¾ cup unsalted butter, softened
- 2½ cups powdered sugar
- 2 teaspoons pure vanilla extract
- 2 to 3 tablespoons heavy cream or milk
- Pinch of salt
Optional Decorations
- Sprinkles
- Fresh berries
- Birthday candles
Pro Tips
Make sure all refrigerated ingredients are at room temperature before starting. This helps the batter mix smoothly and evenly. Cold ingredients can cause the batter to separate or bake unevenly.
Measure flour carefully using the spoon-and-level method. Too much flour can make the cake dense instead of light. Accurate measuring is key for a tender crumb.
Do not overmix the batter once the flour is added. Gentle mixing keeps the cake soft and prevents toughness. Stop as soon as everything is just combined.
Allow the cake layers to cool completely before frosting. Warm cake will cause buttercream to melt and slide. Patience here makes decorating much easier.
If baking with kids, let them help with mixing or decorating rather than precise measuring. This keeps the process fun and low-pressure. The cake will still taste wonderful.
Tools You’ll Need
- Mixing bowls
- Hand mixer or stand mixer
- Measuring cups and spoons
- Rubber spatula
- Cake pans
- Parchment paper
- Cooling rack
- Offset spatula or butter knife
Substitutions and Variations
You can substitute cake flour for all-purpose flour for an even softer crumb. If you do, reduce the amount slightly to avoid a fragile cake. This variation works well for layer cakes.
For a richer flavor, swap half of the milk for heavy cream. This adds moisture and depth without changing the structure too much. It is a subtle but noticeable upgrade.
If dairy-free is needed, plant-based butter and milk alternatives can be used. Choose unsweetened versions to keep the flavor balanced. The texture may vary slightly but remains delicious.
You can easily turn this into a funfetti-style cake by folding in sprinkles at the end. This makes it especially appealing for kids. Keep the amount moderate to maintain structure.
The buttercream can be flavored with almond extract, lemon zest, or a touch of cocoa powder. These small changes create variety while keeping the base recipe intact. It is an easy way to personalize the cake.
Make Ahead Tips
This classic vanilla birthday cake with buttercream is very friendly to advance preparation, which is helpful when planning a celebration. The cake layers can be baked up to two days ahead and stored tightly wrapped at room temperature. This keeps them soft and ready for frosting.
If you want to prepare further in advance, the cake layers can be frozen for up to one month. Wrap each layer tightly in plastic wrap and then in foil to prevent freezer burn. Thaw at room temperature while still wrapped for best texture.
The buttercream frosting can be made up to three days ahead and stored in the refrigerator. Let it come to room temperature before using, then rewhip briefly to restore its smooth texture. This makes frosting easier and more consistent.
You can also fully assemble and frost the cake one day before serving. Store it covered in the refrigerator and bring it to room temperature before slicing. The flavors actually improve as the cake rests.
Decorations like sprinkles or berries should be added closer to serving time. This keeps colors vibrant and textures fresh. Planning ahead helps the celebration feel calm and enjoyable.
Instructions
Step 1: Prepare the Cake Pans
Begin by preheating your oven to 350°F. Grease the cake pans thoroughly and line the bottoms with parchment paper. This ensures the cakes release cleanly after baking.
Lightly dust the pans with flour and tap out the excess. Properly prepared pans prevent sticking and tearing. This small step protects all your hard work.
Step 2: Mix the Dry Ingredients
In a medium bowl, whisk together the flour, baking powder, and salt. Mixing these first helps distribute the leavening evenly. This supports a consistent rise.
Set the bowl aside while you prepare the wet ingredients. Keeping components separate until needed improves control. It also prevents overmixing later.
Step 3: Cream the Butter and Sugar
In a large mixing bowl, beat the softened butter and granulated sugar together until light and fluffy. This usually takes about 3 minutes with a mixer. The mixture should look pale and airy.
Creaming properly incorporates air into the batter. This helps create a tender, soft cake crumb. Do not rush this step.
Step 4: Add the Eggs and Vanilla
Add the eggs one at a time, mixing well after each addition. Scrape down the sides of the bowl as needed. This keeps the batter smooth and evenly mixed.
Mix in the vanilla extract until fully incorporated. The batter should look creamy and cohesive. At this stage, the base flavor is established.
Step 5: Combine Wet and Dry Ingredients
Add half of the dry ingredients to the butter mixture and mix on low speed. Pour in the milk and mix gently until combined. Finish with the remaining dry ingredients.
Mix just until no streaks of flour remain. Overmixing at this stage can toughen the cake. A gentle hand keeps the texture light.
Step 6: Divide and Bake
Divide the batter evenly between the prepared cake pans. Smooth the tops gently with a spatula. This helps the layers bake evenly.
Bake for 22 to 26 minutes, or until a toothpick inserted in the center comes out clean. The cakes should spring back lightly when touched. Avoid opening the oven too early.
Step 7: Cool the Cake Layers
Let the cakes cool in the pans for about 10 minutes. Carefully turn them out onto a cooling rack. Remove the parchment paper gently.
Allow the cakes to cool completely before frosting. Cooling fully prevents melting and sliding. This step is essential for clean assembly.
Step 8: Make the Buttercream Frosting
In a large bowl, beat the softened butter until smooth and creamy. Add the powdered sugar gradually, mixing on low speed. This prevents sugar from flying out of the bowl.
Add the vanilla extract, salt, and cream. Beat until the frosting is smooth, fluffy, and spreadable. Adjust consistency as needed with more cream.
Step 9: Level and Assemble the Cake
If needed, level the cake layers using a serrated knife. This creates a stable, even surface. Save scraps for tasting.
Place one cake layer on a serving plate and spread a generous layer of buttercream on top. Add the second layer and press gently. This forms the structure of the cake.
Step 10: Frost and Decorate
Spread buttercream over the top and sides of the cake. Use an offset spatula to smooth or create swirls. There is no need for perfection.
Add sprinkles, berries, or candles as desired. Decorations make the cake feel festive and personal. Keep the style simple or playful.
Serving Suggestions
This cake is best served at room temperature for the softest texture. The buttercream becomes creamy and smooth when slightly warm. This enhances both flavor and mouthfeel.
Serve slices with a cold glass of milk or a warm cup of tea. The gentle vanilla flavor pairs well with many drinks. This makes it suitable for any time of day.
For birthdays, present the cake whole before slicing. Candles and decorations add excitement and anticipation. This moment often becomes the most memorable part.
The cake also works well as part of a dessert table. Pair it with fresh fruit or simple cookies. This gives guests options without overwhelming the spread.
Leftover slices can be plated with berries or a drizzle of chocolate sauce. This turns leftovers into a fresh-feeling treat. It keeps the cake enjoyable beyond the celebration.
Leftovers and Storage
Classic vanilla birthday cake with buttercream stores very well when handled gently. Allow the cake to sit at room temperature for a short time after serving before covering it. This prevents condensation from forming on the frosting.
Covered loosely with a cake dome or plastic wrap, the cake will keep at room temperature for up to two days. If your kitchen is warm, refrigeration is a better option. Chilling helps maintain the shape of the buttercream.
When storing in the refrigerator, place the cake in an airtight container if possible. This keeps it from absorbing other flavors. Bring slices to room temperature before serving for the best texture.
Individual slices can be wrapped and frozen for up to two months. Thaw at room temperature while still wrapped. This preserves moisture and flavor.
Nutrition and Benefits
This cake offers more than just sweetness and celebration. The eggs and milk provide protein and calcium, supporting growth and energy. These ingredients add structure and richness.
Butter contributes flavor and fat that create a satisfying texture. Enjoyed in moderation, it fits comfortably into special occasions. Celebratory foods have value beyond nutrition.
Vanilla adds warmth without heaviness. It allows the cake to feel comforting rather than overly sweet. This balance makes the cake appealing to all ages.
Because the recipe is homemade, ingredients can be adjusted to fit dietary preferences. Reducing sugar slightly or using alternative dairy can tailor it to your needs. Homemade baking allows thoughtful choices.
Recipe FAQ
Can I make this cake as cupcakes?
Yes, this batter works well for cupcakes. Fill liners about two-thirds full and bake at the same temperature. Reduce baking time to about 16 to 18 minutes.
How do I keep the cake moist?
Do not overbake the cake layers. Remove them as soon as a toothpick comes out clean. Proper storage also helps retain moisture.
Can I color the buttercream?
Buttercream can be colored with gel food coloring. Add a small amount at a time and mix thoroughly. Gel colors keep the texture stable.
Is this cake suitable for kids to help make?
This recipe is very kid-friendly. Mixing and decorating are great tasks for young helpers. It makes the baking experience more meaningful.
Can I use salted butter?
Salted butter can be used in a pinch. Reduce or omit the added salt in the recipe. Taste the frosting and adjust if needed.
How far in advance can I decorate the cake?
The cake can be fully decorated one day in advance. Store it covered in the refrigerator. Bring it to room temperature before serving.
Can I add a filling between the layers?
You can add fruit preserves or pastry cream between layers. Keep the layer thin to maintain stability. This adds variety without overwhelming the cake.
A Birthday Cake That Feels Like Home
Classic vanilla birthday cake with buttercream captures the joy of simple celebrations.
Its soft crumb, gentle sweetness, and familiar flavor make it a dessert everyone recognizes and loves.
Whether shared at a party or enjoyed quietly, this cake carries warmth, tradition, and happiness in every slice.