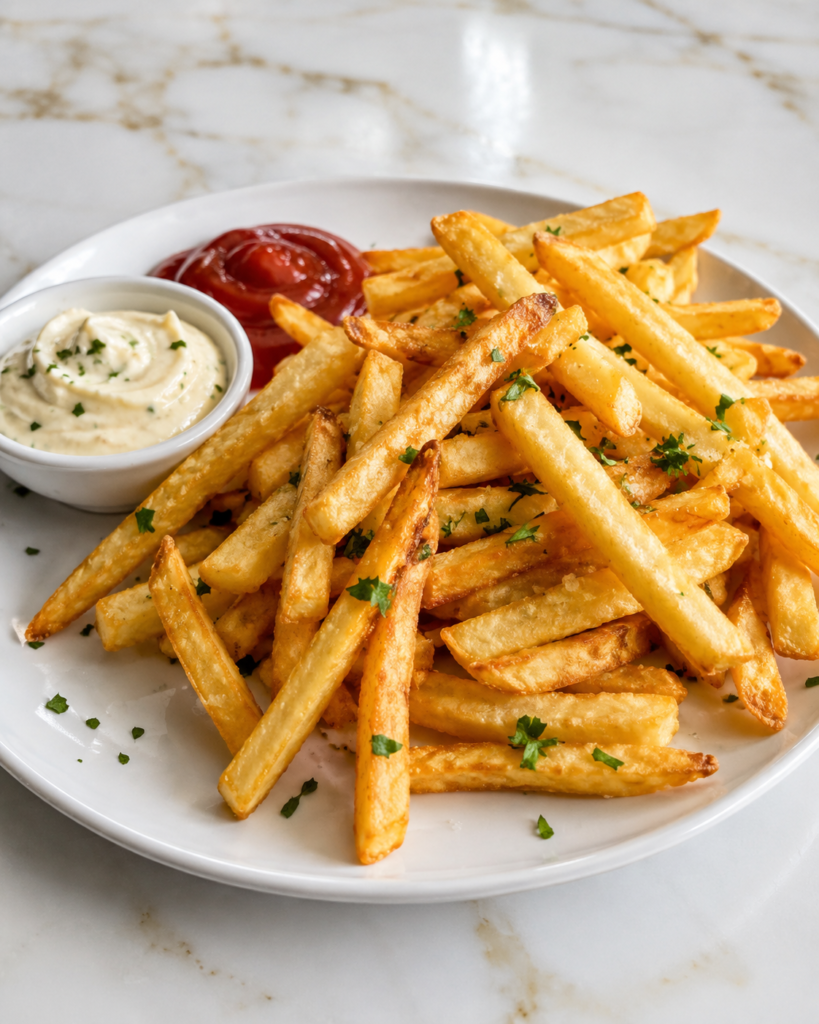
I make Classic French Fries with Aioli when I want a side dish that feels simple, familiar, and a little special at the same time. There is something so comforting about a hot plate of golden fries with a creamy dip on the side, especially when everyone can gather around and share.
I like this recipe because it uses basic potatoes and turns them into something crisp, salty, and satisfying. The aioli adds a smooth, garlicky touch that makes the fries feel restaurant-style, but the whole dish is still easy enough to make at home for family dinners, game nights, or weekend snacks.

Why You’ll Love This Recipe
Classic French Fries with Aioli are loved because they are crisp on the outside, soft in the center, and full of simple potato flavor. The fries are seasoned just enough to taste savory without overpowering the creamy aioli.
This recipe is great for families because fries are easy to serve with so many meals. They go well with burgers, sandwiches, grilled chicken, fish, or a simple snack plate.
The aioli makes the dish feel a little more homemade and special. It is creamy, lightly tangy, and garlicky, but you can keep it mild for kids or add extra flavor for adults.
Serves: 4 people
This recipe serves 4 people as a side dish or shared snack. Each person gets a generous portion of fries with enough aioli for dipping.
If you are serving these fries with a full meal, the portions should be just right. For a bigger gathering or hungry teenagers, you can double the potatoes and make extra aioli so there is plenty to go around.
Ingredients You’ll Need
For the French Fries
- 4 large russet potatoes, about 2 pounds total
- 2 tablespoons white vinegar, for soaking
- 8 cups cold water, for soaking
- 4 cups vegetable oil, canola oil, or peanut oil, for frying
- 1 1/2 teaspoons kosher salt, plus more to taste
- 1/2 teaspoon garlic powder, optional
- 1/4 teaspoon black pepper, optional
- 1 tablespoon chopped fresh parsley, optional for serving
For the Aioli
- 1/2 cup mayonnaise
- 1 small garlic clove, finely grated or minced
- 1 tablespoon fresh lemon juice
- 1 teaspoon Dijon mustard
- 1/4 teaspoon kosher salt
- 1/8 teaspoon black pepper
- 1 tablespoon olive oil, optional for a smoother texture
Pro Tips
Choose russet potatoes for the best fries. They have enough starch to become fluffy inside while still turning crisp and golden on the outside.
Cut the fries as evenly as possible. Similar-sized fries cook at the same pace, which helps keep some from burning while others stay too soft.
Soak the cut potatoes in cold water with vinegar before frying. This helps remove extra starch and can help the fries hold their shape while cooking.
Dry the potatoes very well before adding them to hot oil. Wet potatoes can splatter and may not crisp as nicely, so use a clean towel or paper towels to pat them dry.
Fry the potatoes twice for the best texture. The first fry cooks the inside, and the second fry gives them that crisp, golden outside.
Keep the aioli mild if serving kids. Use a small garlic clove and taste before adding more, since raw garlic can become strong as it sits.
Tools You’ll Need
- Cutting board
- Sharp knife
- Large mixing bowl
- Measuring cups
- Measuring spoons
- Large heavy pot or Dutch oven
- Deep-fry thermometer or instant-read thermometer
- Slotted spoon or spider strainer
- Paper towels
- Rimmed baking sheet
- Wire cooling rack, optional
- Small mixing bowl
- Spoon or small whisk
- Garlic grater or microplane, optional
- Serving platter
- Small bowl for aioli
Substitutions and Variations
Use a Different Potato
Russet potatoes make the crispiest classic fries, but Yukon Gold potatoes can also work. They will be a little creamier inside and may not crisp quite as much, but they still taste delicious.
Make It Oven-Baked
Toss the cut potatoes with oil and bake them on a hot sheet pan instead of frying. They will be less crisp than fried fries, but they are still golden, flavorful, and easier for a lighter family meal.
Change the Aioli Flavor
Add a pinch of smoked paprika, chopped herbs, lemon zest, or a little hot sauce to the aioli. These small changes keep the dip creamy while giving it a fresh twist.
Make It Dairy-Free
This recipe is naturally dairy-free if your mayonnaise is dairy-free. Check the label to be sure, especially if you are serving someone with a dairy allergy.
Make It Heartier or Lighter
For a heartier snack, sprinkle the fries with Parmesan, herbs, or a little chili seasoning after frying. For a lighter plate, serve smaller portions with fresh vegetables, grilled chicken, or a crisp salad on the side.
Make Ahead Tips
Classic French Fries with Aioli are best served hot and fresh, but you can still prepare a few parts ahead to make cooking easier. The aioli can be made up to 2 days ahead and stored in an airtight container in the refrigerator.
You can also wash, peel, and cut the potatoes a few hours before frying. Keep the cut potatoes covered in cold water in the refrigerator so they do not brown.
Do not dry the potatoes until right before frying. Once they are drained, pat them very dry with paper towels or a clean kitchen towel so they crisp better and the oil does not splatter.
If you want to get even further ahead, you can do the first fry earlier in the day. Let the fries cool completely on a wire rack, then fry them a second time right before serving so they are hot, crisp, and golden.
Instructions
Step 1: Make the Aioli
In a small mixing bowl, stir together 1/2 cup mayonnaise, 1 finely grated or minced small garlic clove, 1 tablespoon fresh lemon juice, 1 teaspoon Dijon mustard, 1/4 teaspoon kosher salt, and 1/8 teaspoon black pepper.
Add 1 tablespoon olive oil if you want a smoother, richer texture. Cover the aioli and refrigerate it while you make the fries so the flavors have time to blend.
Step 2: Wash and Cut the Potatoes
Scrub 4 large russet potatoes well under cool water. Peel them if you like smooth fries, or leave the skins on for a more rustic texture.
Cut each potato lengthwise into slices about 1/4 to 1/2 inch thick. Then cut those slices into sticks, trying to keep them close in size so they cook evenly.
Step 3: Soak the Potatoes
Place the cut potatoes in a large bowl with 8 cups cold water and 2 tablespoons white vinegar. Make sure the fries are fully covered.
Let them soak for at least 30 minutes, or up to a few hours in the refrigerator. This helps remove extra starch, which makes the fries cook up crisper.
Step 4: Drain and Dry the Fries
Drain the potatoes well and spread them out on a clean kitchen towel or several layers of paper towels. Pat them very dry on all sides.
This step is important because water and hot oil do not mix well. Dry fries also brown better and have a crispier texture.
Step 5: Heat the Oil
Pour 4 cups vegetable oil, canola oil, or peanut oil into a large heavy pot or Dutch oven. The oil should be deep enough for the fries to move around, but the pot should not be more than halfway full.
Heat the oil to 325°F over medium heat. Use a deep-fry thermometer or instant-read thermometer to check the temperature so the fries cook properly.
Step 6: First Fry the Potatoes
Carefully add a small batch of dried potatoes to the 325°F oil. Do not overcrowd the pot, because too many fries at once can lower the oil temperature and make them greasy.
Fry for 4 to 5 minutes, or until the potatoes look pale and softened but not browned. Lift them out with a slotted spoon or spider strainer and place them on a paper towel-lined baking sheet or wire rack.
Step 7: Let the Fries Rest
Let the first-fried potatoes rest for at least 10 minutes while you finish the remaining batches. This pause helps the inside become tender and gives the outside a better chance to crisp during the second fry.
At this point, the fries will not look fully finished, and that is normal. They should be soft, light in color, and ready for their final crisping.
Step 8: Increase the Oil Temperature
Raise the heat and bring the oil to 375°F. Give the oil a few minutes to reach the higher temperature before adding the fries back in.
Keep checking the temperature between batches. Steady oil heat makes a big difference in getting fries that are crisp instead of oily.
Step 9: Second Fry Until Golden
Return the fries to the hot oil in small batches. Fry for 2 to 4 minutes, or until they are golden brown and crisp.
Use a slotted spoon or spider strainer to lift the fries out of the oil. Let any extra oil drip back into the pot before transferring them to a clean paper towel-lined sheet pan or wire rack.
Step 10: Season and Serve
While the fries are still hot, sprinkle them with 1 1/2 teaspoons kosher salt, plus more to taste. Add 1/2 teaspoon garlic powder, 1/4 teaspoon black pepper, and 1 tablespoon chopped fresh parsley if you are using them.
Serve the fries right away with the chilled aioli on the side. Hot fries and cool, creamy aioli make the best contrast.
Serving Suggestions
Classic French Fries with Aioli are perfect with burgers because they bring that crisp, salty side everyone expects. The creamy garlic dip makes the plate feel a little more homemade and special.
They also go well with grilled chicken, turkey burgers, or simple sandwiches. The fries add comfort, while the aioli gives each bite a little extra flavor.
For a family snack night, serve the fries on a large platter in the middle of the table. Add small bowls of aioli, ketchup, honey mustard, or ranch so everyone can choose their favorite dip.
These fries are also delicious with fish, especially crispy baked fish or fish sandwiches. The lemon in the aioli pairs nicely with seafood and keeps the plate tasting bright.
For a lighter meal, serve a smaller portion of fries with a big green salad or fresh vegetable sticks. This gives you the comfort of fries while keeping the meal balanced.
If you are making them for game day, keep the fries simple and serve them with several dips. Aioli, barbecue sauce, spicy mayo, and cheese sauce all make the platter feel fun and easy to share.
Leftovers and Storage
French fries are always best right after they are cooked, while they are hot and crisp. If you have leftovers, let them cool completely before storing them so extra steam does not make them even softer.
Store leftover fries in an airtight container in the refrigerator for up to 2 days. Place a paper towel in the container to help absorb extra moisture.
To reheat, avoid the microwave if you want the fries crisp again. A microwave will warm them, but it usually makes them soft and limp.
For the best texture, reheat fries in an oven or air fryer at 375°F until hot and crisp. Spread them in a single layer and heat for 5 to 10 minutes, depending on thickness.
Store leftover aioli in a separate airtight container in the refrigerator for up to 3 days. Stir it before serving again, and do not leave it at room temperature for long periods.
Freezing leftover fries is not ideal after they have been fully fried and seasoned. They can become dry or uneven when reheated, so it is better to enjoy them fresh or within a day or two.
Nutrition and Benefits
- Potatoes provide potassium, vitamin C, and carbohydrates that help make this side dish filling. Leaving the skins on can add a little extra fiber and a more rustic texture.
- Making fries at home lets you control the salt, oil, and portion size. This can be helpful for families who want a treat but still like knowing what goes into the food.
- Aioli adds creamy flavor, which means a small amount can make the fries feel satisfying. The lemon juice and Dijon mustard also add brightness and balance to the rich dip.
- Frying twice creates a better texture, so the fries taste crisp without needing heavy coatings or extra ingredients. A good cooking method can make simple potatoes feel special.
- Serving fries with vegetables, grilled protein, or a salad can make the meal feel more balanced. They can still be a fun comfort food while fitting into a family dinner.
Recipe FAQ
Can I make these fries without peeling the potatoes?
Yes, you can leave the skins on if you like a more rustic fry. Just scrub the potatoes well before cutting them. The skins add texture and a little extra fiber.
Why do I need to soak the potatoes?
Soaking helps remove extra starch from the cut potatoes. This helps the fries cook up crisper and keeps them from sticking together as much. The vinegar also helps the fries hold their shape.
Can I bake these instead of frying?
Yes, you can bake them for a lighter version. Toss the cut and dried potatoes with oil, spread them on a hot baking sheet, and bake at 425°F until golden and crisp. They will not be exactly the same as fried fries, but they will still taste good.
What is the best oil for frying French fries?
Vegetable oil, canola oil, and peanut oil all work well because they handle high heat. Choose a neutral oil so the potato flavor stays clean. Make sure the pot is not too full when frying.
How do I keep fries from getting soggy?
Dry the potatoes very well before frying and do not overcrowd the pot. Frying in small batches keeps the oil temperature steady. Season the fries right after frying, then serve them quickly.
Can I make the aioli less garlicky?
Yes, use a very small garlic clove or only half a clove. Raw garlic gets stronger as it sits, so start with less if serving kids. You can also add a little extra lemon juice or mayonnaise to soften the flavor.
Can I use store-bought mayonnaise for aioli?
Yes, store-bought mayonnaise works well and makes the aioli quick and easy. Adding garlic, lemon juice, Dijon mustard, salt, and pepper gives it a homemade flavor. It is a simple shortcut that still tastes fresh.
A Golden Fry Night Made for Sharing
Classic French Fries with Aioli bring simple comfort to the table with crisp edges, fluffy centers, and a creamy dip that makes every bite feel special. They are easy to serve with family dinners, weekend lunches, game day snacks, or a relaxed night at home.
I love that this recipe turns everyday potatoes into something warm, familiar, and dependable. With a little soaking, two quick fries, and a simple aioli, these homemade fries are worth making again whenever you want a cozy side everyone will enjoy.