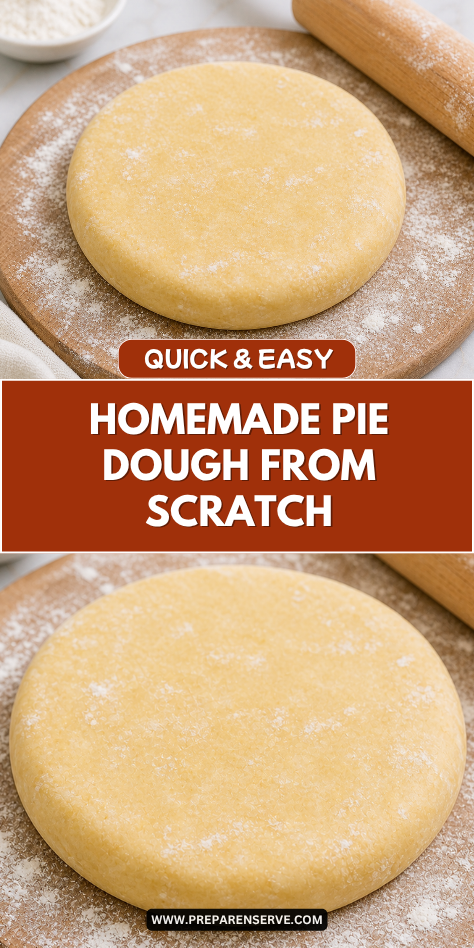
I make All-Purpose Pie Dough from Scratch whenever I want a crust that can work for almost any pie, tart, galette, or hand pie. It is simple, buttery, and dependable, with a tender bite that feels much better than anything from a box.
I know homemade pie dough can feel a little scary at first, especially if you worry about tearing, sticking, or making it too tough. Once you understand how cold butter, gentle mixing, and resting time work together, it becomes one of those kitchen basics you can trust again and again.
Why You’ll Love This Recipe
All-Purpose Pie Dough from Scratch is one of the most useful recipes to keep in your kitchen. It works for sweet pies like apple, cherry, pumpkin, and chocolate cream, but it also works beautifully for savory pies, quiche, pot pies, and rustic galettes.
The flavor is buttery and simple, which means it supports the filling instead of taking over. The dough bakes into a crust that is crisp at the edges, tender in the center, and sturdy enough to hold juicy fruit or creamy fillings.
This recipe is also family-friendly because it can be made ahead and kept in the refrigerator or freezer. Having a disk of dough ready to go makes homemade desserts and cozy dinners feel much easier on busy days.
Serves: 8 people
This recipe makes enough dough for one double-crust 9-inch pie or two single-crust 9-inch pies. If you are making a pie with a top and bottom crust, use both disks for one dessert.
For smaller recipes, you can use one disk now and freeze the other for later. That makes it easy to bake a quick quiche, small galette, or simple fruit pie without starting from scratch every time.
Ingredients You’ll Need
- 2 1/2 cups all-purpose flour, plus more for rolling
- 1 tablespoon granulated sugar, optional for sweet pies
- 1 teaspoon fine sea salt
- 1 cup unsalted butter, very cold and cut into small cubes
- 1/2 cup ice water, plus more as needed
- 1 teaspoon apple cider vinegar or fresh lemon juice, optional
- 1 large egg, optional for egg wash when baking
- 1 tablespoon milk or cream, optional for egg wash when baking
- Coarse sugar, optional for sweet pie crust topping
Pro Tips
Keep everything cold from the very beginning. Cold butter is what creates flaky layers, so chill the butter, use ice water, and do not let the dough sit too long on a warm counter.
Cut the butter into small cubes before adding it to the flour. Smaller pieces are easier to work into the dough, and they help create a mix of tiny crumbs and pea-sized butter pieces.
Do not add all the water at once. Start with part of it, then add more one tablespoon at a time until the dough holds together when pressed.
Stop mixing before the dough looks perfectly smooth. A few visible butter pieces and a slightly shaggy texture are good signs because they help make the crust flaky.
Let the dough rest before rolling. Resting gives the flour time to hydrate and helps the dough roll out more easily without shrinking too much in the oven.
Use gentle pressure when rolling. Pressing too hard can make the dough tough, while steady, even rolling helps keep the crust tender.
Flour the counter lightly, but do not overdo it. Too much extra flour can dry out the dough and make the crust less tender after baking.
Tools You’ll Need
- Large mixing bowl
- Measuring cups
- Measuring spoons
- Sharp knife
- Cutting board
- Pastry cutter, fork, or clean hands
- Bench scraper, optional
- Plastic wrap
- Rolling pin
- Pie dish
- Parchment paper, optional
- Baking sheet, optional
- Pastry brush, optional
- Small bowl, optional for egg wash
- Refrigerator
- Freezer-safe bag or airtight container, optional for storage
Substitutions and Variations
Use Salted Butter
You can use salted butter if that is what you have on hand. Reduce the fine sea salt to 1/2 teaspoon so the crust does not taste too salty.
Make It Without Sugar
Leave out the granulated sugar if you are making a savory pie, quiche, or pot pie. The crust will still brown well and taste buttery without the extra sweetness.
Try Part Whole Wheat Flour
Replace 1/2 cup of the all-purpose flour with whole wheat flour for a slightly heartier flavor. This works especially well with savory pies, apple pies, and rustic galettes.
Use a Food Processor
Pulse the flour, salt, sugar, and cold butter in a food processor until the butter is in small pieces, then add the ice water slowly. Be careful not to overmix, because the dough can go from crumbly to tough very quickly.
Make It Extra Flaky
Use a folding method after the dough comes together by patting it into a rectangle and folding it over itself a few times. This creates more layers while keeping the dough easy to roll and use.
Make Ahead Tips
All-Purpose Pie Dough from Scratch is one of the easiest baking basics to make ahead. I often prepare the dough a day or two before I need it because the resting time helps the flour hydrate and makes the crust easier to roll.
You can keep wrapped dough disks in the refrigerator for up to 3 days. Let the dough sit at room temperature for 10 to 15 minutes before rolling if it feels too firm from the fridge.
For longer storage, freeze the dough disks for up to 3 months. Wrap each disk tightly in plastic wrap, then place it in a freezer-safe bag or airtight container to protect it from freezer burn.
Thaw frozen pie dough overnight in the refrigerator before using. Try not to thaw it on the counter for too long, because the butter needs to stay cold for the best flaky texture.
You can also roll out the dough and place it in a pie dish ahead of time. Cover it well and refrigerate for up to 24 hours before filling and baking.
Instructions
Step 1: Mix the Dry Ingredients
Add the all-purpose flour, granulated sugar if using, and fine sea salt to a large mixing bowl. Whisk everything together so the salt and sugar are evenly mixed through the flour.
This gives the dough a more even flavor from edge to edge. It also helps prevent salty pockets or sweet spots in the finished crust.
Step 2: Cut in the Cold Butter
Add the very cold cubed butter to the flour mixture. Use a pastry cutter, fork, or clean fingertips to work the butter into the flour until the mixture has some pea-sized pieces and some smaller crumbly bits.
Do not blend the butter in completely. Those little pieces of butter melt in the oven and help create a flaky, tender crust.
Step 3: Add the Ice Water
Stir the apple cider vinegar or lemon juice into the ice water if using. Drizzle about 1/3 cup of the ice water over the flour and butter mixture.
Gently toss the mixture with a fork or your hands. Add more ice water 1 tablespoon at a time, just until the dough holds together when pressed.
Step 4: Bring the Dough Together
Turn the shaggy dough out onto a lightly floured counter. Gather it with your hands and press it gently into one mound without kneading it like bread dough.
The dough should look a little rough, with small butter pieces still visible. If it feels dry and crumbly, sprinkle on a tiny bit more ice water and press again.
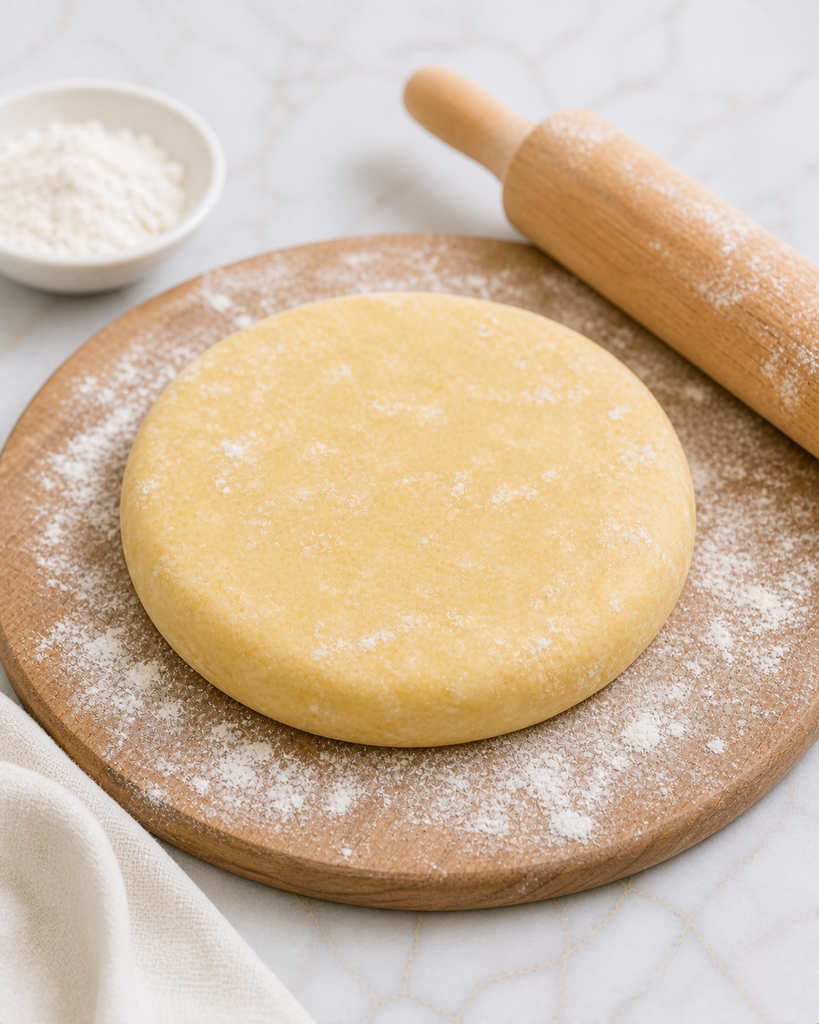
Step 5: Divide and Shape
Divide the dough into 2 equal pieces. Shape each piece into a flat disk about 1 inch thick.
Try not to overwork the dough while shaping it. Flat disks chill faster and roll out more evenly than round balls of dough.
Step 6: Chill the Dough
Wrap each dough disk tightly in plastic wrap. Refrigerate for at least 1 hour before rolling.
This chilling time helps the butter firm up and gives the dough a better texture. It also makes the dough less likely to shrink during baking.
Step 7: Roll Out the Dough
Lightly flour your counter and rolling pin. Place one chilled disk of dough on the counter and roll from the center outward, turning the dough often to keep it from sticking.
Roll the dough into a circle about 12 inches wide for a 9-inch pie dish. Add a small dusting of flour only as needed so the dough stays tender.
Step 8: Transfer to the Pie Dish
Carefully fold the dough in half, or roll it loosely around the rolling pin. Lift it into the pie dish and unfold it gently.
Press the dough into the bottom and sides of the dish without stretching it. Stretching can cause the crust to shrink as it bakes.
Step 9: Trim and Crimp
Trim the edges so there is about 1 inch of dough hanging over the pie dish. Fold the extra dough under itself to make a thicker edge.
Crimp the edge with your fingers or press it gently with a fork. Chill the shaped crust for 20 to 30 minutes before filling or blind baking.
Step 10: Blind Bake for Cream or Custard Pies
For a fully or partially baked crust, preheat the oven to 375°F. Line the chilled crust with parchment paper and fill it with pie weights, dried beans, or dry rice.
Bake for 15 to 18 minutes, then carefully remove the parchment and weights. For a partially baked crust, bake 5 more minutes, and for a fully baked crust, bake 10 to 15 more minutes until golden.
Step 11: Use for a Filled Pie
For fruit pies, custard pies, pot pies, or quiche, follow the baking directions for your specific recipe. Most filled pies bake best when the dough is cold before going into the oven.
If making a double-crust pie, roll out the second disk and place it over the filling. Trim, seal, crimp, and cut a few vents in the top so steam can escape.
Step 12: Add Egg Wash If Needed
For a golden finish, whisk the large egg with the milk or cream in a small bowl. Brush a thin layer over the top crust or exposed edges right before baking.
For sweet pies, sprinkle coarse sugar over the egg wash. This gives the crust a pretty sparkle and a light crunch.
Serving Suggestions
Use this dough for a classic apple pie with cinnamon, sugar, and a flaky top crust. It bakes into a sturdy crust that holds juicy fruit while still tasting tender.
Turn it into a single-crust pumpkin pie, chocolate cream pie, or lemon pie. The buttery flavor works well with smooth, creamy fillings and simple toppings.
Make a savory quiche with eggs, cheese, vegetables, and cooked bacon or ham. Leaving out the sugar makes the crust perfect for breakfast, brunch, or an easy dinner.
Use one disk for a rustic fruit galette when you do not want to fuss with a pie dish. Just roll it out, add fruit filling in the center, fold the edges, and bake until golden.
This dough also works well for chicken pot pie. The tender crust pairs beautifully with creamy filling, vegetables, and shredded chicken.
For a kid-friendly treat, use scraps to make cinnamon sugar pie crust cookies. Brush the scraps with butter, sprinkle with cinnamon sugar, and bake until crisp.
Leftovers and Storage
Unbaked pie dough keeps well in the refrigerator for up to 3 days when wrapped tightly. Keep it in a flat disk so it is easy to roll when you are ready to bake.
For longer storage, freeze the wrapped dough for up to 3 months. I like to label each bag with the date and whether it is a single disk or a double batch.
Baked pie crust can be stored at room temperature for 1 to 2 days if it is plain and unfilled. Once it has a cream, custard, egg, or meat filling, store it in the refrigerator according to the finished recipe.
Leftover dough scraps can be wrapped and chilled for a day. Roll them out for small hand pies, decorative cutouts, or simple cinnamon sugar snacks.
If the dough feels too firm after chilling, let it rest briefly at room temperature. If it becomes soft or greasy, place it back in the refrigerator until the butter firms up again.
Nutrition and Benefits
- Homemade pie dough uses simple pantry ingredients, so you know exactly what goes into your crust.
- Butter gives the dough rich flavor and helps create a flaky texture without needing extra additives.
- This recipe is flexible enough for sweet and savory meals, which makes it useful for desserts, brunches, and family dinners.
- Making dough ahead can save time and help homemade pies feel more manageable during busy weeks.
- Because the dough is rich, a small slice of pie or quiche can feel satisfying when served with fruit, salad, or vegetables.
Recipe FAQ
Why is my pie dough crumbly?
Pie dough is usually crumbly when it needs a little more water. Add ice water 1 teaspoon at a time and gently press the dough together after each addition. Stop as soon as it holds together, because too much water can make the crust tough.
Why is my pie dough tough?
Tough pie dough usually comes from overmixing, kneading, or adding too much flour while rolling. Handle the dough gently and mix only until it comes together. A light touch helps keep the crust tender and flaky.
Can I make this pie dough in a food processor?
Yes, you can make this dough in a food processor. Pulse the dry ingredients and butter just until the butter is in small pieces, then pulse in the ice water slowly. Stop before the dough forms one smooth ball, then press it together by hand.
Do I need to chill pie dough before baking?
Yes, chilling makes a big difference. It firms up the butter, relaxes the dough, and helps the crust hold its shape in the oven. Even 30 minutes helps, but 1 hour is better when you have time.
Can I use this dough for savory pies?
Yes, this dough works very well for savory pies, quiche, and pot pies. Leave out the sugar if you want a more neutral flavor. The buttery crust pairs nicely with creamy, cheesy, or vegetable fillings.
How do I keep pie crust from shrinking?
Do not stretch the dough when placing it in the pie dish. Let it rest and chill before baking, and use pie weights if blind baking. These steps help the crust keep its shape.
Can I freeze pie dough after rolling it out?
Yes, you can freeze rolled-out dough in a pie dish. Wrap it tightly and freeze it for up to 1 month for best quality. Bake it from frozen or let it thaw slightly in the refrigerator, depending on your pie recipe.
A Buttery Baking Basic to Use Again and Again
All-Purpose Pie Dough from Scratch is one of those simple kitchen recipes that makes homemade baking feel more comforting and reliable. With cold butter, a gentle hand, and a little resting time, you get a crust that works for pies, galettes, quiche, and family dinners.
I love keeping this dough ready because it turns everyday ingredients into something special. It is useful, flexible, and worth making again whenever you want a flaky homemade crust that feels warm, simple, and made with care.