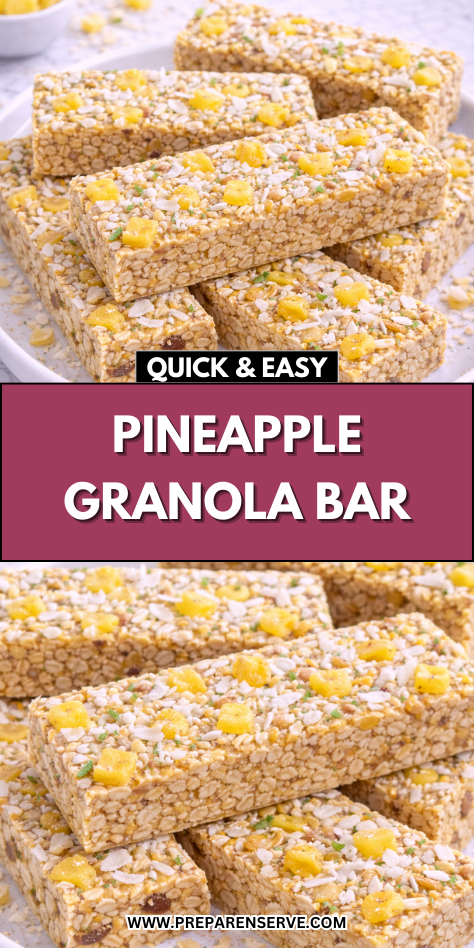
Pineapple Granola Bars came into my kitchen during a time when I wanted something that felt bright, gentle, and a little unexpected. I was craving a snack that carried a sense of warmth and freshness without feeling heavy or overly sweet. Pineapple brought that balance in a way that felt natural and inviting.
There is something quietly uplifting about pineapple. Its sweetness is soft and rounded, not sharp, and it brings a subtle brightness that makes a recipe feel lighter. When paired with oats, that brightness settles into something comforting rather than bold.
I started making these bars when I wanted a break from deeper, spiced flavors. They felt like a small shift toward something sunny but still grounded. From the first batch, they felt easy to enjoy and easy to keep around.
What I love most about this recipe is how calm it feels to make. Measuring oats, chopping pineapple, and stirring everything together creates a steady rhythm that never feels rushed. It is the kind of recipe that fits easily into everyday life.
These granola bars also feel dependable in the best way. They hold together well, store easily, and always deliver that gentle pineapple sweetness. That reliability is what keeps them in regular rotation.
Why You’ll Love This Recipe
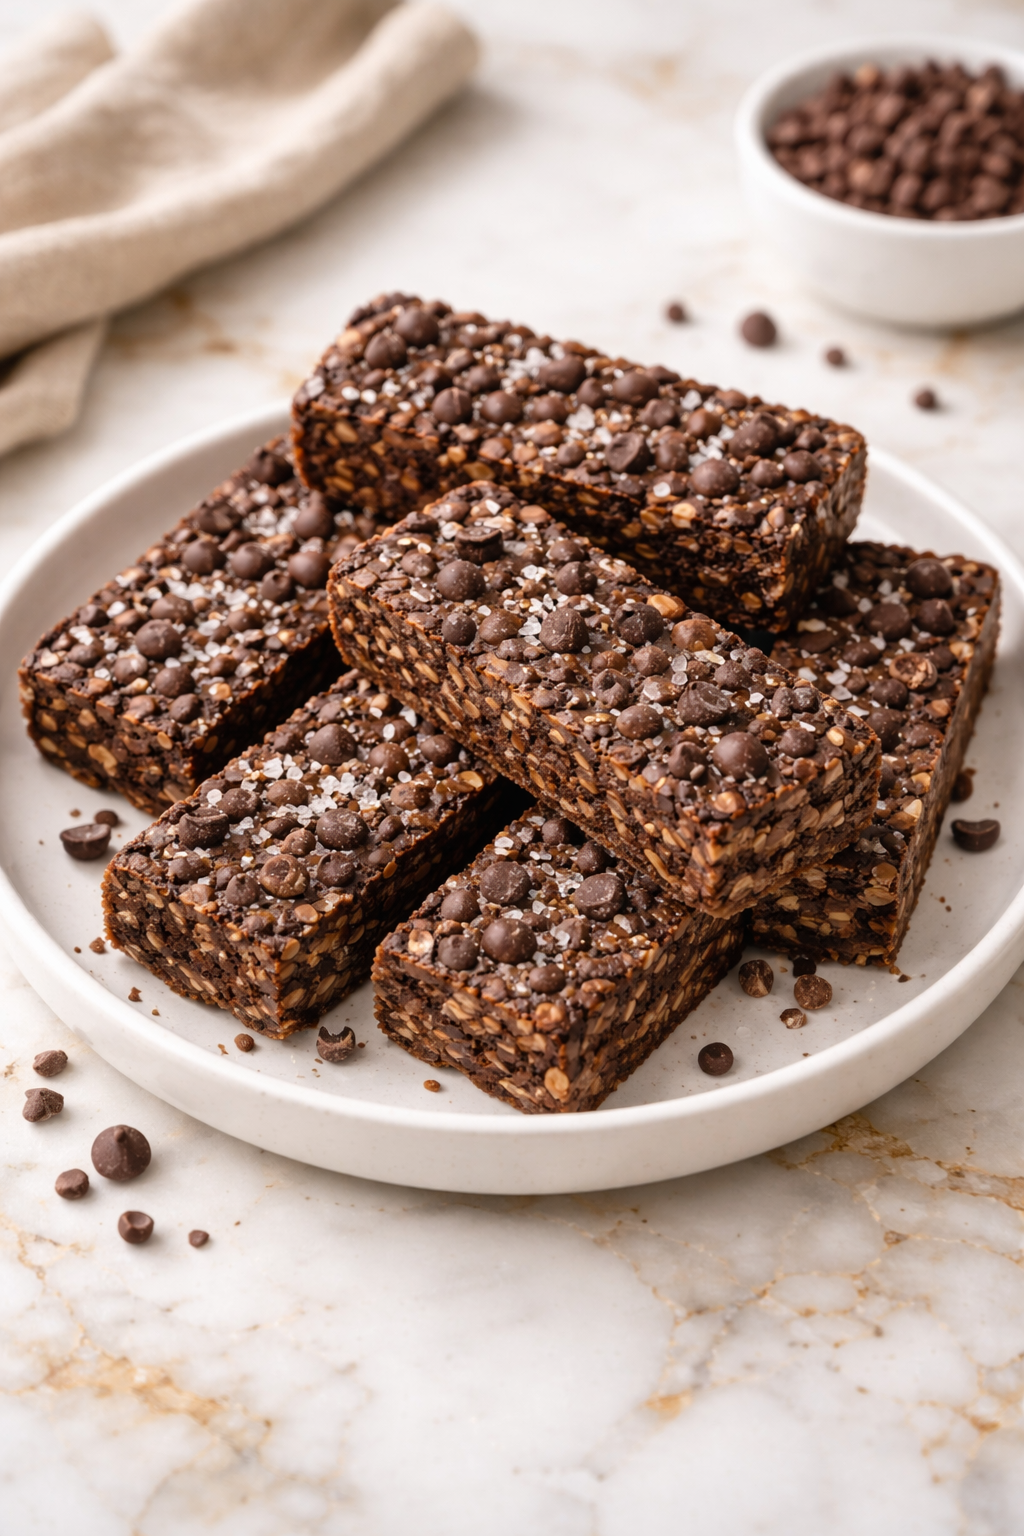
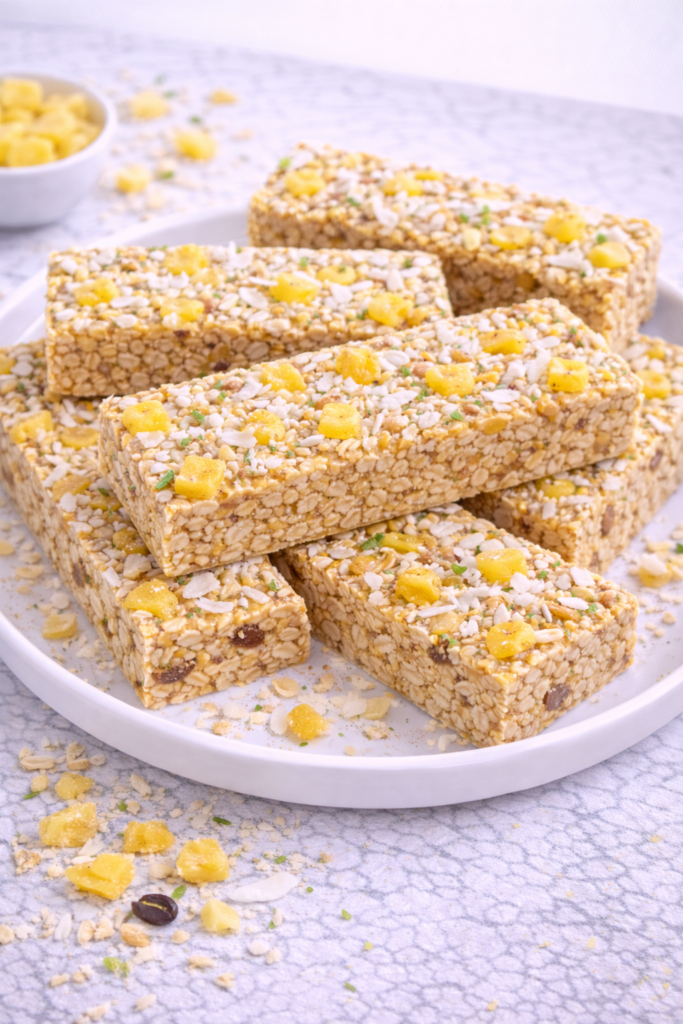
These Pineapple Granola Bars have a lightly sweet, mellow fruit flavor that feels refreshing and comforting at the same time. The pineapple adds brightness, while the oats keep everything grounded and satisfying.
The recipe is simple and approachable, even if baking is not something you do often. The steps are forgiving and easy to follow from start to finish.
They are also very family-friendly and versatile. These bars work well for breakfast, snacks, or a quiet afternoon bite.
Because the flavor is gentle and familiar, they appeal to a wide range of tastes. That makes them a dependable choice for everyday baking.
Serves: 2 people
This recipe is designed to serve two people with several bars each. It works well for small households or anyone who prefers making fresh batches.
The bars can be cut into larger portions for breakfast or smaller ones for snacks. The recipe also doubles easily if needed.
Ingredients You’ll Need
- 2 cups old-fashioned rolled oats
- ¼ cup honey
- 2 tablespoons unsalted butter
- ¼ cup brown sugar
- ½ teaspoon vanilla extract
- ¼ teaspoon salt
- ⅓ cup dried pineapple, finely chopped
Pro Tips
Use dried pineapple rather than fresh to avoid excess moisture. Finely chopping it helps distribute sweetness evenly.
If the dried pineapple feels very firm, soak it briefly in warm water and drain well. This keeps the bars tender.
Let the warm honey mixture cool slightly before adding the pineapple. This helps preserve its texture.
Press the mixture firmly into the pan before baking. Firm pressure helps the bars hold together cleanly.
Allow the bars to cool completely before slicing. This step is essential for preventing crumbling.
If making these with kids, let them help stir in the pineapple. It is a simple and safe way to involve them.
Tools You’ll Need
- Medium saucepan
- Large mixing bowl
- Wooden spoon or spatula
- Knife
- Cutting board
- Measuring cups
- Measuring spoons
- 8×8-inch baking pan
- Parchment paper
Substitutions and Variations
You can replace dried pineapple with dried mango or papaya for a similar tropical feel. Each option brings a slightly different sweetness.
Maple syrup can be used instead of honey for a softer flavor. The bars will still bind well.
Butter can be swapped for coconut oil to make the recipe dairy-free. Make sure it is fully melted before mixing.
A tablespoon of shredded coconut pairs nicely with pineapple. Keep additions balanced so the bars hold together.
For extra warmth, a small pinch of cinnamon can be added. Use lightly so it does not overpower the fruit.
For softer bars, reduce baking time slightly. For firmer bars, bake a few minutes longer and cool completely.
Make Ahead Tips
Pineapple Granola Bars are a great option to prepare ahead when you want something bright and dependable ready to enjoy. Making them in advance helps keep snacks simple while still feeling homemade and thoughtful.
You can bake, cool, and slice the bars up to five days before serving. Once prepared, they store well at room temperature or in the refrigerator depending on the texture you prefer.
Refrigeration is helpful if you enjoy a firmer bar with clean edges. Chilling allows the honey and butter to set more fully, helping the bars hold together well.
Another helpful approach is prepping ingredients ahead of time. Chopping the dried pineapple and measuring the oats in advance makes assembly quicker and more relaxed.
The wet ingredients can also be measured and stored together in a heat-safe container. When ready, gently warm them and continue with the recipe.
For longer storage, these bars freeze very well. Freezing allows you to prepare a larger batch without worrying about freshness.
Once baked and fully cooled, wrap each bar individually. This makes it easy to thaw only what you need.
Frozen bars thaw at room temperature in about thirty minutes. They retain their chewy texture and gentle pineapple flavor.
You can also pack bars while slightly frozen. They thaw gradually and are often ready to eat by snack time.
If you want freshly baked bars but need flexibility, assemble the mixture and press it into the pan ahead of time. Cover and refrigerate, then bake within twenty-four hours.
This make-ahead flexibility makes the recipe easy to fit into everyday routines. It quietly supports busy days.
Instructions
Step 1: Prepare the Baking Pan
Preheat your oven to 350°F. Line an 8×8-inch baking pan with parchment paper, leaving overhang on the sides.
The parchment paper makes it easy to lift the bars out after baking. It also prevents sticking and simplifies cleanup.
Set the prepared pan aside on a flat surface. Having it ready keeps the process smooth and unhurried.
Step 2: Measure the Dry Ingredients
Place the rolled oats into a large mixing bowl. Add the salt and stir gently to combine.
Add the finely chopped dried pineapple and mix lightly. Distributing it evenly helps each bar have balanced sweetness.
Combining dry ingredients first helps ensure consistent texture. This step keeps the bars cohesive.
Set the bowl aside while you prepare the wet ingredients. Keeping steps organized makes the process feel calm.
Step 3: Warm the Sweeteners and Butter
Place a medium saucepan over low heat. Add the butter, honey, and brown sugar.
Stir gently as the ingredients warm and begin to melt together. The goal is to blend them smoothly without boiling.
Continue stirring until the mixture is glossy and fully combined. This usually takes just a few minutes.
Remove the saucepan from the heat once melted. Allow it to cool slightly before adding vanilla.
Step 4: Add the Vanilla Extract
Stir the vanilla extract into the warm honey mixture. Mix until fully incorporated.
Adding vanilla off the heat helps preserve its flavor. This step adds warmth that balances the pineapple.
The mixture should be warm but not hot. This helps protect the texture of the dried fruit.
Step 5: Combine Wet and Dry Ingredients
Pour the warm honey mixture over the oats and pineapple in the mixing bowl. Use a spatula or wooden spoon to stir.
Mix slowly and thoroughly until all oats are evenly coated. Take your time to avoid dry spots.
The mixture will feel thick and sticky. This texture helps the bars bind together once baked.
Scrape the sides of the bowl as needed. Even mixing leads to better structure.
Step 6: Transfer the Mixture to the Pan
Spoon the mixture into the prepared baking pan. Spread it evenly across the surface.
Press the mixture firmly into the pan using the back of a spatula. Firm pressure helps the bars slice cleanly later.
Pay special attention to the corners and edges. Compacting these areas helps prevent crumbling.
Smooth the top so the bars bake evenly. A flat surface also helps with slicing.
Step 7: Bake the Granola Bars
Place the pan in the preheated oven. Bake for 20 to 25 minutes until the edges are lightly golden.
The center should look set but not dry. Avoid overbaking to keep the bars soft and chewy.
Begin checking around the 20-minute mark. Oven temperatures can vary slightly.
Once baked, remove the pan from the oven. Place it on a cooling rack.
Step 8: Cool Completely
Allow the bars to cool in the pan for at least one hour. This cooling time is essential for structure.
Cutting too soon can cause the bars to fall apart. Cooling allows the honey to firm up properly.
As the bars cool, the pineapple flavor settles into the oats. This creates a cohesive texture.
Once fully cooled, lift the bars out using the parchment paper. Transfer them to a cutting board.
Step 9: Slice the Bars
Use a sharp knife to cut the bars into portions. Wipe the knife between cuts for clean edges.
Choose portion size based on how you plan to serve them. Larger bars work well for breakfast, while smaller ones suit snacks.
Handle the bars gently as you slice. They should feel firm but still chewy.
At this stage, the bars are ready to enjoy or store. They hold together well once fully cooled.
Serving Suggestions
Pineapple Granola Bars make a light, refreshing breakfast paired with yogurt or fresh fruit. The pineapple flavor feels especially gentle in the morning.
They work well as a mid-morning or afternoon snack. The oats provide steady energy without feeling heavy.
Serve a bar with tea or coffee for a quiet moment. The fruit flavor pairs nicely with warm drinks.
These bars pack easily into lunchboxes or bags. Their sturdy texture makes them easy to transport.
For a simple dessert, enjoy a bar slightly chilled. The pineapple flavor becomes even more refreshing.
They are also great for travel or busy days out. The bars hold up well without becoming messy.
Cut into smaller squares, they work nicely for sharing. Their gentle sweetness appeals to all ages.
No matter how they are served, they feel bright and dependable. That soft balance is what makes them special.
Leftovers and Storage
Pineapple Granola Bars store very well, making them a reliable option to keep on hand throughout the week. Once the bars are fully cooled and sliced, they can be stored at room temperature in an airtight container for several days.
Room temperature storage works best in a cool, dry kitchen. The bars will remain chewy, with the pineapple staying tender and evenly distributed.
If you prefer a firmer bar, refrigeration is a great option. Stored in the refrigerator, the bars can last up to ten days while holding together more cleanly.
Chilling helps the honey and butter set completely. This is especially helpful if the bars are packed for lunches, workdays, or travel.
When stacking bars, place parchment paper between layers. This prevents sticking and keeps the edges neat.
For longer storage, freezing works very well. Wrap each bar individually in parchment paper or plastic wrap.
Place the wrapped bars in a freezer-safe container or bag. They can be frozen for up to three months without losing quality.
To thaw, let a bar sit at room temperature for about thirty minutes. The texture will return to its original chewiness.
Bars can also be packed while slightly frozen. They thaw gradually and are often ready to eat by snack time.
Avoid reheating the bars for long periods. Too much heat can soften the structure and affect texture.
If you enjoy them slightly warm, a few seconds in the microwave is enough. Keep the time short to preserve consistency.
With proper storage, these bars stay fresh and enjoyable. Their gentle durability makes them easy to rely on.
Nutrition and Benefits
Pineapple Granola Bars offer balanced, everyday nourishment that feels light yet satisfying. They are well suited for steady energy throughout the day.
Rolled oats provide complex carbohydrates that digest slowly. This helps promote fullness and prevent quick energy dips.
Dried pineapple contributes natural sweetness and a small amount of fiber. It brings brightness without needing excess sugar.
Honey adds gentle sweetness while helping bind the bars together. It allows the recipe to avoid processed syrups.
Butter contributes richness and satiety. Fat helps snacks feel complete and satisfying.
Because the ingredients are simple and familiar, these bars avoid unnecessary additives. This makes them a reassuring option for families.
Portion size is easy to control with homemade bars. You can cut them to fit different needs and appetites.
The recipe can be adjusted to reduce sweetness if desired. Even with small changes, the bars remain cohesive.
These bars pair well with yogurt or fresh fruit for added nutrition. Combining foods helps create balanced snacks.
Overall, these bars provide gentle, everyday nourishment. They fit easily into busy routines.
Recipe FAQ
Can I use fresh pineapple instead of dried?
Fresh pineapple is not recommended because it adds too much moisture. This can prevent the bars from setting properly. Dried pineapple works best for structure.
Why are my bars falling apart?
Bars usually fall apart if they are sliced before fully cooling. Pressing the mixture firmly into the pan also helps improve structure.
Can I reduce the sweetness?
Yes, you can slightly reduce the honey or brown sugar. Keep in mind that sweetness also helps bind the bars together.
Are these bars kid-friendly?
These bars are very kid-friendly due to their mild sweetness and soft texture. Smaller portions work well for lunchboxes.
Can I make these bars dairy-free?
Yes, replace the butter with coconut oil. Make sure it is fully melted before mixing with the other ingredients.
Do these bars need to be baked?
Yes, baking helps the bars set properly and improves texture. This recipe is designed for baking rather than no-bake preparation.
Can I add other ingredients?
Yes, small amounts of coconut, nuts, or seeds pair well with pineapple. Keep additions balanced so the bars hold together.
A Bright Everyday Bar Worth Keeping
Pineapple Granola Bars are the kind of recipe that quietly earns a place in your routine. They bring gentle fruit sweetness and comforting texture together in a way that feels calm and dependable.
Each batch feels like a small moment of care made from simple pantry ingredients. The balance of oats and pineapple creates a bar that feels light without being delicate.
They are easy to adapt and easy to store. Whether enjoyed at home or packed for later, they fit naturally into everyday life.