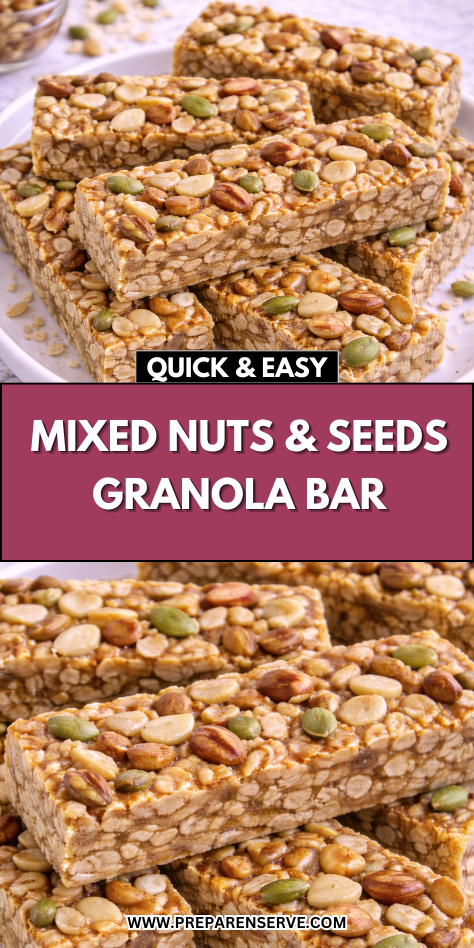
Mixed Nuts & Seeds Granola Bars came into my kitchen during a time when I wanted snacks that felt sturdy, nourishing, and dependable. I was looking for something that could truly hold me over between meals, not just satisfy a quick craving. A combination of nuts, seeds, and oats felt like the most natural solution.
There is something grounding about working with nuts and seeds. Chopping, measuring, and stirring them together creates a sense of intention that feels steady and calm. From the first batch, these bars felt like real fuel, the kind of snack you trust to carry you through a long day.
I started making these bars as an alternative to snacks that felt either too sweet or too light. They offered substance, texture, and balance without feeling heavy. Over time, they became a regular part of our routine.
What I love most about this recipe is how adaptable it is. No two batches ever need to be exactly the same, yet the results are always reliable. That flexibility makes it easy to work with what you have on hand.
These granola bars also feel practical in the best way. They store well, travel easily, and always feel satisfying. That consistency is what makes them a true pantry staple.
Why You’ll Love This Recipe
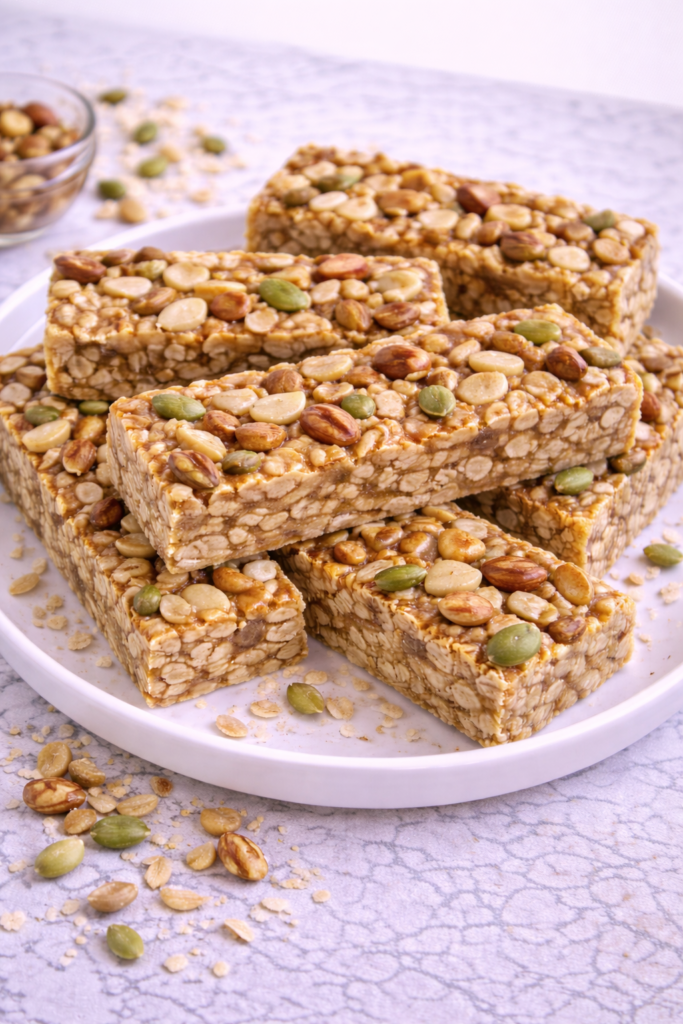
These Mixed Nuts & Seeds Granola Bars have a hearty, balanced flavor that feels nourishing and filling. The combination of nuts and seeds adds crunch and richness, while the oats provide structure.
The recipe is straightforward and approachable, even if you do not bake often. Each step is simple and forgiving, making it easy to get good results.
They are also very family-friendly and versatile. These bars work well for breakfast, snacks, or a quick bite between activities.
Because the ingredients are flexible, you can easily customize the mix of nuts and seeds. That adaptability makes this recipe one you can return to again and again.
Serves: 2 people
This recipe is designed to serve two people with several bars each. It works well for small households or anyone who prefers making fresh batches.
The bars can be cut into larger portions for meals or smaller ones for snacks. The recipe also doubles easily if needed.
Ingredients You’ll Need
- 2 cups old-fashioned rolled oats
- ¼ cup honey
- 2 tablespoons unsalted butter
- ¼ cup brown sugar
- ½ teaspoon vanilla extract
- ¼ teaspoon salt
- ¼ cup chopped almonds
- ¼ cup chopped walnuts or pecans
- 2 tablespoons sunflower seeds
- 2 tablespoons pumpkin seeds
Pro Tips
Use a mix of nuts and seeds for the best texture. Combining different sizes and shapes adds interest and balance.
Lightly toast the nuts and seeds before using them. This enhances their flavor and adds depth to the bars.
Let the warm honey mixture cool slightly before combining with nuts and seeds. This helps preserve their texture.
Press the mixture firmly into the pan before baking. Firm pressure helps the bars hold together cleanly.
Allow the bars to cool completely before slicing. This step is essential for preventing crumbling.
If making these with kids, let them help choose or mix the nuts and seeds. It is a simple way to involve them safely.
Tools You’ll Need
- Medium saucepan
- Large mixing bowl
- Wooden spoon or spatula
- Measuring cups
- Measuring spoons
- Knife
- Cutting board
- 8×8-inch baking pan
- Parchment paper
Substitutions and Variations
You can swap any of the nuts for what you have on hand, such as cashews or hazelnuts. Each option brings a slightly different flavor.
Maple syrup can be used instead of honey for a different sweetness. The bars will still bind well.
Butter can be replaced with coconut oil for a dairy-free option. Make sure it is fully melted before mixing.
Sesame seeds or chia seeds can replace sunflower or pumpkin seeds. Keep additions balanced so the bars hold together.
For extra warmth, add a pinch of cinnamon or nutmeg. Use lightly so the nut flavors remain dominant.
For softer bars, reduce baking time slightly. For firmer bars, bake a few minutes longer and cool completely.
Make Ahead Tips
Mixed Nuts & Seeds Granola Bars are especially helpful to make ahead when you want something filling and dependable ready to go. Preparing them in advance makes busy days feel easier because a nourishing snack is already waiting.
You can bake, cool, and slice the bars up to five days before serving. Once prepared, they store well at room temperature or in the refrigerator, depending on the texture you prefer.
Refrigeration is a good choice if you enjoy firmer bars that hold their shape well. Chilling helps the honey and butter set more fully, which makes the bars easier to pack and transport.
Another time-saving option is prepping ingredients ahead of time. Measuring and chopping the nuts and seeds in advance speeds up assembly later.
The dry ingredients can be stored together in an airtight container until you are ready to use them. This keeps everything organized and ready to go.
The wet ingredients can also be measured and stored together in a heat-safe container. When ready to bake, gently warm them and continue with the recipe.
For longer storage, these bars freeze very well. Freezing allows you to prepare a larger batch without worrying about freshness.
Once baked and fully cooled, wrap each bar individually. This makes it easy to thaw only what you need.
Frozen bars thaw at room temperature in about thirty minutes. They maintain their hearty texture and nutty flavor.
You can also pack bars while they are slightly frozen. They thaw gradually and are often ready to eat by snack time.
This make-ahead flexibility makes the recipe practical and reliable. It fits naturally into everyday routines.
Instructions
Step 1: Prepare the Baking Pan
Preheat your oven to 350°F. Line an 8×8-inch baking pan with parchment paper, leaving overhang on the sides.
The parchment paper makes it easy to lift the bars out once they are baked. It also helps prevent sticking and simplifies cleanup.
Set the prepared pan aside on a flat surface. Having it ready keeps the process smooth and efficient.
Step 2: Measure the Dry Ingredients
Place the rolled oats into a large mixing bowl. Add the salt and stir gently to combine.
Add the chopped nuts and seeds to the bowl. Mix lightly so they are evenly distributed throughout the oats.
Combining dry ingredients first helps ensure consistent texture. Each bar will have a balanced mix of oats, nuts, and seeds.
Set the bowl aside while you prepare the wet ingredients. Keeping steps organized helps everything come together easily.
Step 3: Warm the Wet Ingredients
Place a medium saucepan over low heat. Add the butter, honey, and brown sugar.
Stir gently as the ingredients warm and begin to melt. The goal is to combine them smoothly without boiling.
Continue stirring until the mixture is glossy and fully blended. This usually takes just a few minutes over low heat.
Remove the saucepan from the heat once melted. Allow it to cool slightly before adding vanilla.
Step 4: Add the Vanilla Extract
Stir the vanilla extract into the warm honey mixture. Mix until fully incorporated.
Adding vanilla off the heat helps preserve its flavor. This step adds warmth and balance to the bars.
The mixture should be warm but not hot. This helps maintain the texture of the nuts and seeds.
Step 5: Combine Wet and Dry Ingredients
Pour the warm honey mixture over the oats, nuts, and seeds in the mixing bowl. Use a spatula or wooden spoon to stir.
Mix slowly and thoroughly until all ingredients are evenly coated. Take your time to avoid dry spots.
The mixture will feel thick and sticky. This texture helps the bars bind together once baked.
Scrape the sides of the bowl as needed. Even mixing leads to better structure and consistency.
Step 6: Transfer the Mixture to the Pan
Spoon the mixture into the prepared baking pan. Spread it evenly with the back of a spatula.
Press the mixture firmly into the pan. Firm pressure is essential for bars that hold together well.
Pay special attention to the corners and edges. Compacting these areas helps prevent crumbling later.
Smooth the top so the bars bake evenly. A flat surface also helps with slicing.
Step 7: Bake the Granola Bars
Place the pan in the preheated oven. Bake for 20 to 25 minutes until the edges are lightly golden.
The center should look set but not dry. Avoid overbaking to keep the bars chewy.
Begin checking at the 20-minute mark. Oven temperatures can vary slightly.
Once baked, remove the pan from the oven. Place it on a cooling rack.
Step 8: Cool Completely
Allow the bars to cool in the pan for at least one hour. This cooling time is crucial for structure.
Cutting too soon can cause the bars to fall apart. Cooling allows the honey and butter to set properly.
As the bars cool, the nuts and seeds settle into the oat base. This creates a sturdy, cohesive texture.
Once fully cooled, lift the bars out using the parchment paper. Transfer them to a cutting board.
Step 9: Slice the Bars
Use a sharp knife to cut the bars into portions. Wipe the knife between cuts for clean edges.
Choose portion size based on how you plan to use them. Larger bars work well for meals, while smaller ones suit snacks.
Handle the bars gently as you slice. They should feel firm and sturdy.
At this stage, the bars are ready to enjoy or store. They hold together well when handled carefully.
Serving Suggestions
Mixed Nuts & Seeds Granola Bars make a filling breakfast paired with fruit or yogurt. The hearty texture helps keep you satisfied.
They work well as a mid-morning or afternoon snack. The combination of nuts and seeds provides steady energy.
Serve a bar with coffee or tea for a simple, grounding moment. The nutty flavors pair well with warm drinks.
These bars pack easily into lunchboxes or bags. Their sturdy structure makes them ideal for travel.
For outdoor activities or busy days, these bars are especially useful. They hold up well without becoming messy.
Cut into smaller pieces, they make a great addition to snack boards. Their simple, wholesome flavor appeals to many tastes.
They also work well as a post-workout snack. The balance of carbohydrates and fats feels satisfying.
No matter how they are served, they feel dependable and nourishing. That reliability is what makes them a staple.
Leftovers and Storage
Mixed Nuts & Seeds Granola Bars store exceptionally well, which makes them a reliable choice for everyday snacking. Once the bars are fully cooled and sliced, they can be kept at room temperature in an airtight container for several days.
Room temperature storage works best in a cool, dry kitchen. The bars will remain firm and chewy, while the nuts and seeds keep their texture and flavor.
If you prefer a firmer bar, refrigeration is a great option. Stored in the refrigerator, the bars can last up to ten days while holding together especially well.
Chilling helps the honey and butter set more completely. This makes the bars easier to pack for lunches, workdays, or travel.
When stacking bars, place parchment paper between layers. This prevents sticking and keeps the edges clean and intact.
For longer storage, freezing works very well. Wrap each bar individually in parchment paper or plastic wrap.
Place the wrapped bars in a freezer-safe container or bag. They can be frozen for up to three months without losing quality.
To thaw, let a bar sit at room temperature for about thirty minutes. The texture will return to its original firmness and chew.
Bars can also be packed while slightly frozen. They thaw gradually and are often ready to eat by snack time.
Avoid reheating the bars for long periods. Too much heat can soften the honey and affect structure.
If you prefer them slightly warm, a few seconds in the microwave is enough. Keep the time short to preserve texture.
With proper storage, these bars stay fresh and satisfying. Their sturdy nature makes them easy to rely on.
Nutrition and Benefits
Mixed Nuts & Seeds Granola Bars offer a nutrient-dense combination of carbohydrates, fats, and fiber. This balance supports steady energy throughout the day.
Rolled oats provide complex carbohydrates that digest slowly. This helps prevent sudden energy dips.
Nuts contribute healthy fats and plant-based protein. These nutrients help promote fullness and satisfaction.
Seeds add additional minerals and fiber. They also enhance texture and nutritional variety.
Honey provides natural sweetness while helping bind the bars together. It allows the recipe to avoid processed syrups.
Butter adds richness and helps with satiety. Fat plays an important role in keeping snacks satisfying.
Because the ingredients are simple and whole, these bars avoid unnecessary additives. This makes them a dependable option for families.
Portion size is easy to control with homemade bars. You can cut them to suit individual needs.
The recipe can be adjusted to reduce sweetness if desired. Even with small changes, the bars remain cohesive.
These bars pair well with fruit or yogurt for added nutrition. Combining foods helps create balanced snacks.
Overall, these bars provide steady, practical nourishment. They are well suited for busy, active days.
Recipe FAQ
Can I use different nuts and seeds?
Yes, this recipe is very flexible. You can swap in any nuts or seeds you enjoy, keeping the overall quantities similar.
Why are my bars falling apart?
Bars usually fall apart if they are sliced before fully cooling. Pressing the mixture firmly into the pan also helps improve structure.
Can I reduce the sweetness?
Yes, you can slightly reduce the honey or brown sugar. Keep in mind that sweetness also helps bind the bars together.
Are these bars kid-friendly?
These bars are kid-friendly, especially for families who enjoy nutty snacks. Cutting smaller portions works well for lunchboxes.
Can I make these bars dairy-free?
Yes, replace the butter with coconut oil. Make sure it is fully melted before mixing with the other ingredients.
Do these bars need to be baked?
Baking helps the bars set and improves texture. This recipe is designed for baking rather than no-bake preparation.
Can I add dried fruit?
Yes, small amounts of dried fruit can be added for sweetness. Keep additions balanced so the bars hold together.
A Hearty Everyday Bar Worth Keeping
Mixed Nuts & Seeds Granola Bars are the kind of recipe that quietly becomes part of a routine. They bring together simple ingredients in a way that feels sturdy, nourishing, and dependable.
Each batch feels like a small act of care made from pantry staples. The balance of oats, nuts, and seeds creates a bar that feels filling without being heavy.
They are easy to adapt and easy to store. Whether packed for later or enjoyed at home, they fit naturally into everyday life.