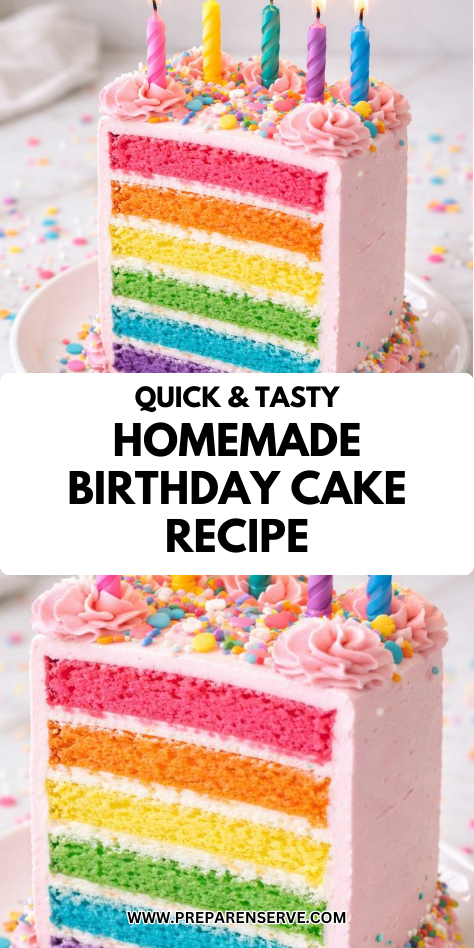
Homemade birthday cake has a special way of making celebrations feel more personal and meaningful. In my home, it’s never just about the cake itself, but about the excitement of baking it, frosting it, and watching someone smile when the candles are lit.
There is something deeply comforting about knowing a cake was made from scratch, just for that moment. This recipe was created to be reliable, festive, and easy enough for anyone to make with confidence.
It’s the kind of birthday cake that feels classic and familiar, with a soft crumb and balanced sweetness that everyone enjoys. Every time I bake this cake, it reminds me that the best birthday memories are often made in the kitchen.
Why You’ll Love This Recipe
This Homemade Birthday Cake Recipe is soft, fluffy, and perfectly sweet without being overwhelming. The texture is light and tender, making it ideal for layering, frosting, and decorating. It tastes just as good on its own as it does with your favorite frosting.
The recipe is straightforward and forgiving, which makes it great for home bakers of all experience levels. You don’t need special techniques or equipment to get a beautiful result. It’s designed to work well every time.
Families love this cake because it feels festive and familiar. Kids enjoy the soft texture and sweet flavor, while adults appreciate that it’s not overly rich. It’s a cake that fits any birthday celebration.
Serves: 2 people
This recipe makes a small birthday cake that serves two people generously. It’s perfect for an intimate celebration or a quiet birthday at home. The recipe can easily be doubled or tripled for larger gatherings.
Ingredients You’ll Need
Cake Batter
- 1 cup all-purpose flour
- 3/4 teaspoon baking powder
- 1/4 teaspoon salt
- 1/2 cup unsalted butter, softened
- 1/2 cup granulated sugar
- 1 large egg, room temperature
- 1 teaspoon vanilla extract
- 1/4 cup whole milk
Optional Simple Frosting
- 1/2 cup unsalted butter, softened
- 1 1/2 cups powdered sugar
- 1/2 teaspoon vanilla extract
- 1 to 2 tablespoons milk
- Sprinkles, for decorating
Pro Tips
Use room temperature ingredients to create a smooth batter. Butter, egg, and milk blend more evenly when they are not cold. This helps produce a lighter cake.
Cream the butter and sugar until pale and fluffy. This step adds air to the batter, which helps the cake rise properly. Rushing this step can affect texture.
Measure flour carefully to avoid a dry cake. Spoon the flour into the measuring cup and level it off. Too much flour can make the cake dense.
Do not overmix once the flour is added. Overmixing can make the cake tough. Mix just until the ingredients are combined.
Let the cake cool completely before frosting. Frosting a warm cake can cause melting and sliding. Cooling ensures clean layers and smooth decorating.
Tools You’ll Need
- Mixing bowls
- Electric mixer or whisk
- Measuring cups and spoons
- Rubber spatula
- Small cake pan
- Cooling rack
Substitutions and Variations
You can substitute whole milk with almond milk or oat milk if needed. This works well for dairy-sensitive households. The cake will still be soft and tender.
For a richer flavor, replace part of the butter with vegetable oil. Oil helps keep the cake moist for longer. Use equal amounts when swapping.
If you prefer a stronger vanilla flavor, add an extra half teaspoon of vanilla extract. Vanilla bean paste also works well. This adds deeper flavor and visual appeal.
You can turn this into a funfetti-style cake by folding sprinkles into the batter. Add them gently at the end. This makes the cake extra festive.
For a chocolate birthday cake variation, replace a small portion of the flour with cocoa powder. Keep the rest of the recipe the same. This creates a simple chocolate twist.
Make Ahead Tips
Homemade birthday cake is a wonderful dessert to prepare ahead of time, especially when you want to keep the celebration relaxed and enjoyable. The cake layers can be baked one to two days in advance and wrapped tightly at room temperature. Wrapping them well keeps the cake soft and prevents it from drying out.
If you need to prepare the cake further ahead, unfrosted layers can be frozen for up to one month. Wrap each layer tightly in plastic wrap and then in foil to protect them from freezer burn. Thaw the layers at room temperature before frosting and assembling.
The frosting can also be made ahead and stored in the refrigerator for up to three days. Let it come to room temperature and rewhip briefly before using to restore a smooth, fluffy texture. This makes decorating easier and more enjoyable.
Assembling and decorating the cake on the day of serving gives the best presentation. It keeps the frosting fresh and the cake looking festive. Planning ahead helps the celebration feel calm and organized.
Instructions
Step 1: Prepare the Pan and Oven
Preheat the oven to 350°F. Grease a small cake pan and line the bottom with parchment paper. This helps ensure the cake releases cleanly after baking.
Set the prepared pan aside while you make the batter. Proper pan preparation prevents sticking. It also helps the cake bake evenly.
Step 2: Mix the Dry Ingredients
In a medium bowl, whisk together the flour, baking powder, and salt. Whisking evenly distributes the leavening agents. Set the bowl aside.
This step helps prevent uneven texture. It ensures the cake rises properly. Mixing dry ingredients first makes combining easier later.
Step 3: Cream the Butter and Sugar
In a large mixing bowl, beat the softened butter and granulated sugar together. Mix until the mixture becomes pale and fluffy. This usually takes two to three minutes.
This step incorporates air into the batter. Air helps create a light and tender cake. Do not rush this process.
Step 4: Add the Egg and Vanilla
Add the egg to the butter mixture and beat until fully combined. Scrape down the sides of the bowl as needed. The batter should look smooth and cohesive.
Mix in the vanilla extract until evenly incorporated. Vanilla adds warmth and flavor. Make sure it is well blended.
Step 5: Add Dry Ingredients and Milk
Add half of the dry ingredients to the batter and mix gently. Pour in the milk and mix until just combined. Add the remaining dry ingredients and mix again.
Avoid overmixing at this stage. Overmixing can make the cake dense. Stop mixing as soon as the batter is smooth.
Step 6: Transfer Batter to Pan
Pour the batter into the prepared cake pan. Use a spatula to smooth the top evenly. Tap the pan gently on the counter to release air bubbles.
Smoothing the batter helps the cake bake evenly. Releasing air bubbles improves texture. This step helps the cake rise nicely.
Step 7: Bake the Cake
Place the pan in the preheated oven. Bake for 22 to 28 minutes, depending on pan size. The cake is done when a toothpick inserted in the center comes out clean.
The top should be lightly golden and spring back when touched. Avoid opening the oven too early. Consistent heat helps the cake rise evenly.
Step 8: Cool the Cake
Remove the cake from the oven and let it cool in the pan for about 10 minutes. Carefully turn it out onto a cooling rack. Remove the parchment paper.
Allow the cake to cool completely before frosting. Cooling fully prevents melting. This step is essential for clean decorating.
Step 9: Make the Frosting
Beat the softened butter until smooth and creamy. Gradually add powdered sugar while mixing on low speed. Scrape down the sides of the bowl as needed.
Add vanilla extract and milk a little at a time. Beat until light and fluffy. Adjust consistency depending on how spreadable you want the frosting.
Step 10: Frost and Decorate the Cake
Spread frosting evenly over the cooled cake. Use a spatula to smooth the top and sides. Keep the layer even and neat.
Decorate with sprinkles or simple piping if desired. Keep decorations fun and festive. The cake is now ready to celebrate.
Serving Suggestions
Serve homemade birthday cake at room temperature for the best flavor and texture. Soft cake slices cleanly and tastes richer when not chilled. This makes serving easy and enjoyable.
Pair the cake with a glass of milk or a warm drink like tea or coffee. The simple vanilla flavor works well with many beverages. This makes it suitable for all ages.
For an extra special touch, serve with a scoop of ice cream. Vanilla or chocolate ice cream pairs beautifully. This turns the cake into a complete dessert.
Homemade birthday cake also works well for leftovers the next day. The flavor often deepens slightly overnight. It makes a lovely treat even after the celebration ends.
Leftovers and Storage
Leftover homemade birthday cake should be stored carefully to keep it soft and fresh. Cover the cake tightly or place slices in an airtight container. It can be kept at room temperature for up to two days if lightly frosted.
If the cake is fully frosted, refrigeration is recommended. Store it in a covered container in the refrigerator for up to four days. Bring slices to room temperature before serving for the best flavor and texture.
Birthday cake also freezes well if you want to save it longer. Wrap individual slices tightly in plastic wrap and place them in a freezer-safe container. Thaw at room temperature before enjoying.
Nutrition and Benefits
Homemade birthday cake is a treat meant to be enjoyed and celebrated. It provides carbohydrates for energy and fats that help make it satisfying. Enjoyed in moderation, it fits comfortably into a balanced lifestyle.
Baking at home allows you to control ingredients and sweetness levels. You can adjust portion sizes and frosting amounts to suit your needs. This makes homemade cake feel more thoughtful and intentional.
There are also emotional benefits to homemade desserts. Baking for someone’s birthday shows care and effort. That sense of connection is part of what makes this cake special.
Recipe FAQ
Why did my birthday cake turn out dense?
Dense cake is often caused by overmixing or too much flour. Mixing just until combined helps keep the texture light. Measuring flour carefully also makes a big difference.
Can I make this cake ahead of time?
Yes, the cake layers can be baked one to two days in advance. Wrap them tightly to keep them moist. Frost the cake on the day you plan to serve it.
What frosting works best with this cake?
Simple buttercream works beautifully with this recipe. Cream cheese frosting also pairs well. Choose a frosting that matches the celebration style.
Can I add food coloring to the batter or frosting?
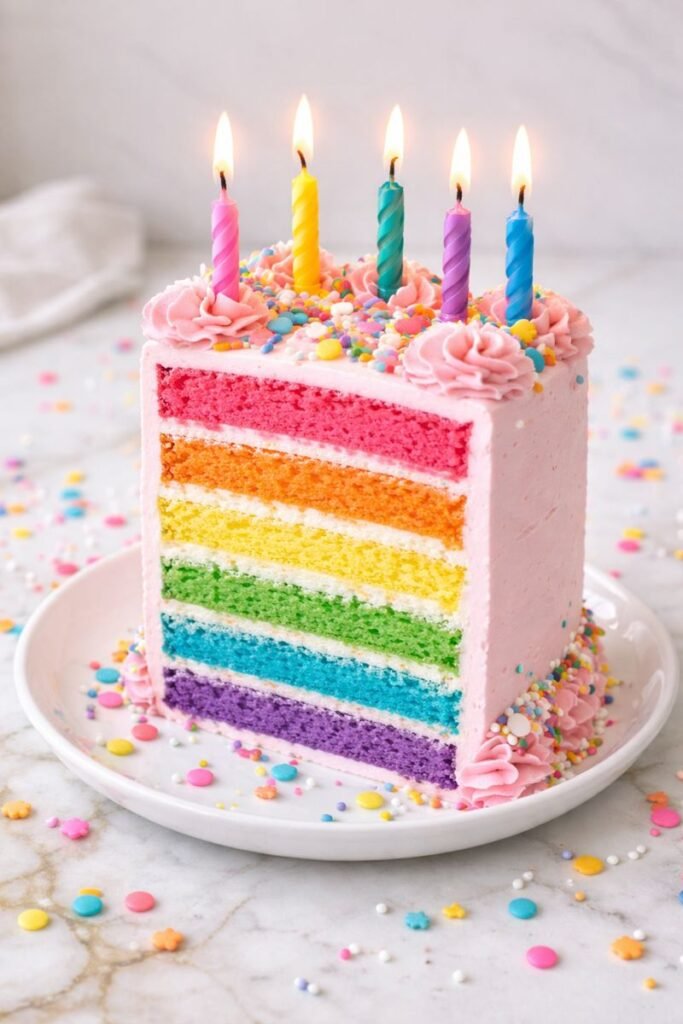
Yes, food coloring can be added easily. Gel food coloring works best for vibrant color. Add a small amount at a time.
How do I keep sprinkles from bleeding into the batter?
Fold sprinkles in gently at the very end. Use jimmies rather than nonpareils. This helps prevent color bleeding.
Is this cake good for kids?
Yes, this cake is very kid-friendly. The flavor is mild and sweet without being overpowering. Decorations can be customized for any age.
Can I double this recipe for a larger cake?
Yes, this recipe doubles easily. Use a larger pan and adjust baking time as needed. Always check for doneness before removing from the oven.
A Cake Made for Celebrating
Homemade birthday cake is about more than just dessert. It represents care, celebration, and the joy of making something special from scratch.
Whether shared quietly or surrounded by candles and laughter, this cake helps turn moments into memories.